二、IntelliJ IDEA安装与使用
1、认识IntelliJ IDEA
1、IDEA 的下载
下载网址: https://www.jetbrains.com/idea/download/#section=windows
IDEA 分为两个版本:
旗舰版(Ultimate)和社区版(Community)。IDEA的大版本每年迭代一次,大版本下的小版本(如:2022.x)迭代时间不固定,一般每年3个小版本。
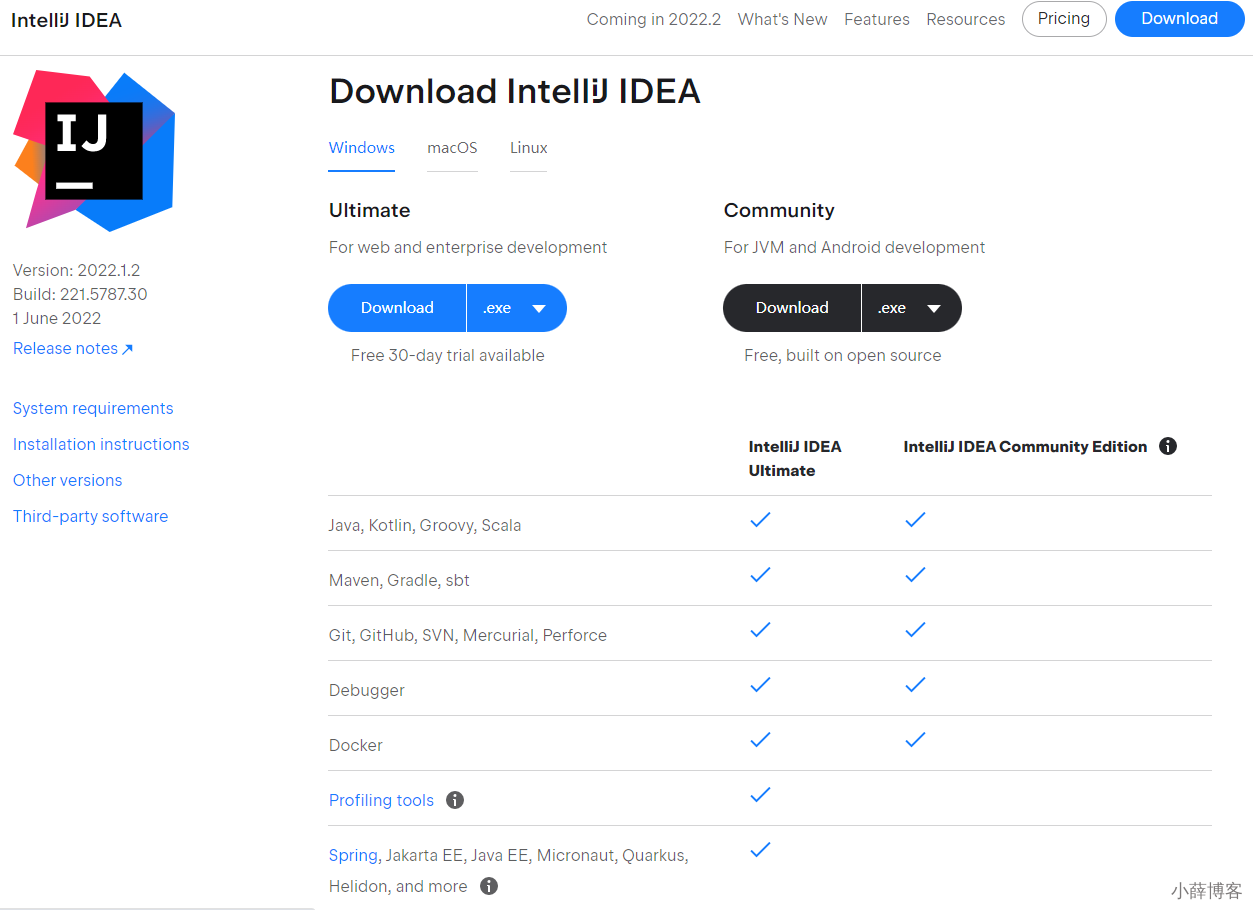
两个不同版本的详细对比,可以参照官网: https://www.jetbrains.com/idea/features/editions_comparison_matrix.html
官网提供的详细使用文档: https://www.jetbrains.com/help/idea/meet-intellij-idea.html
2、卸载与安装
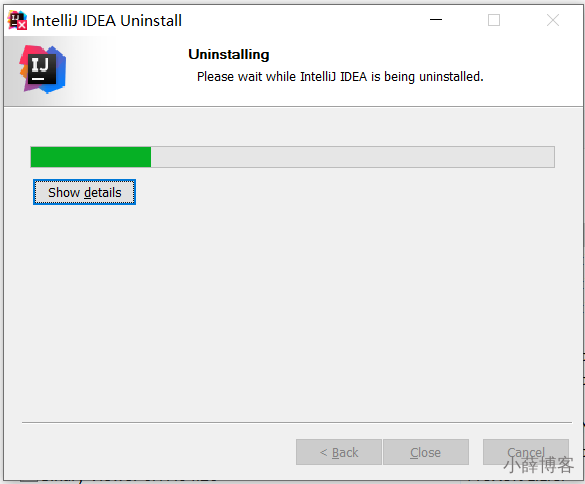
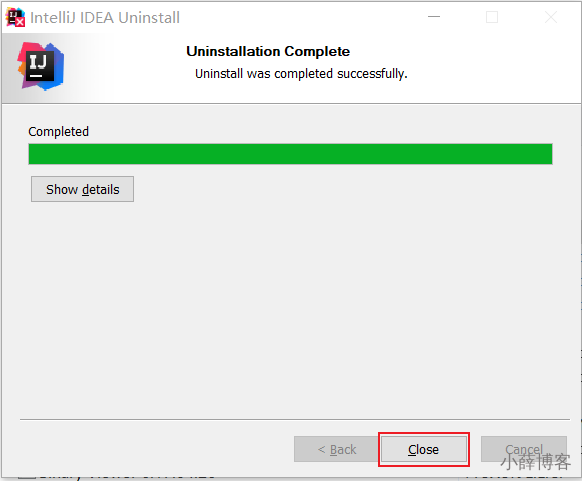
1、卸载过程
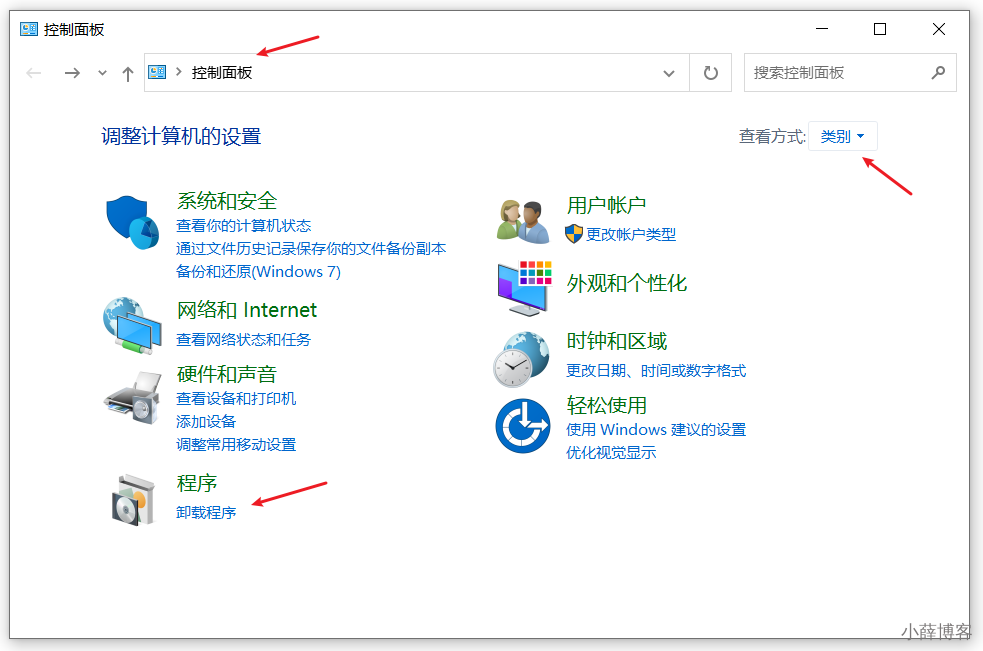
这里以卸载2022.1.2版本为例说明。在【控制面板】找到【卸载程序】
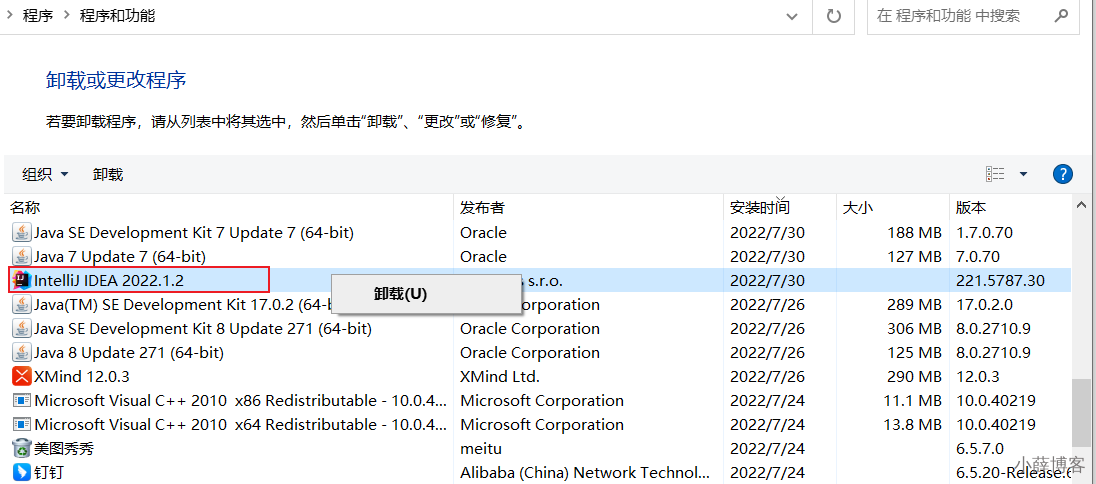
右键点击或左键双击IntelliJ IDEA 2022.1.2进行卸载:
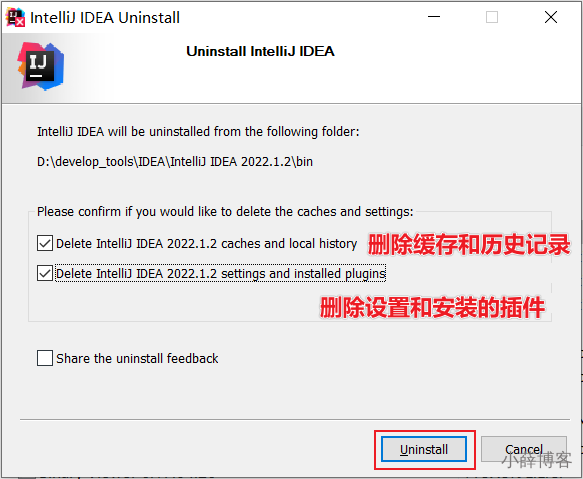
如果需要保留下述数据,就不要打√。如果想彻底删除IDEA所有数据,那就打上√。
软件卸载完以后,还需要删除其它几个位置的残留:
c:/用户/xx/AppData/Local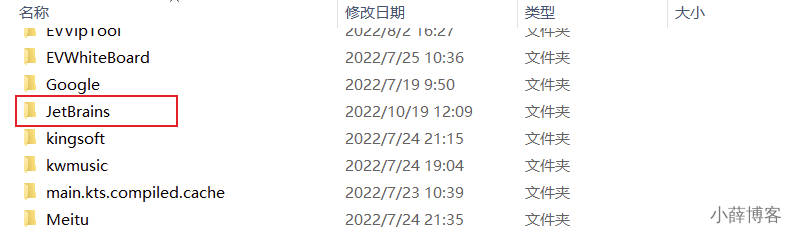
c:/用户/xx/AppData/Roaming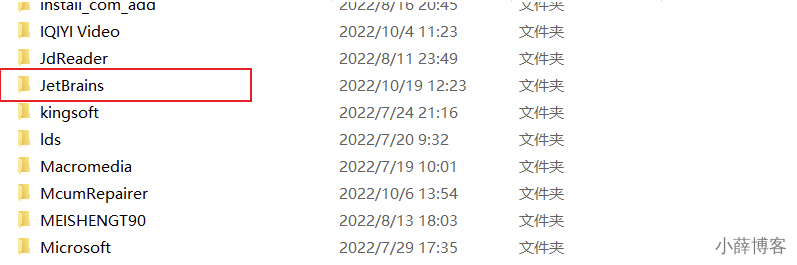
2、安装前的准备
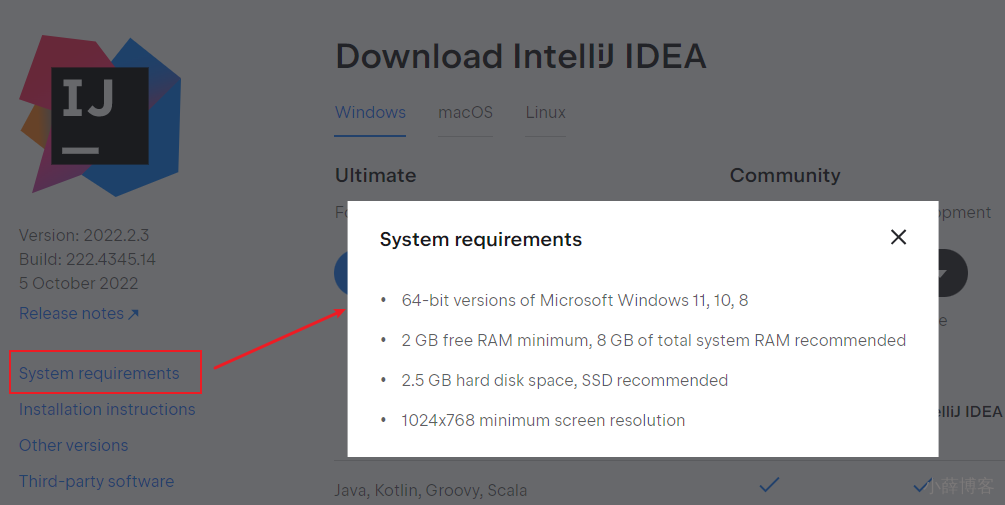
- 64 位 Microsoft Windows 11、10、8
- 最低 2 GB 可用 RAM,推荐 8 GB 系统总 RAM
- 2.5 GB 硬盘空间,推荐 SSD
- 最低屏幕分辨率 1024x768
从安装上来看,IntelliJ IDEA 对硬件的要求似乎不是很高。可是在实际开发中并不是这样的,因为 IntelliJ IDEA 执行时会有大量的缓存、索引文件,所以如果你正在使用 Eclipse / MyEclipse,想通过 IntelliJ IDEA 来解决计算机的卡、慢等问题,这基本上是不可能的,本质上你应该对自己的硬件设备进行升级。
3、安装过程
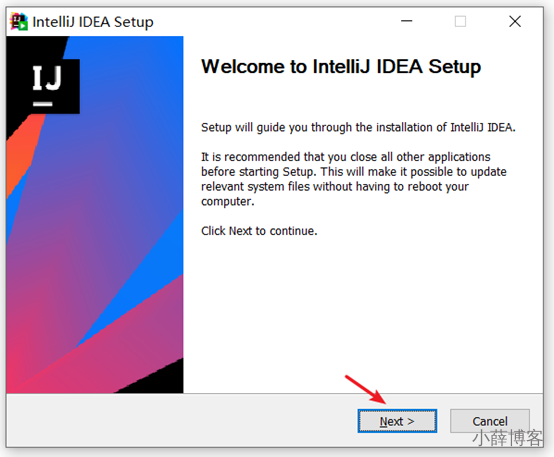
1、下载完安装包,双击直接安装
2、欢迎安装
3、是否删除电脑上低版本的IDEA(如果有,可以选择忽略)
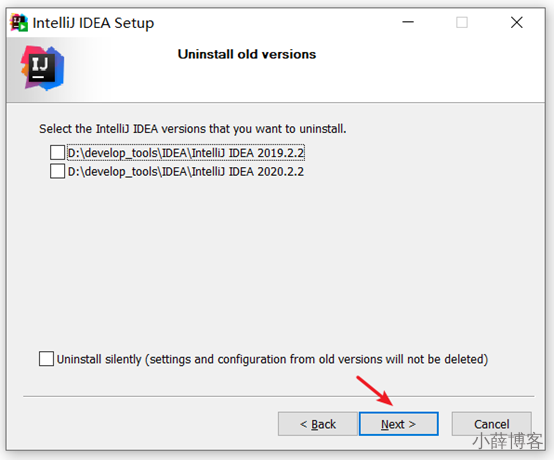
如果电脑上有低版本的IDEA,可以选择删除或保留。
这里没有卸载旧版本,如果需要卸载,记得勾选下面的保留旧的设置和配置。
4、选择安装目录
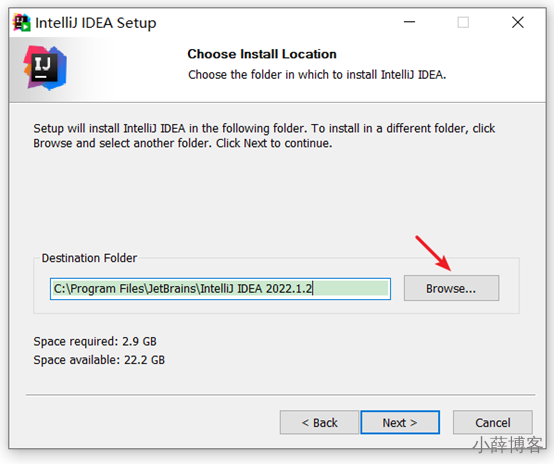
选择安装目录,目录中要避免中文和空格。

5、创建桌面快捷图标等

确认是否与.java、.groovy、.kt 格式文件进行关联。这里建议不关联。
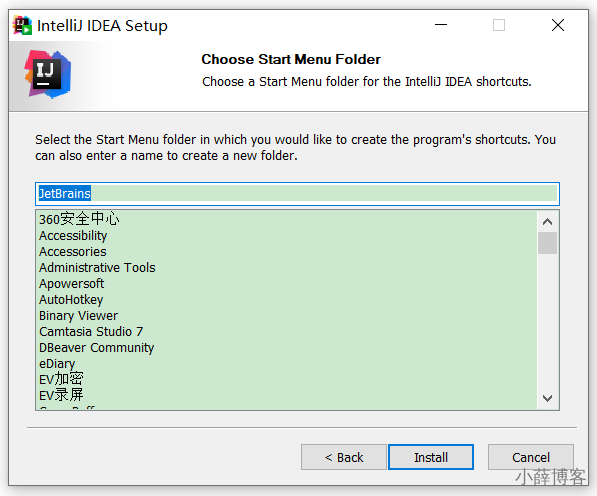
6、在【开始】菜单新建一个文件夹(这里需要确认文件夹的名称),来管理IDEA的相关内容。
7、完成安装
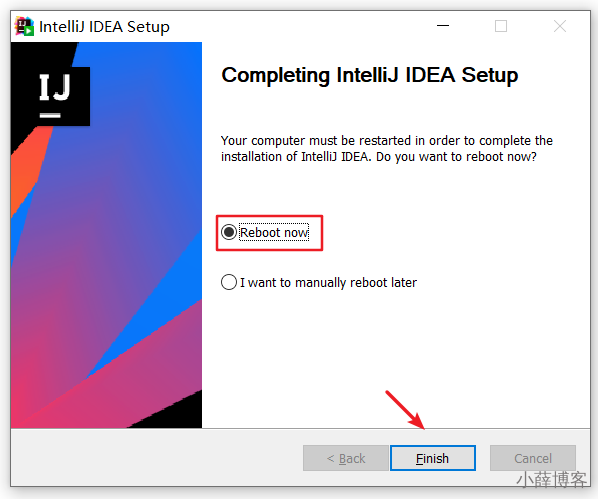
重启以后,单击登录:
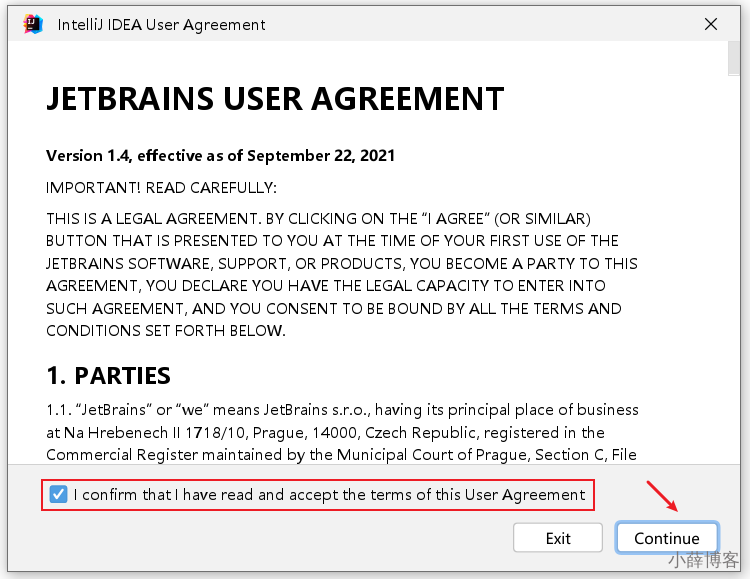
4、注册
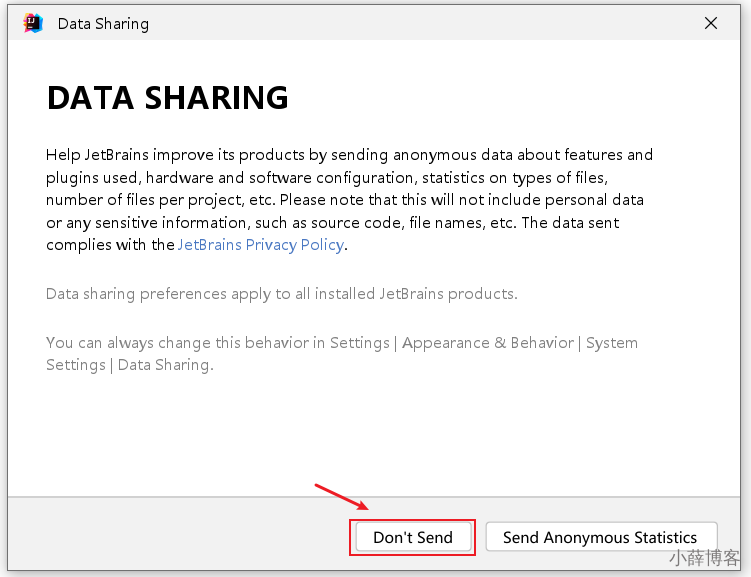
首先,需要通过用户协议:
是否同意发送用户数据(特性、使用的插件、硬件与软件配置等),建议选择:不发送。
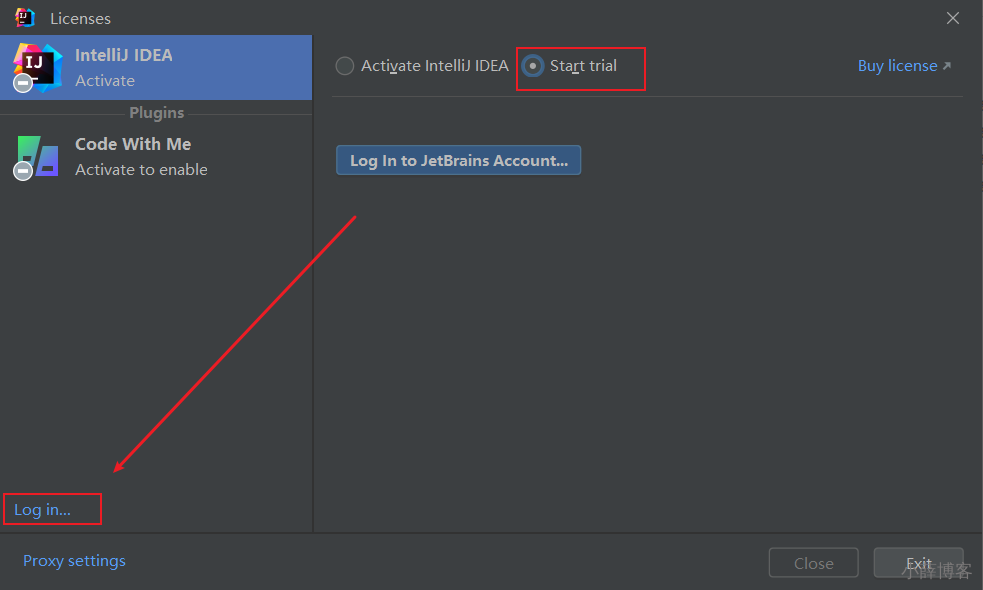
接着,会提示我们进行注册。
选择1:试用30天。在IDEA2022.1.2版本中,需要先登录,才能开启试用。
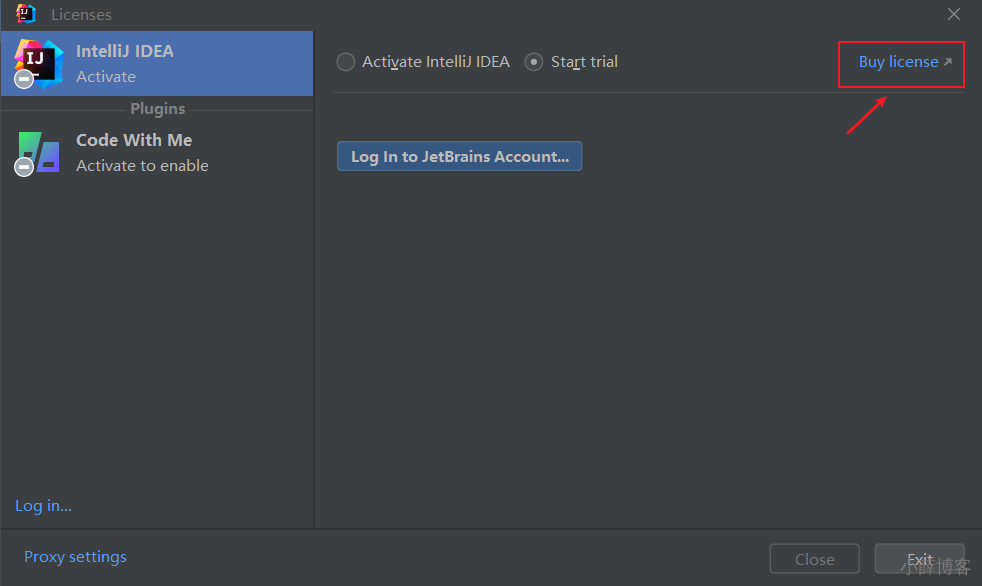
选择2:付费购买旗舰版

选择3:(推荐)
- https://drive.weixin.qq.com/s?k=AIIACQe1AA8XqTqMue
- 自行到常用工具中idea中寻找,可能会失效,失效了请找其他方案
3、HelloWorld的实现
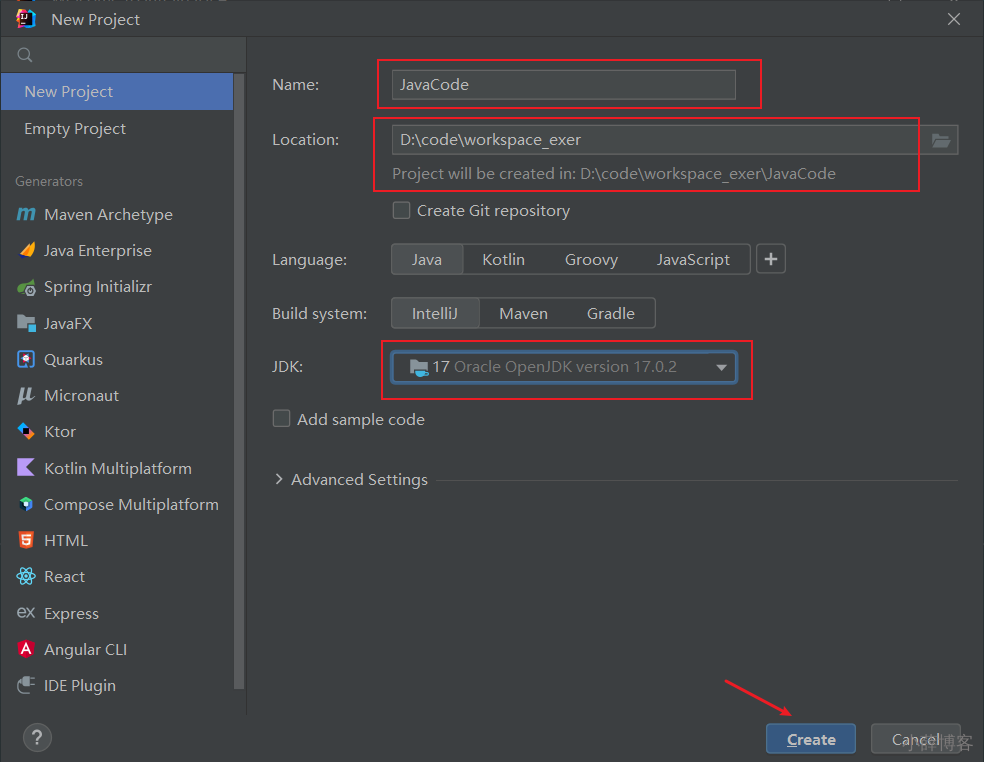
1、新建Project - Class
选择"New Project":
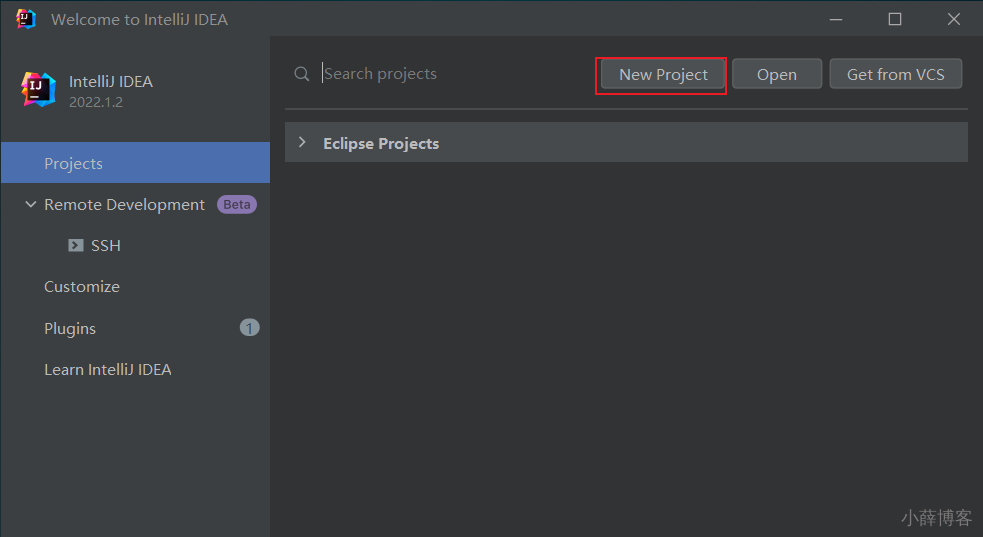
指名工程名、使用的JDK版本等信息。如下所示:
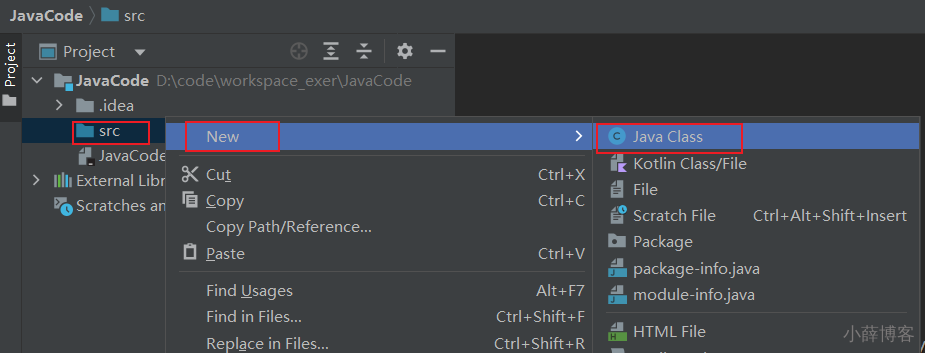
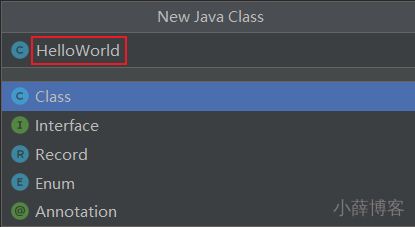
接着创建Java类:
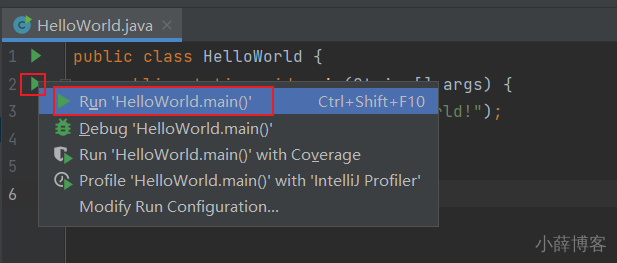
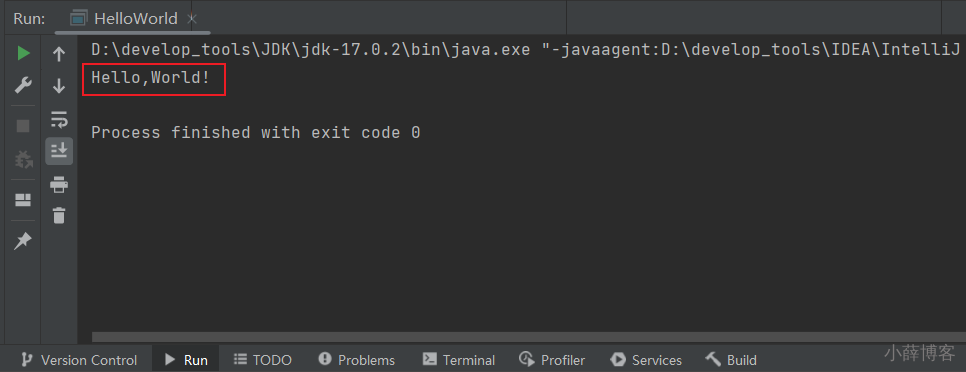
2、编写代码
public class HelloWorld {
    public static void main(String[] args) {
        System.out.println("Hello,World!");
    }
}3、运行
4、JDK相关设置
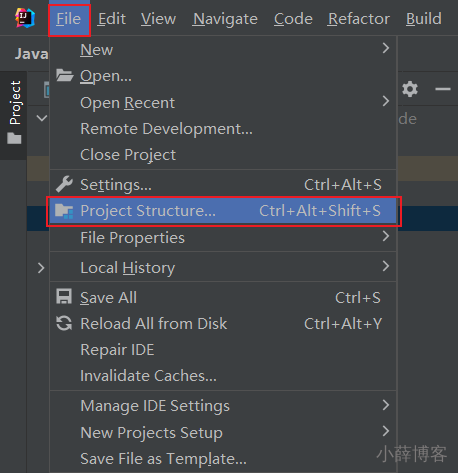
1、项目的JDK设置
File-->Project Structure...-->Platform Settings -->SDKs
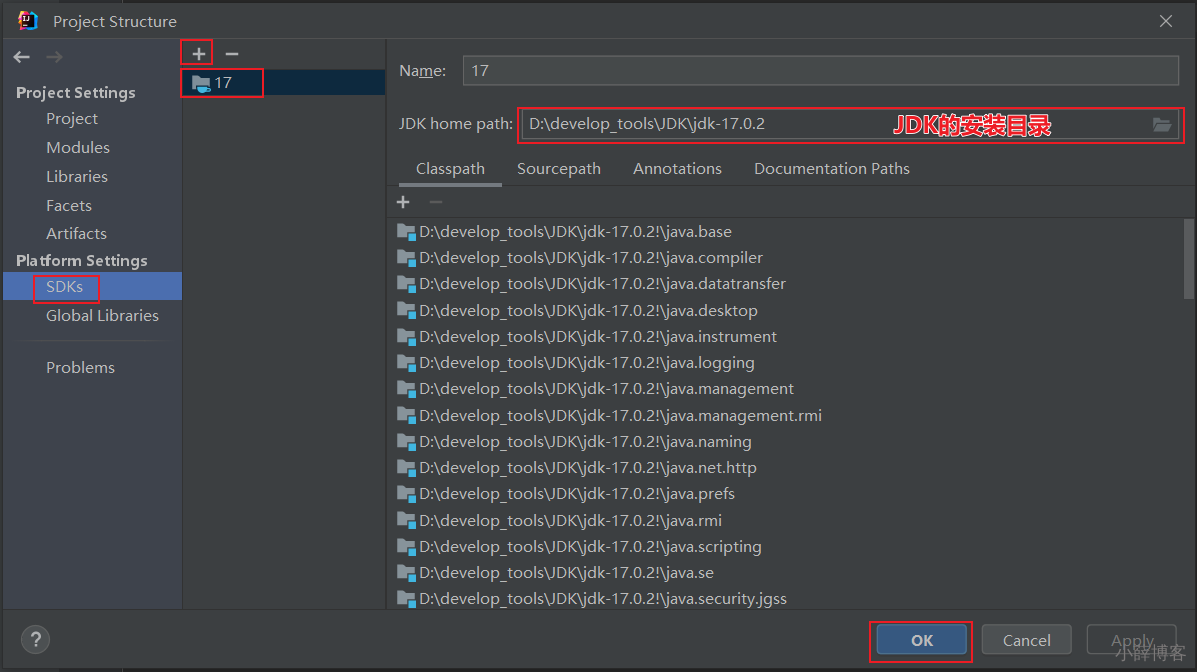
- 注1:SDKs全称是Software Development Kit ,这里一定是选择JDK的安装根目录,不是JRE的目录。
- 注2:这里还可以从本地添加多个JDK。使用“+”即可实现。
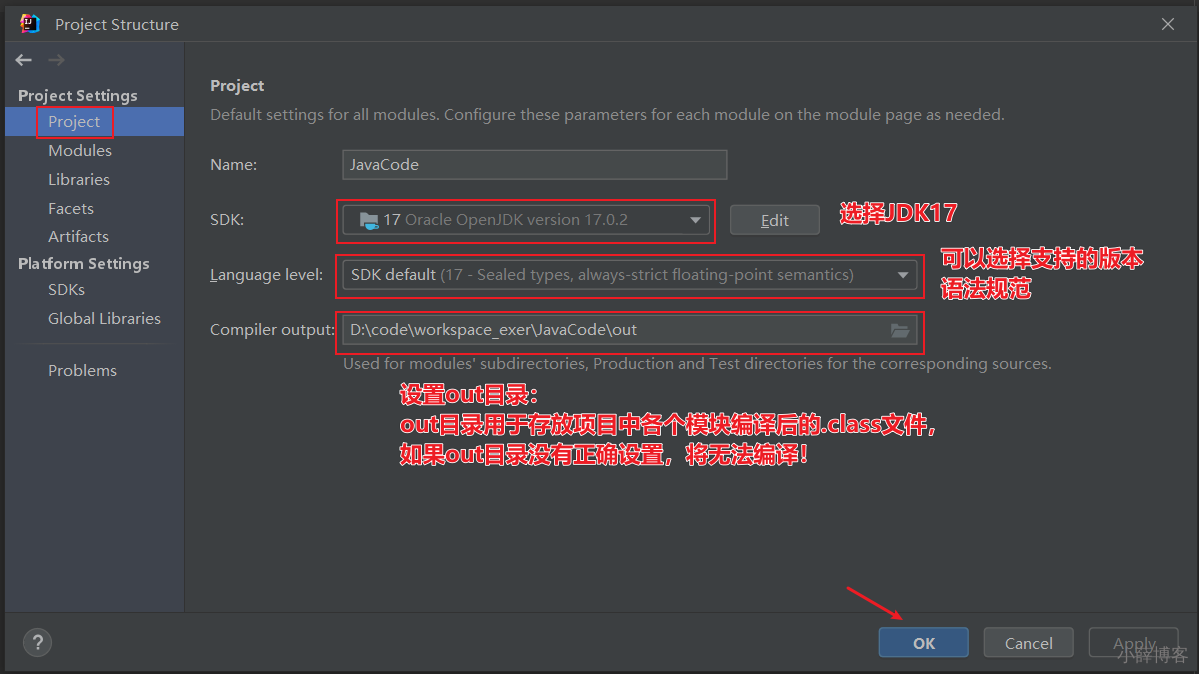
2、out目录和编译版本
File-->Project Structure...-->Project Settings -->Project
5、详细设置
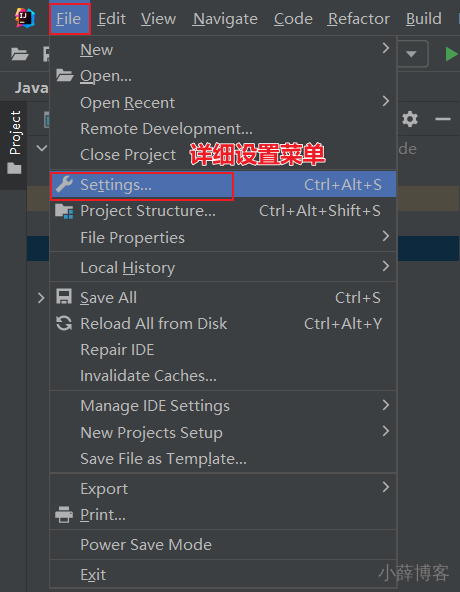
1、如何打开详细配置界面
1、显示工具栏
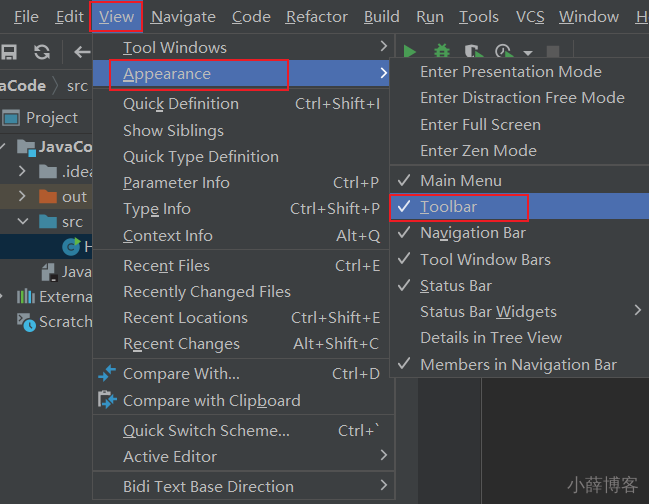
2、选择详细配置菜单或按钮
2、系统设置
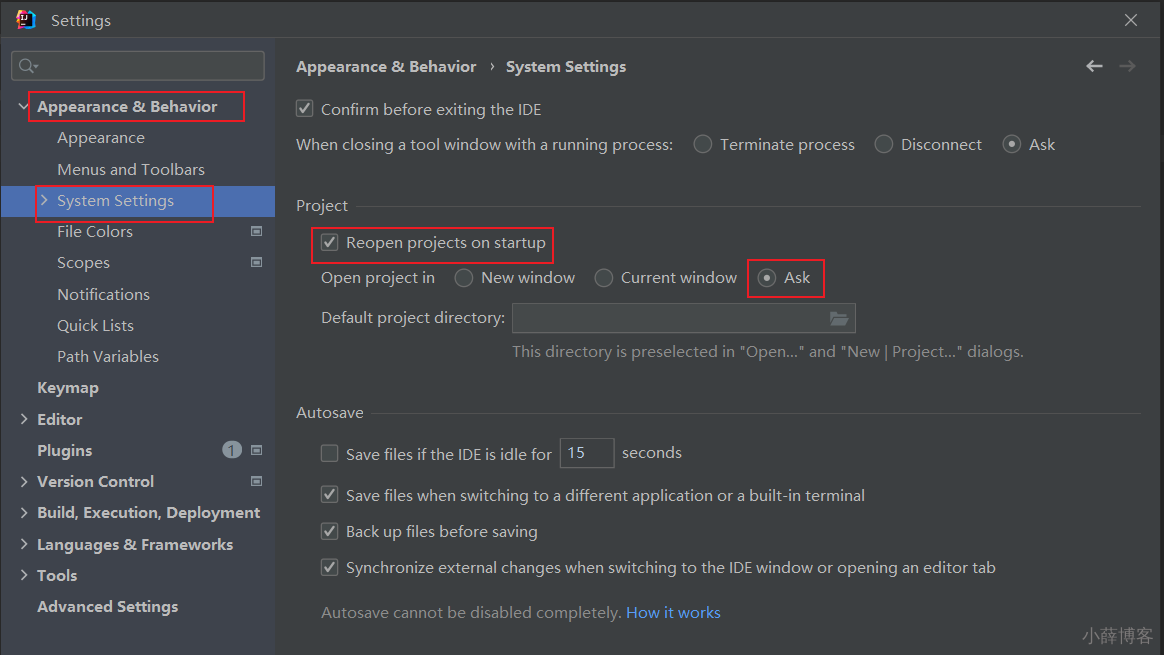
1、默认启动项目配置
启动IDEA时,默认自动打开上次开发的项目?还是自己选择?
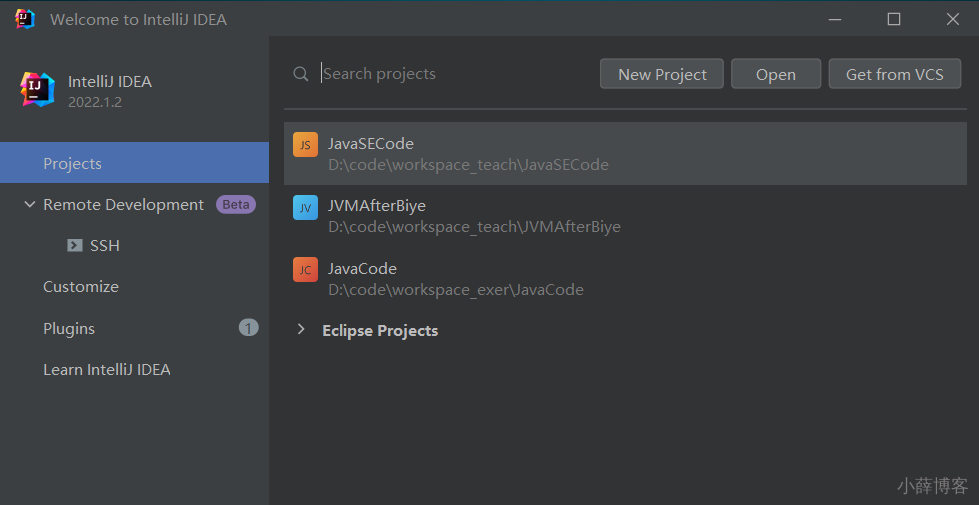
如果去掉Reopen projects on startup前面的对勾,每次启动IDEA就会出现如下界面:
2、取消自动更新
Settings-->Appearance & Behavior->System Settings -> Updates
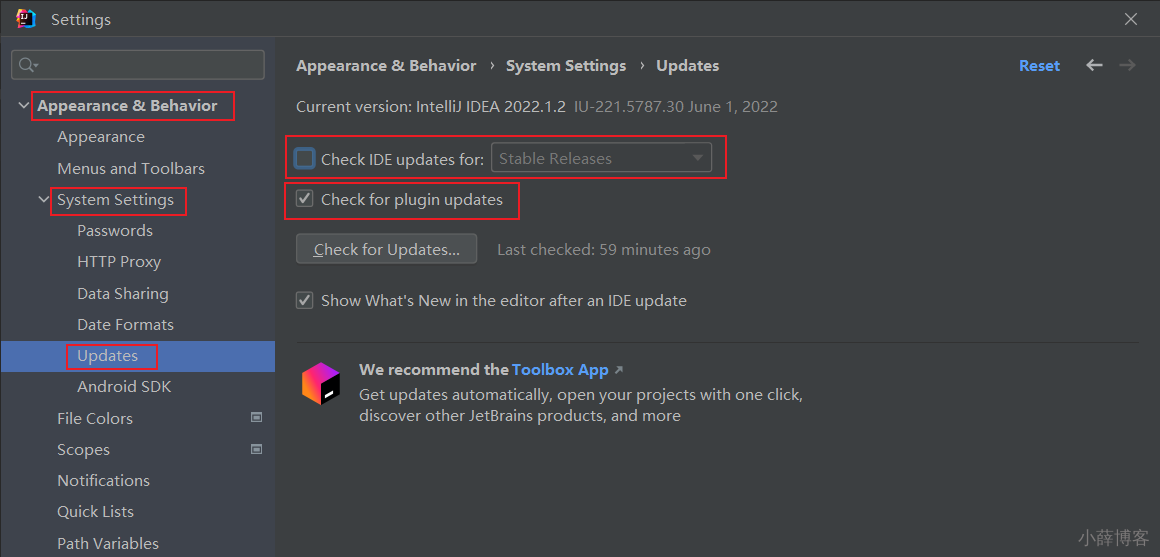
默认都打√了,建议检查IDE更新的√去掉,检查插件更新的√选上。
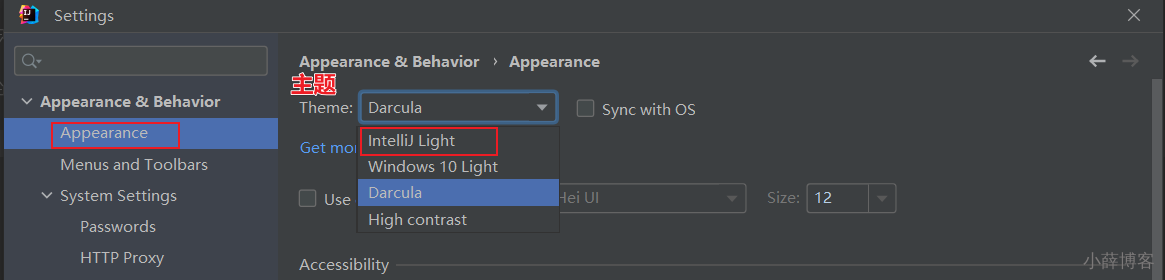
3、设置整体主题
1、选择主题
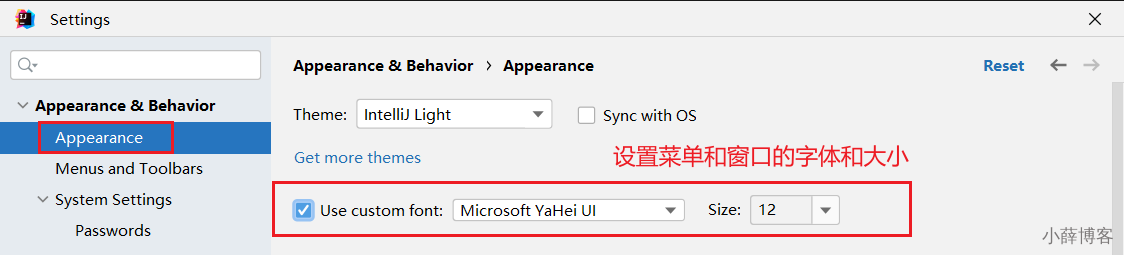
2、设置菜单和窗口字体和大小
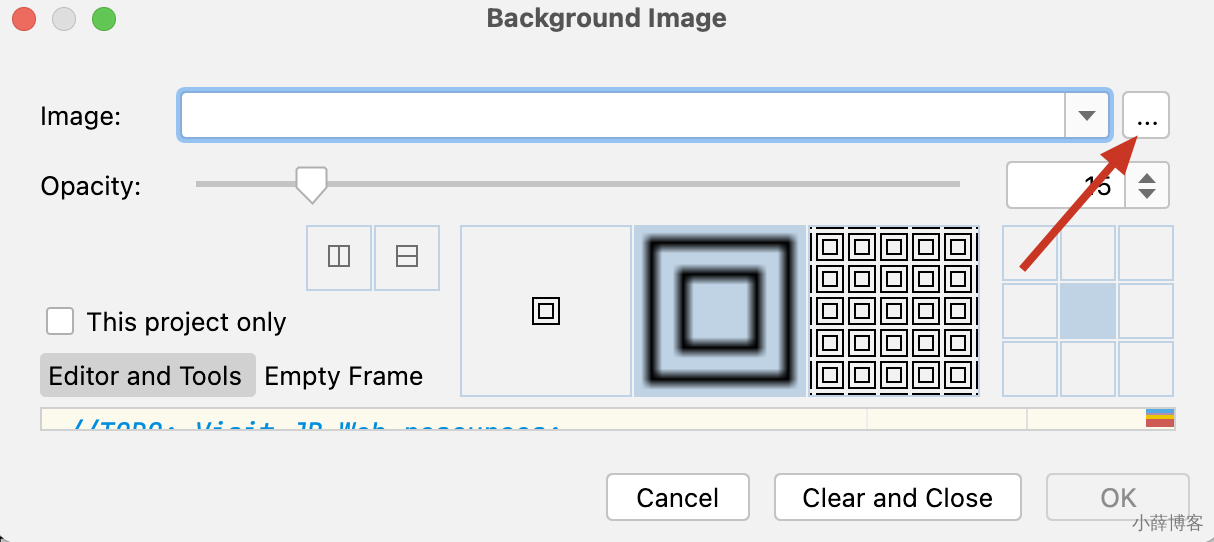
3、设置IDEA背景图
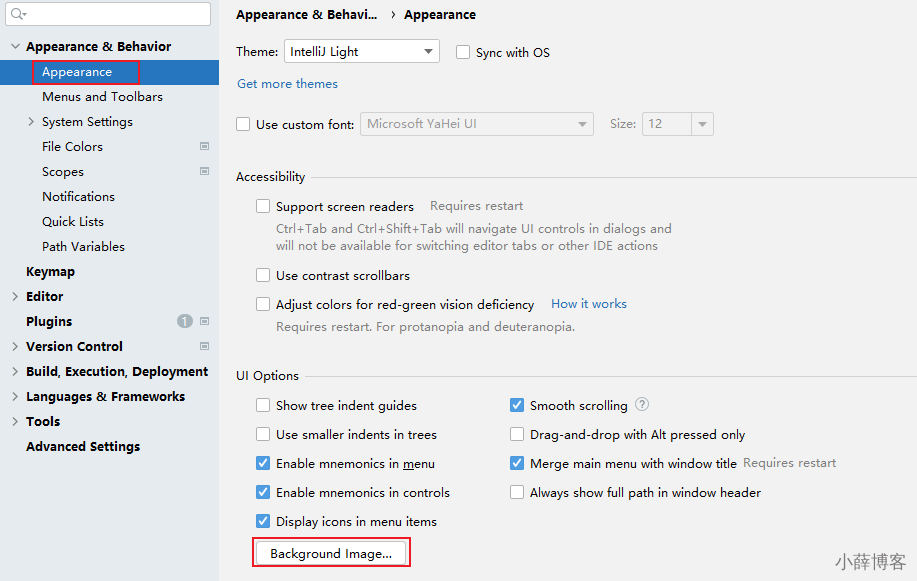
选择一张合适的图片作为背景,即可。
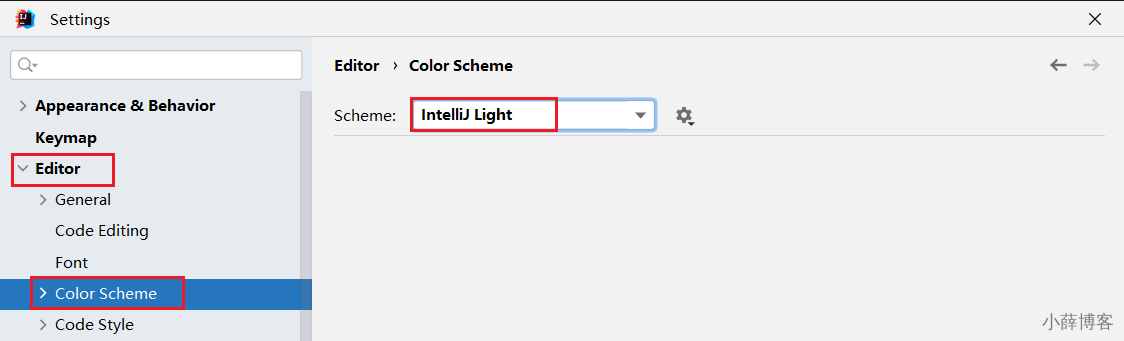
4、设置编辑器主题样式
1、编辑器主题
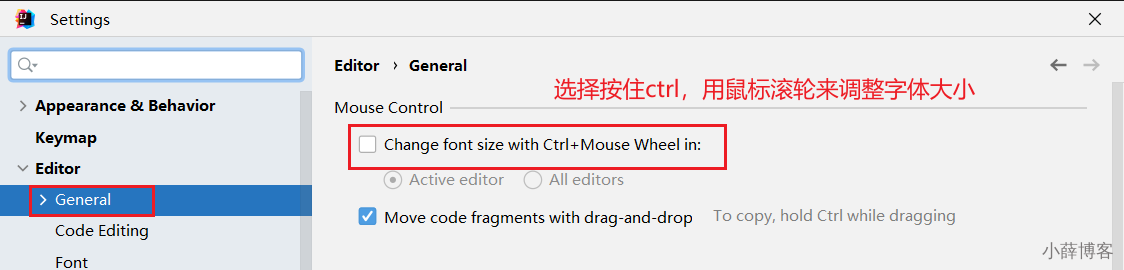
2、字体大小
更详细的字体与颜色如下:
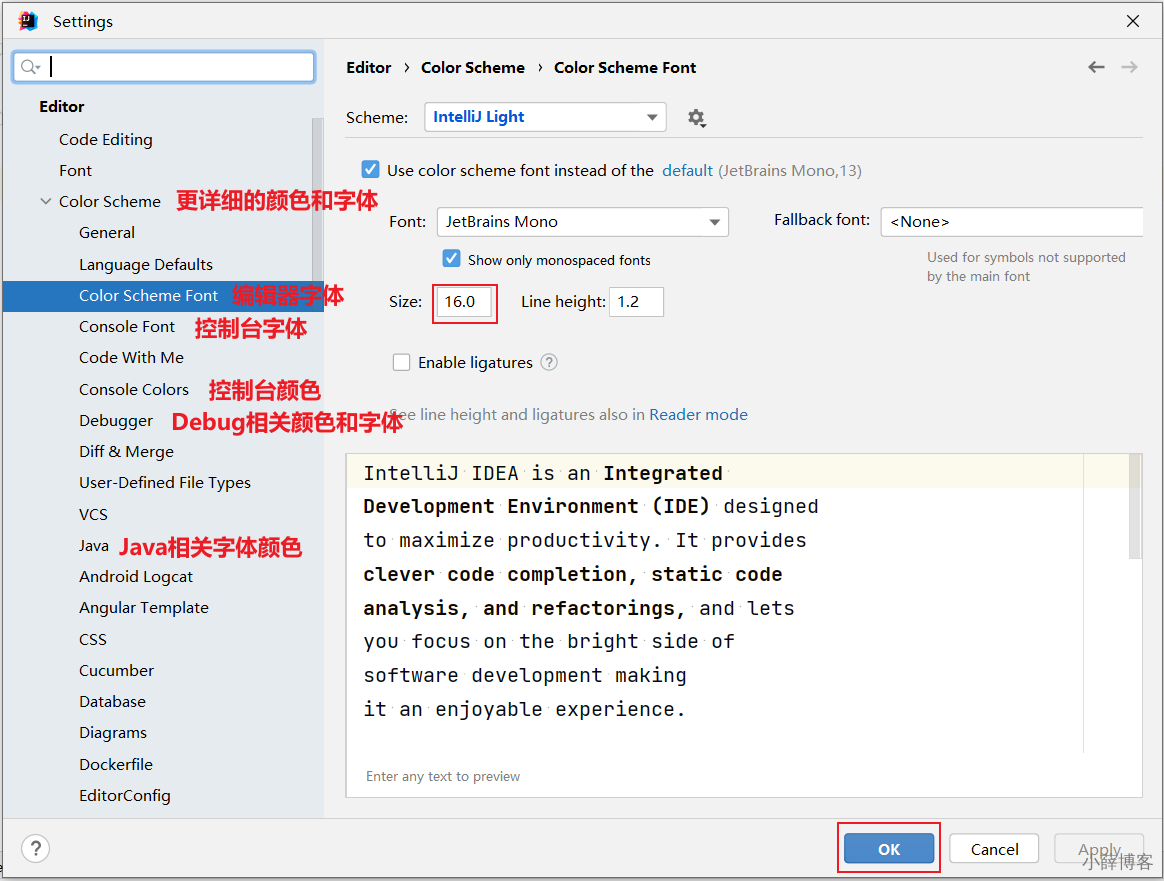
温馨提示:如果选择某个font字体,中文乱码,可以在fallback font(备选字体)中选择一个支持中文的字体。
3、注释的字体颜色
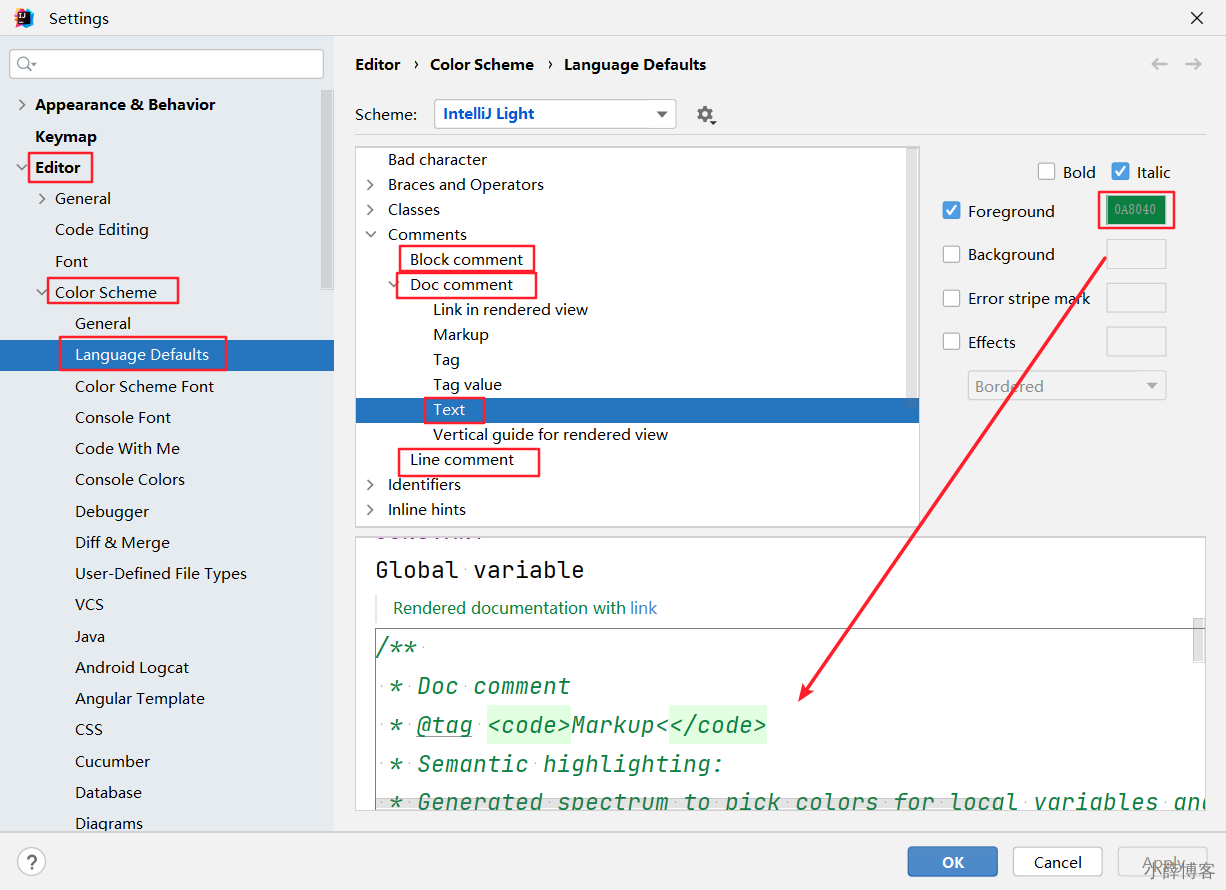
- Block comment:修改多行注释的字体颜色
- Doc Comment –> Text:修改文档注释的字体颜色
- Line comment:修改单行注释的字体颜色
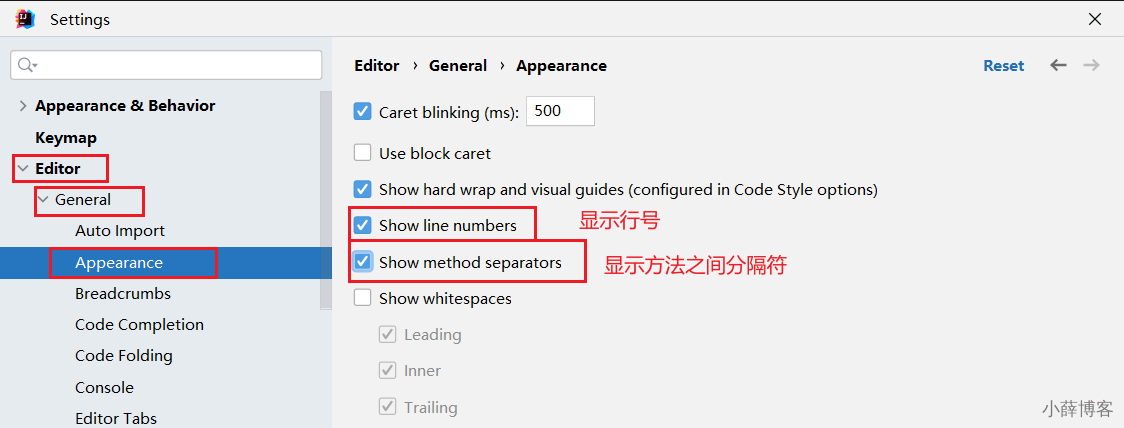
5、显示行号与方法分隔符
6、代码智能提示功能
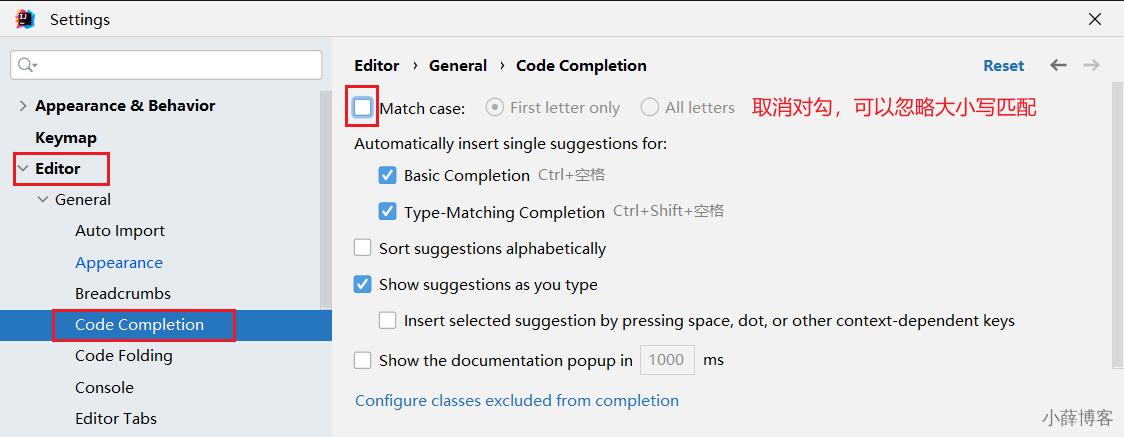
IntelliJ IDEA 的代码提示和补充功能有一个特性:区分大小写。 如果想不区分大小写的话,就把这个对勾去掉。建议去掉勾选。
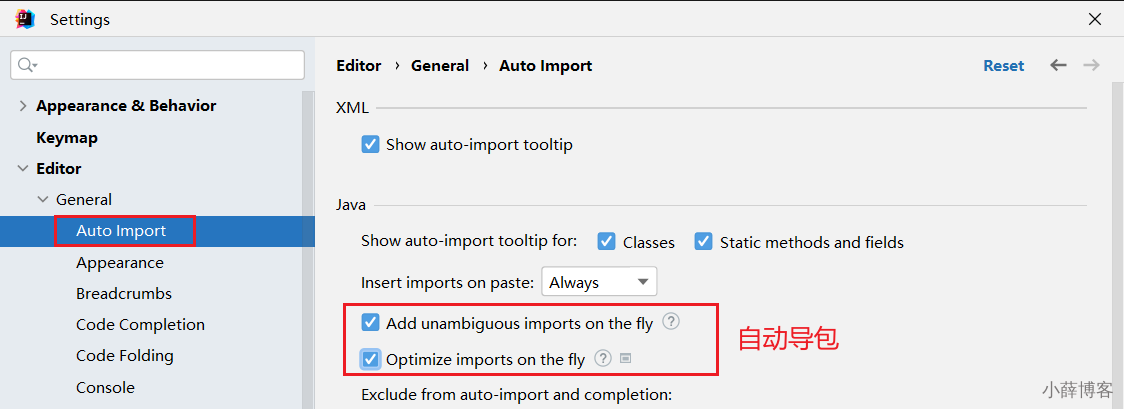
7、自动导包配置
- 默认需要自己手动导包,Alt+Enter快捷键

- 自动导包设置
- 动态导入明确的包:Add unambiguous imports on the fly,该设置具有全局性;
- 优化动态导入的包:Optimize imports on the fly,该设置只对当前项目有效;
8、设置项目文件编码(一定要改)
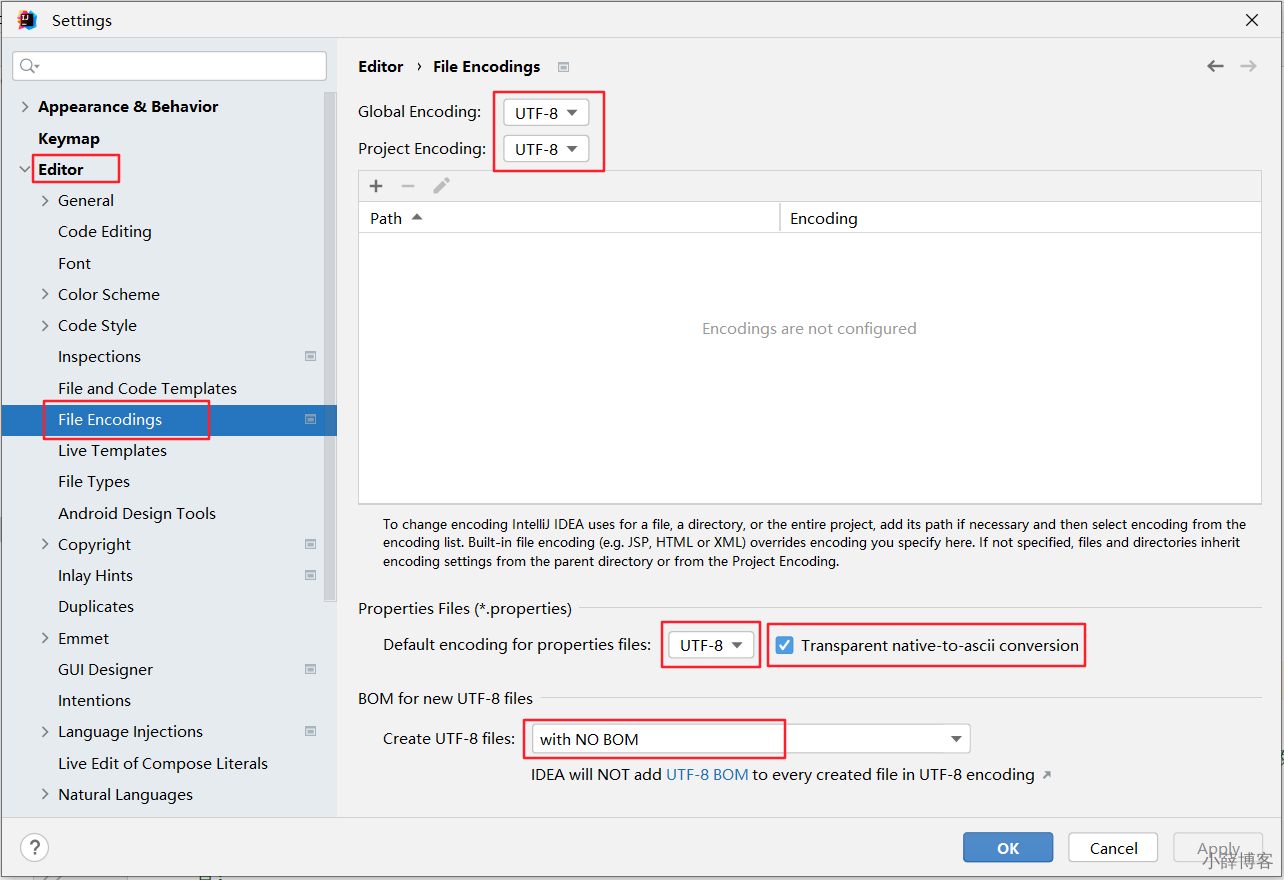
说明: Transparent native-to-ascii conversion主要用于转换ascii,显式原生内容。一般都要勾选。
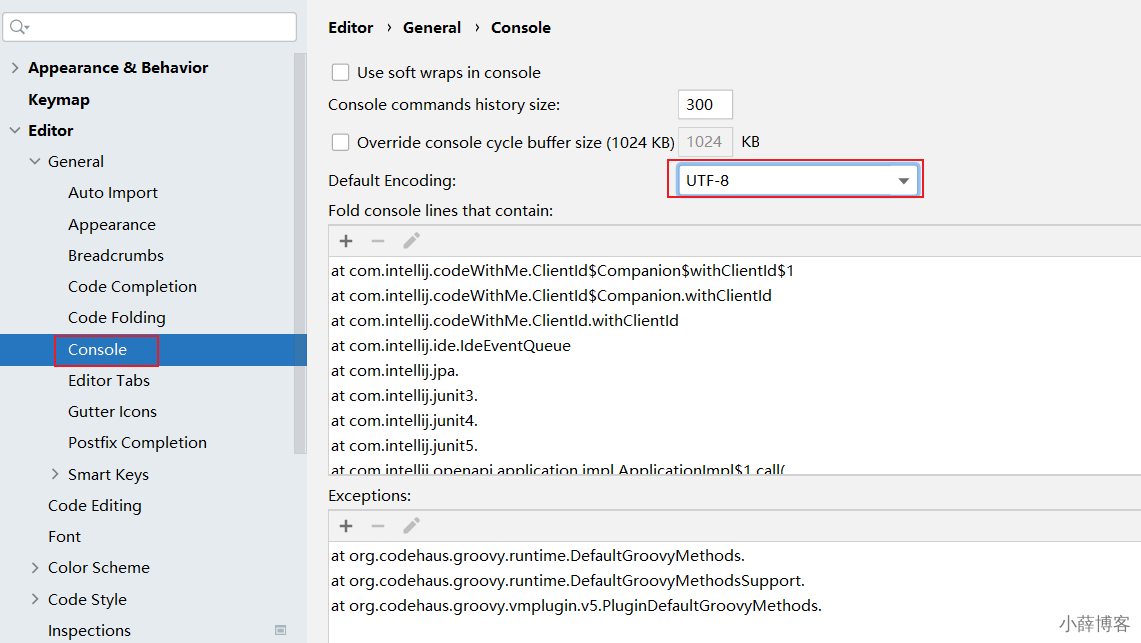
9、设置控制台的字符编码
10、修改类头的文档注释信息
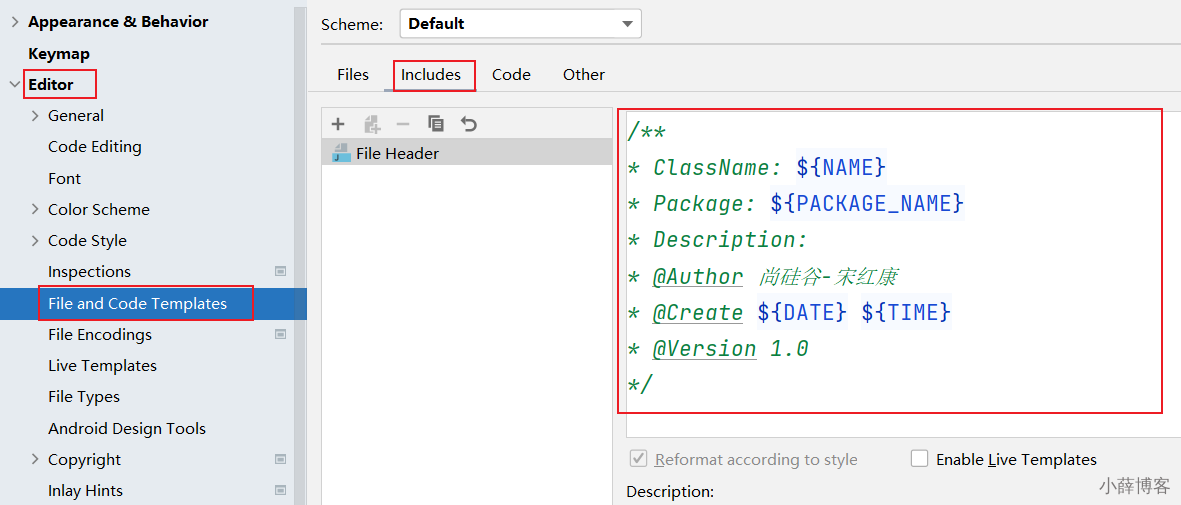
比如:
/**
* ClassName: ${NAME}
* Package: ${PACKAGE_NAME}
* @Author xx
* @Create ${DATE} ${TIME}
* @Version 1.0
*/常用的预设的变量,这里直接贴出官网给的:
${PACKAGE_NAME} - the name of the target package where the new class or interface will be created.
${PROJECT_NAME} - the name of the current project.
${FILE_NAME} - the name of the PHP file that will be created.
${NAME} - the name of the new file which you specify in the New File dialog box during the file creation.
${USER} - the login name of the current user.
${DATE} - the current system date.
${TIME} - the current system time.
${YEAR} - the current year.
${MONTH} - the current month.
${DAY} - the current day of the month.
${HOUR} - the current hour.
${MINUTE} - the current minute.
${PRODUCT_NAME} - the name of the IDE in which the file will be created.
${MONTH_NAME_SHORT} - the first 3 letters of the month name. Example: Jan, Feb, etc.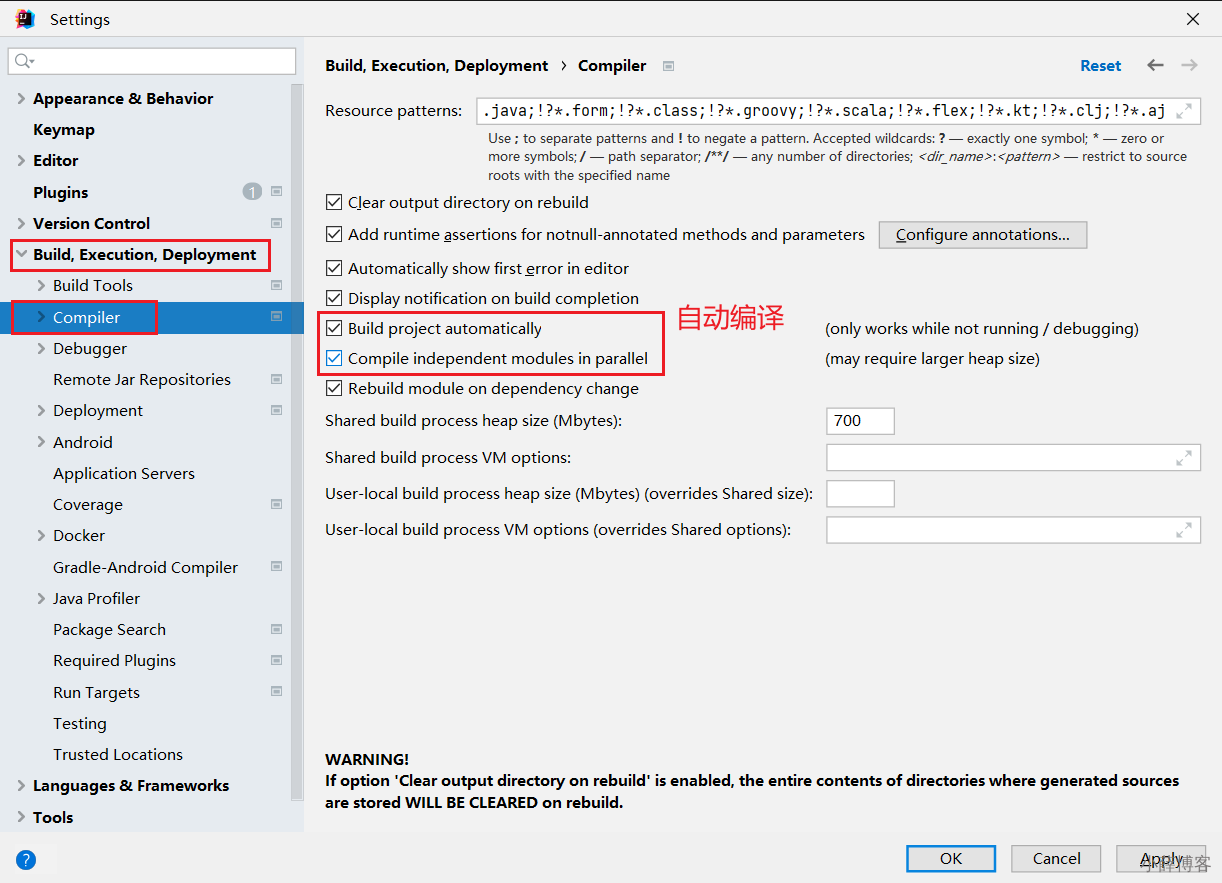
${MONTH_NAME_FULL} - full name of a month. Example: January, February, etc.11、设置自动编译
Settings-->Build,Execution,Deployment-->Compiler
12、设置为省电模式 (可忽略)
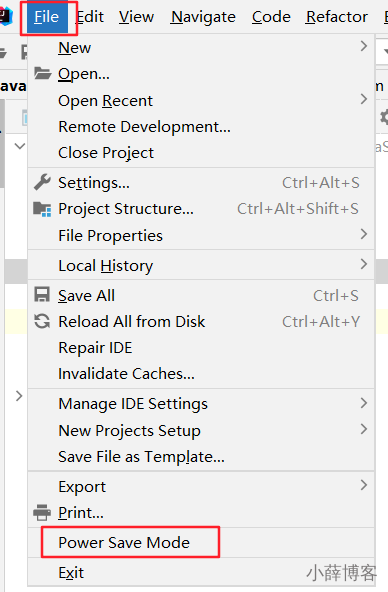
IntelliJ IDEA 有一种叫做省电模式的状态,开启这种模式之后 IntelliJ IDEA 会关掉代码检查和代码提示等功能。所以一般也可认为这是一种阅读模式,如果你在开发过程中遇到突然代码文件不能进行检查和提示,可以来看看这里是否有开启该功能。
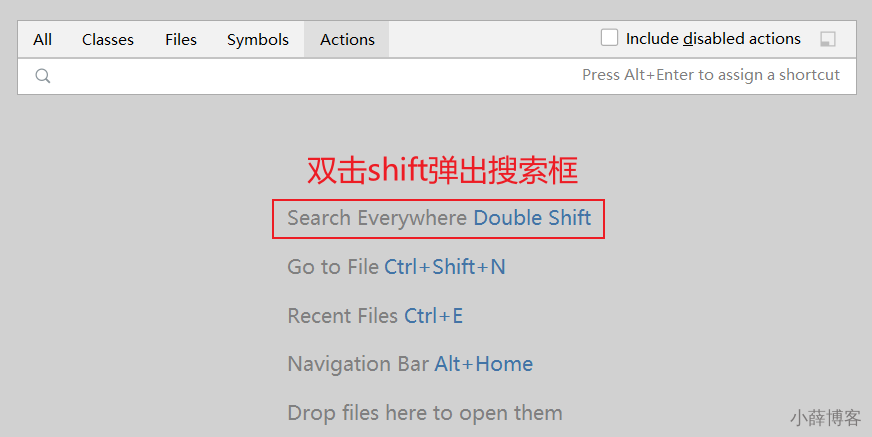
13、取消双击shift搜索
因为我们按shift切换中英文输入方式,经常被按到,总是弹出搜索框,太麻烦了。可以取消它。
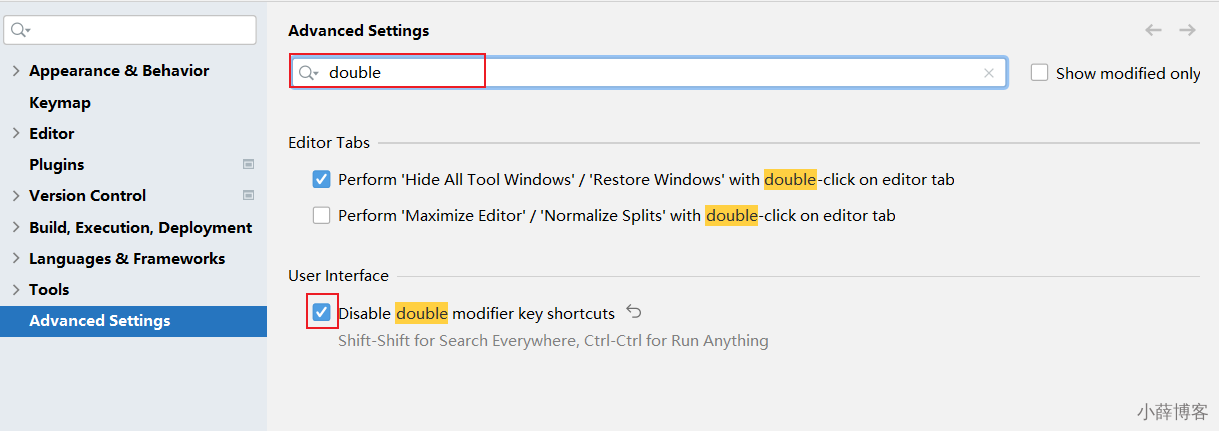
- 方式1:适用于IDEA 2022.1.2版本
在2022.1版本中,采用如下方式消双击shift出现搜索框:搜索double即可,勾选Disable double modifier key shortcuts,禁用这个选项。
- 方式2:适用于IDEA 2022.1.2之前版本
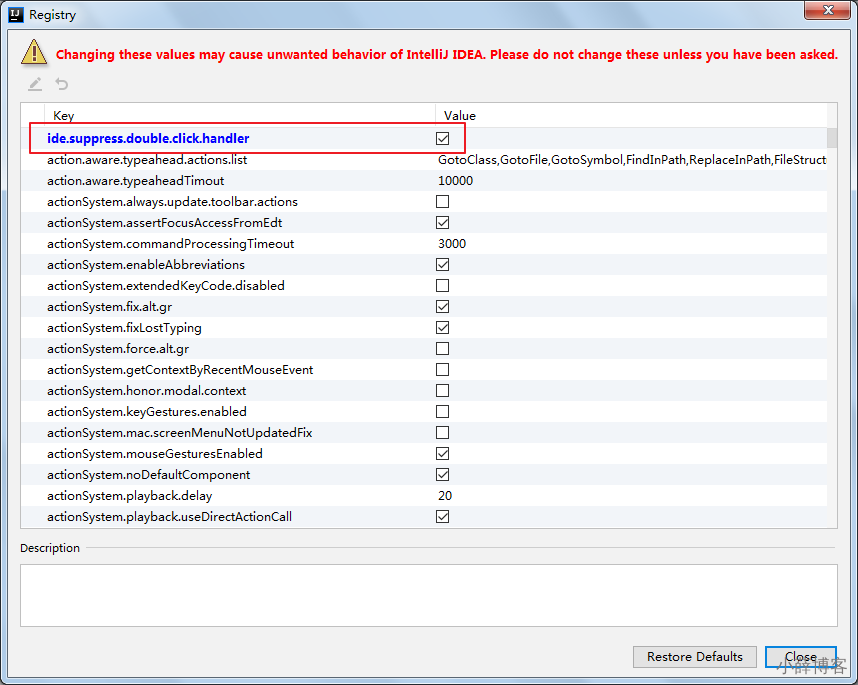
双击shift 或 ctrl + shift + a,打开如下搜索窗口:
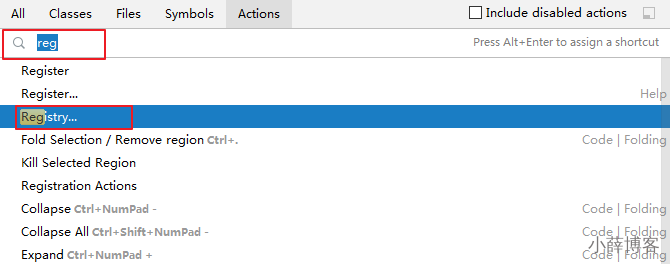
选择registry...,找到"ide.suppress.double.click.handler",把复选框打上勾就可以取消双击shift出现搜索框了。
14、更多
https://blog.xueqimiao.com/idea/5a9e41/
6、快捷键的使用
1、常用快捷键
第1组:通用型
| 说明 | 快捷键 |
|---|---|
| 复制代码-copy | ctrl + c |
| 粘贴-paste | ctrl + v |
| 剪切-cut | ctrl + x |
| 撤销-undo | ctrl + z |
| 反撤销-redo | ctrl + shift + z |
| 保存-save all | ctrl + s |
| 全选-select all | ctrl + a |
第2组:提高编写速度(上)
| 说明 | 快捷键 |
|---|---|
| 智能提示-edit | alt + enter |
| 提示代码模板-insert live template | ctrl+j |
| 使用xx块环绕-surround with ... | ctrl+alt+t |
| 调出生成getter/setter/构造器等结构-generate ... | alt+insert |
| 自动生成返回值变量-introduce variable ... | ctrl+alt+v |
| 复制指定行的代码-duplicate line or selection | ctrl+d |
| 删除指定行的代码-delete line | ctrl+y |
| 切换到下一行代码空位-start new line | shift + enter |
| 切换到上一行代码空位-start new line before current | ctrl +alt+ enter |
| 向上移动代码-move statement up | ctrl+shift+↑ |
| 向下移动代码-move statement down | ctrl+shift+↓ |
| 向上移动一行-move line up | alt+shift+↑ |
| 向下移动一行-move line down | alt+shift+↓ |
| 方法的形参列表提醒-parameter info | ctrl+p |
第3组:提高编写速度(下)
| 说明 | 快捷键 |
|---|---|
| 批量修改指定的变量名、方法名、类名等-rename | shift+f6 |
| 抽取代码重构方法-extract method ... | ctrl+alt+m |
| 重写父类的方法-override methods ... | ctrl+o |
| 实现接口的方法-implements methods ... | ctrl+i |
| 选中的结构的大小写的切换-toggle case | ctrl+shift+u |
| 批量导包-optimize imports | ctrl+alt+o |
第4组:类结构、查找和查看源码
| 说明 | 快捷键 |
|---|---|
| 如何查看源码-go to class... | ctrl + 选中指定的结构 或 ctrl+n |
| 显示当前类结构,支持搜索指定的方法、属性等-file structure | ctrl+f12 |
| 退回到前一个编辑的页面-back | ctrl+alt+← |
| 进入到下一个编辑的页面-forward | ctrl+alt+→ |
| 打开的类文件之间切换-select previous/next tab | alt+←/→ |
| 光标选中指定的类,查看继承树结构-Type Hierarchy | ctrl+h |
| 查看方法文档-quick documentation | ctrl+q |
| 类的UML关系图-show uml popup | ctrl+alt+u |
| 定位某行-go to line/column | ctrl+g |
| 回溯变量或方法的来源-go to implementation(s) | ctrl+alt+b |
| 折叠方法实现-collapse all | ctrl+shift+ - |
| 展开方法实现-expand all | ctrl+shift+ + |
第5组:查找、替换与关闭
| 说明 | 快捷键 |
|---|---|
| 查找指定的结构 | ctlr+f |
| 快速查找:选中的Word快速定位到下一个-find next | ctrl+l |
| 查找与替换-replace | ctrl+r |
| 直接定位到当前行的首位-move caret to line start | home |
| 直接定位到当前行的末位 -move caret to line end | end |
| 查询当前元素在当前文件中的引用,然后按 F3 可以选择 | ctrl+f7 |
| 全项目搜索文本-find in path ... | ctrl+shift+f |
| 关闭当前窗口-close | ctrl+f4 |
第6组:调整格式
| 说明 | 快捷键 |
|---|---|
| 格式化代码-reformat code | ctrl+alt+l |
| 使用单行注释-comment with line comment | ctrl + / |
| 使用/取消多行注释-comment with block comment | ctrl + shift + / |
| 选中数行,整体往后移动-tab | tab |
| 选中数行,整体往前移动-prev tab | shift + tab |
Debug快捷键
| 说明 | 快捷键 |
|---|---|
| 单步调试(不进入函数内部)- step over | F8 |
| 单步调试(进入函数内部)- step into | F7 |
| 强制单步调试(进入函数内部) - force step into | alt+shift+f7 |
| 选择要进入的函数 - smart step into | shift + F7 |
| 跳出函数 - step out | shift + F8 |
| 运行到断点 - run to cursor | alt + F9 |
| 继续执行,进入下一个断点或执行完程序 - resume program | F9 |
| 停止 - stop | Ctrl+F2 |
| 查看断点 - view breakpoints | Ctrl+Shift+F8 |
| 关闭 - close | Ctrl+F4 |
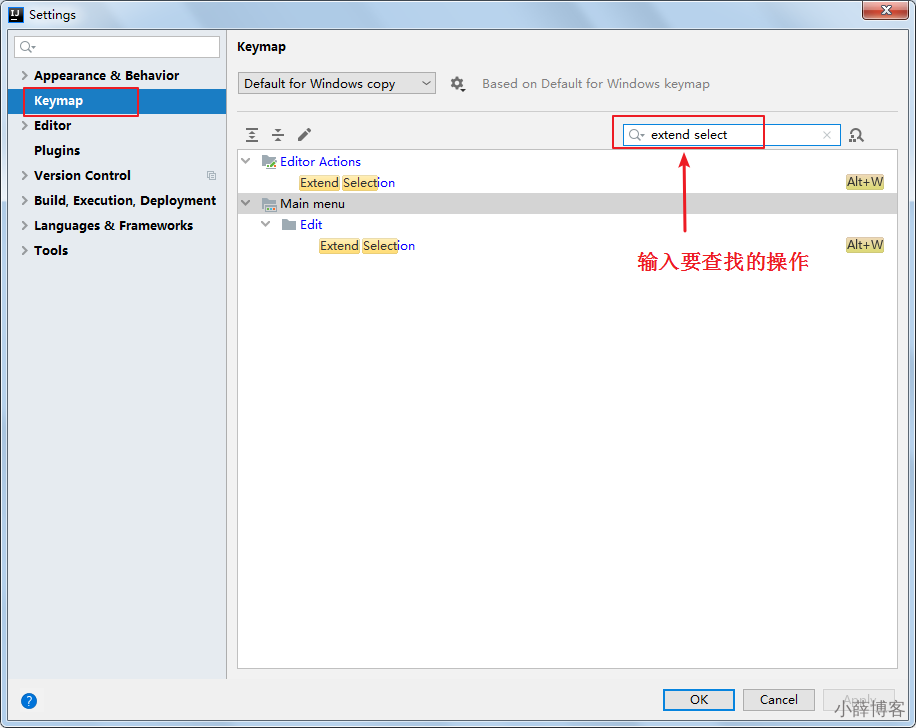
2、查看快捷键
1、已知快捷键操作名,未知快捷键
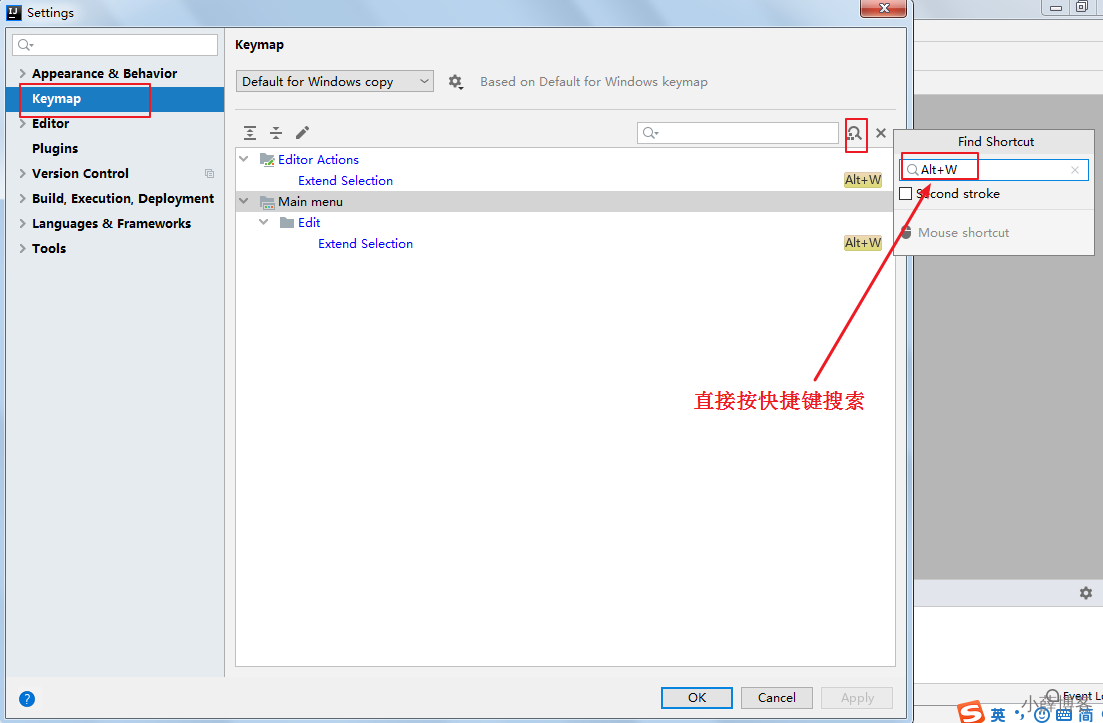
2、已知快捷键,不知道对应的操作名
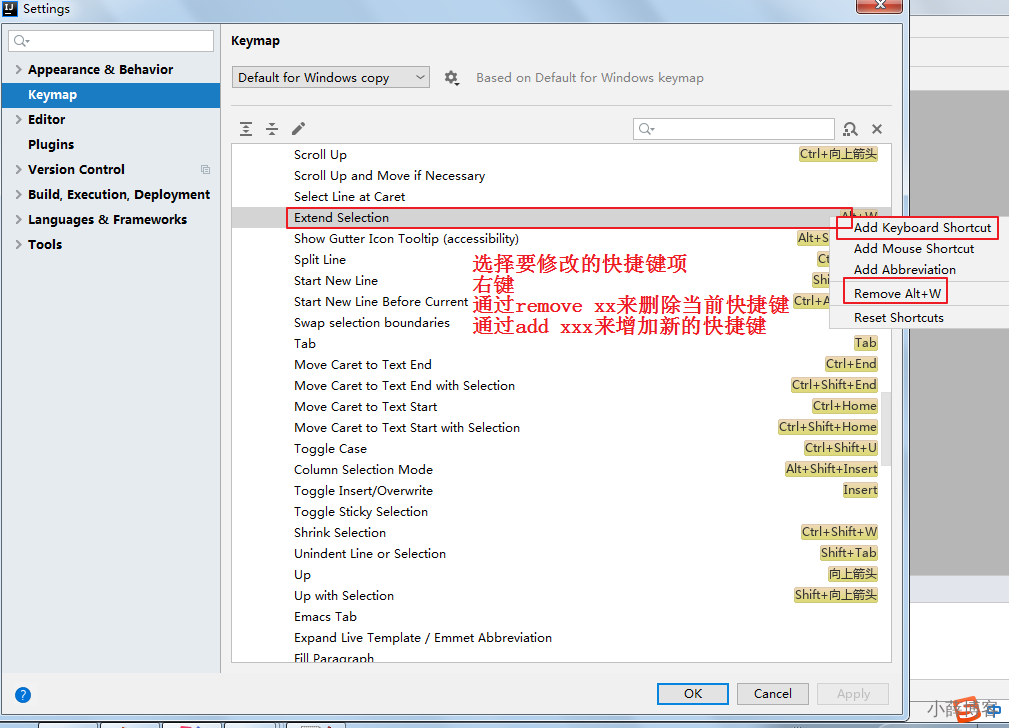
3、自定义快捷键
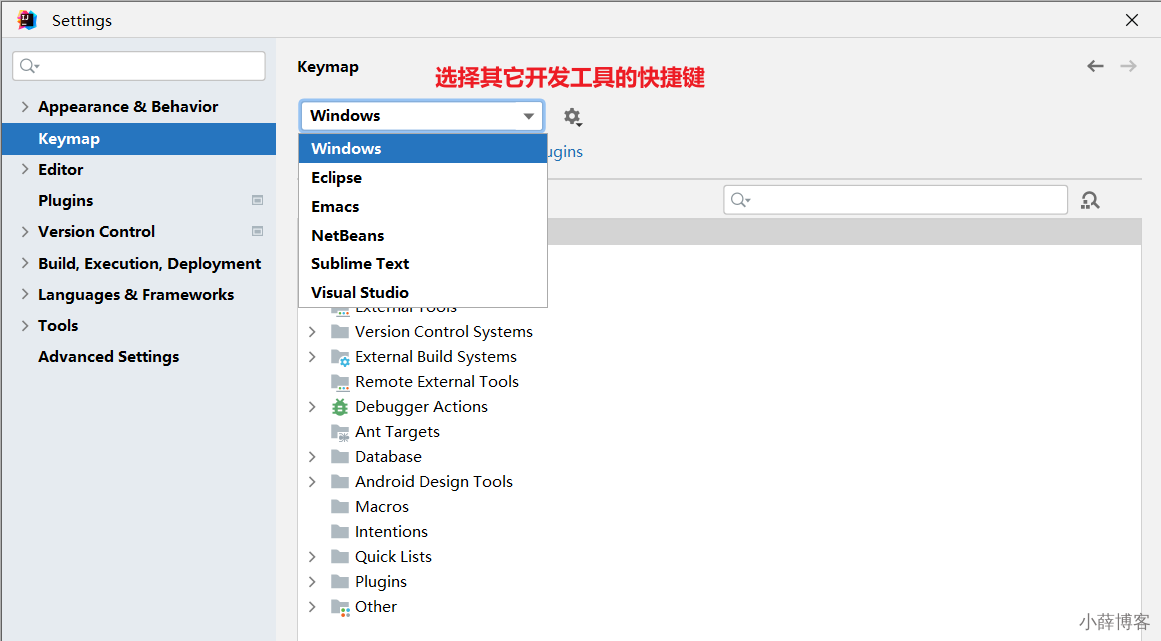
4、使用其它平台快捷键
苹果电脑或者是用惯Eclipse快捷的,可以选择其他快捷键插件。
7、IDEA断点调试(Debug)
1、为什么需要Debug
编好的程序在执行过程中如果出现错误,该如何查找或定位错误呢?简单的代码直接就可以看出来,但如果代码比较复杂,就需要借助程序调试工具(Debug)来查找错误了。
运行编写好的程序时,可能出现的几种情况:
> 情况1:没有任何bug,程序执行正确!

====================如果出现如下的三种情况,都又必要使用debug=============================
> 情况2:运行以后,出现了错误或异常信息。但是通过日志文件或控制台,显示了异常信息的位置。
> 情况3:运行以后,得到了结果,但是结果不是我们想要的。
> 情况4:运行以后,得到了结果,结果大概率是我们想要的。但是多次运行的话,可能会出现不是我们想要的情况。
比如:多线程情况下,处理线程安全问题。2、Debug的步骤
Debug(调试)程序步骤如下:
1、添加断点
2、启动调试
3、单步执行
4、观察变量和执行流程,找到并解决问题
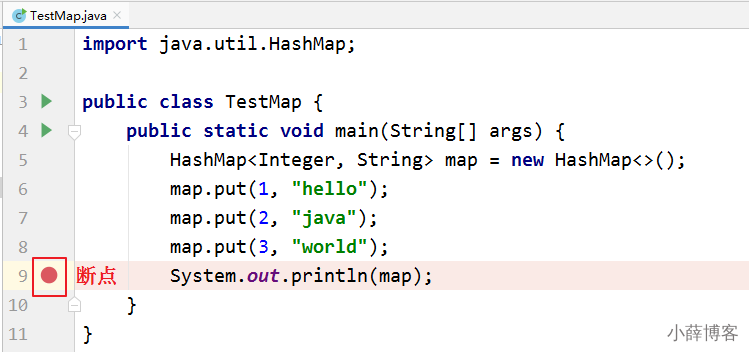
1、添加断点
在源代码文件中,在想要设置断点的代码行的前面的标记行处,单击鼠标左键就可以设置断点,在相同位置再次单击即可取消断点。
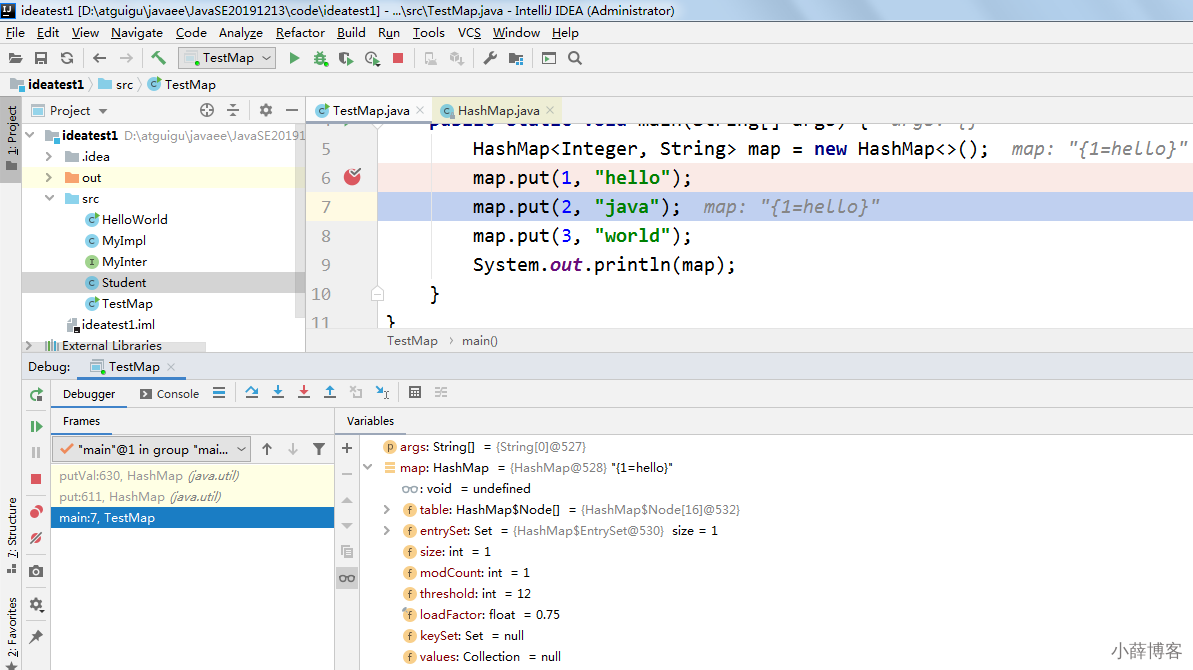
2、启动调试
IDEA提供多种方式来启动程序(Launch)的调试,分别是通过菜单(Run –> Debug)、图标(“绿色臭虫” 等等
等等
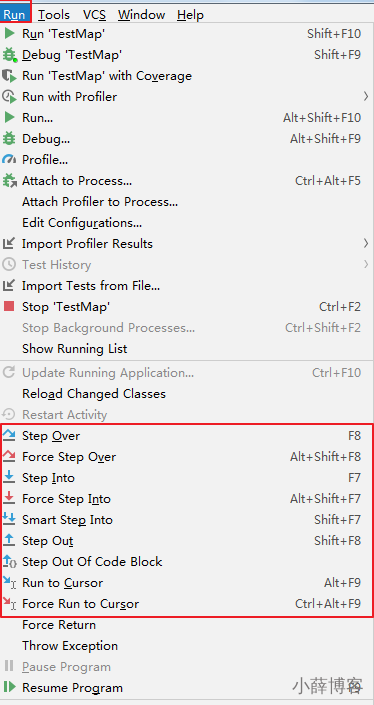
3、单步调试工具介绍
或
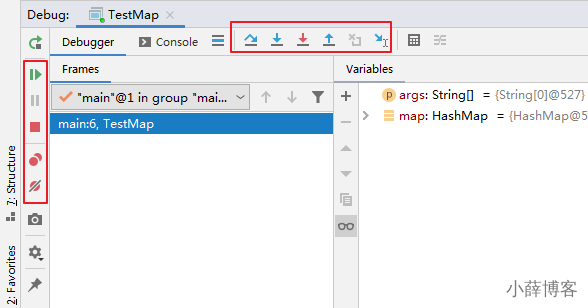
 :Step Over(F8):进入下一步,如果当前行断点是调用一个方法,则不进入当前方法体内
 :Step Into(F7):进入下一步,如果当前行断点是调用一个自定义方法,则进入该方法体内
 :Force Step Into(Alt +Shift + F7):进入下一步,如果当前行断点是调用一个核心类库方法,则进入该方法体内
 :Step Out(Shift + F8):跳出当前方法体
 :Run to Cursor(Alt + F9):直接跳到光标处继续调试
 :Resume Program(F9):恢复程序运行,但如果该断点下面代码还有断点则停在下一个断点上
 :Stop(Ctrl + F2):结束调试
 :View Breakpoints(Ctrl + Shift + F8):查看所有断点
 :Mute Breakpoints:使得当前代码后面所有的断点失效, 一下执行到底
说明:在Debug过程中,可以动态的下断点。
3、多种Debug情况介绍
1、行断点
- 断点打在代码所在的行上。执行到此行时,会停下来。
public class Debug01 {
    public static void main(String[] args) {
        //1.
        int m = 10;
        int n = 20;
        System.out.println("m = " + m + ",n = " + n);
        swap(m, n);
        System.out.println("m = " + m + ",n = " + n);

        //2.
        int[] arr = new int[] {1,2,3,4,5};
        System.out.println(arr);//地址值

        char[] arr1 = new char[] {'a','b','c'};
        System.out.println(arr1);//abc
    }

    public static void swap(int m,int n){
        int temp = m;
        m = n;
        n = temp;
    }

}2、方法断点
- 断点设置在方法的签名上,默认当进入时,断点可以被唤醒。
- 也可以设置在方法退出时,断点也被唤醒
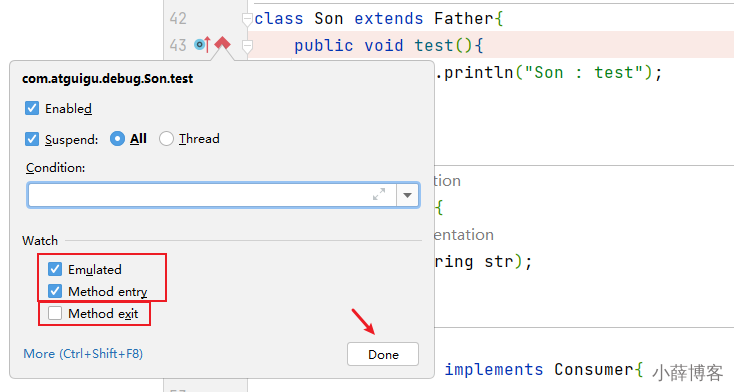
- 在多态的场景下,在父类或接口的方法上打断点,会自动调入到子类或实现类的方法
public class Debug02 {
    public static void main(String[] args) {

        //1.
        Son instance = new Son();
        instance.test();
        //2.
        Father instance1 = new Son();
        instance1.test();

        //3.
        Consumer con = new ConsumerImpl();
        con.accept("xx");

        //4.
        HashMap map = new HashMap();
        map.put("Tom",12);
        map.put("Jerry",11);
        map.put("Tony",20);
    }
}

class Father{
    public void test(){
        System.out.println("Father : test");
    }
}

class Son extends Father{
    public void test(){
        System.out.println("Son : test");
    }
}

interface Consumer{
    void accept(String str);
}

class ConsumerImpl implements Consumer{

    @Override
    public void accept(String str) {
        System.out.println("ConsumerImple:" + str);
    }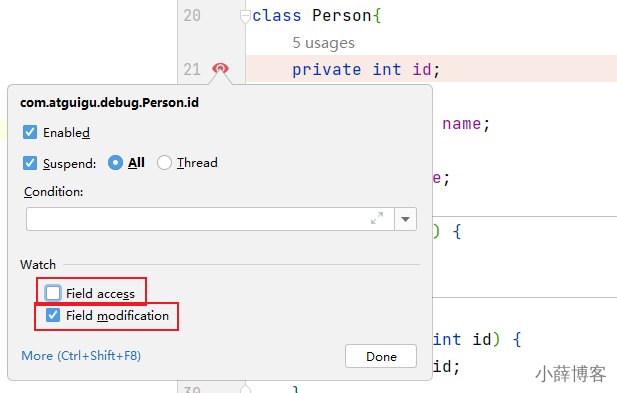
}3、字段断点
- 在类的属性声明上打断点,默认对属性的修改操作进行监控
public class Debug03 {
    public static void main(String[] args) {
        Person p1 = new Person(3);

        System.out.println(p1);
    }
}

class Person{
    private int id = 1;
    private String name;
    private int age;

    public Person() {
    }
    {
        id = 2;
    }
    public Person(int id) {
        this.id = id;
    }


    public Person(int id, String name, int age) {
        this.id = id;
        this.name = name;
        this.age = age;
    }

    public int getId() {
        return id;
    }

    public void setId(int id) {
        this.id = id;
    }

    public String getName() {
        return name;
    }

    public void setName(String name) {
        this.name = name;
    }

    public int getAge() {
        return age;
    }

    public void setAge(int age) {
        this.age = age;
    }

    @Override
    public String toString() {
        return "Person{" +
                "id=" + id +
                ", name='" + name + '\'' +
                ", age=" + age +
                '}';
    }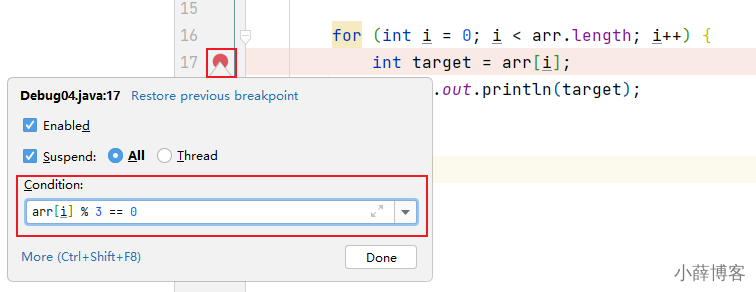
}4、条件断点
public class Debug04 {
    public static void main(String[] args) {
        int[] arr = new int[]{1,2,3,4,5,6,7,8,9,10,11,12};

        for (int i = 0; i < arr.length; i++) {
            int target = arr[i];
            System.out.println(target);
        }
    }
}针对上述代码,在满足arr[i] % 3 == 0的条件下,执行断点。
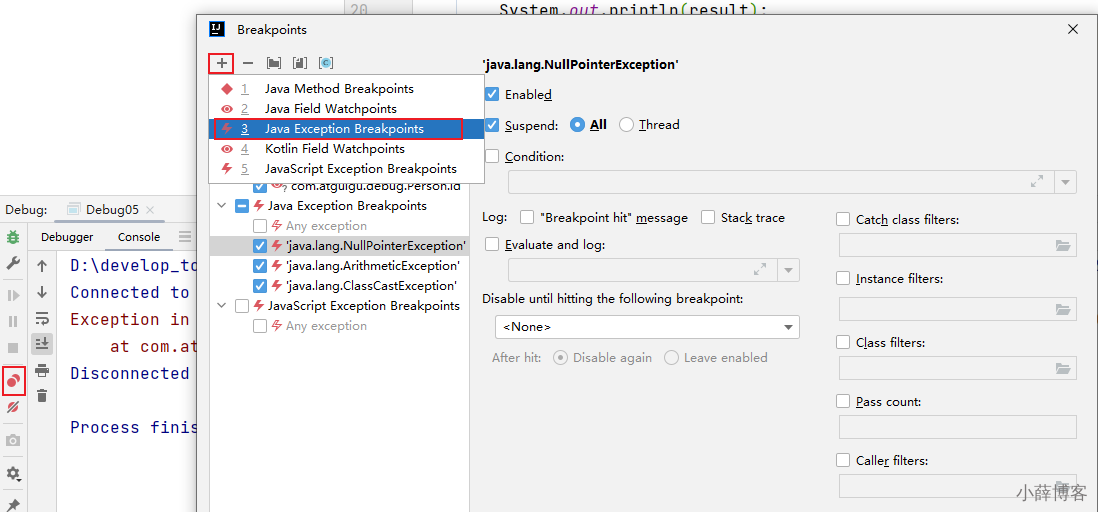
5、异常断点(暂略)
- 对异常进行跟踪。如果程序出现指定异常,程序就会执行断点,自动停住。
public class Debug05 {
    public static void main(String[] args) {

        int m = 10;
        int n = 0;
        int result = m / n;
        System.out.println(result);


//        Person p1 = new Person(1001);
//        System.out.println(p1.getName().toUpperCase());


    }
}通过下图的方式,对指定的异常进行监控:
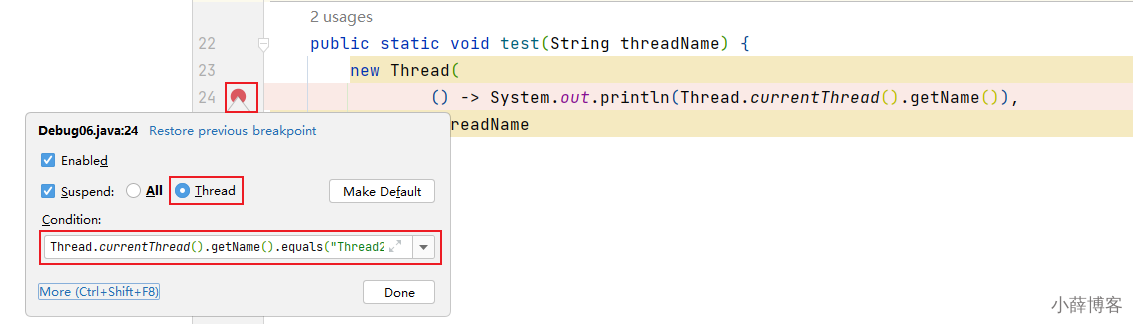
6、线程调试(暂略)
public class Debug06 {

    public static void main(String[] args) {

        test("Thread1");
        test("Thread2");


    }

    public static void test(String threadName) {
        new Thread(
                () -> System.out.println(Thread.currentThread().getName()),
                threadName
        ).start();
    }

}
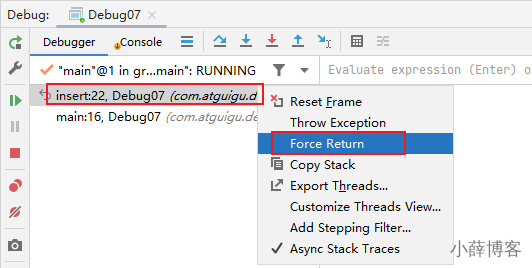
7、强制结束
public class Debug07 {
    public static void main(String[] args) {
        System.out.println("获取请求的数据");
        System.out.println("调用写入数据库的方法");
        insert();
        System.out.println("程序结束");
    }

    private static void insert() {
        System.out.println("进入insert()方法");
        System.out.println("获取数据库连接");
        System.out.println("将数据写入数据表中");
        System.out.println("写出操作完成");
        System.out.println("断开连接");
    }
}
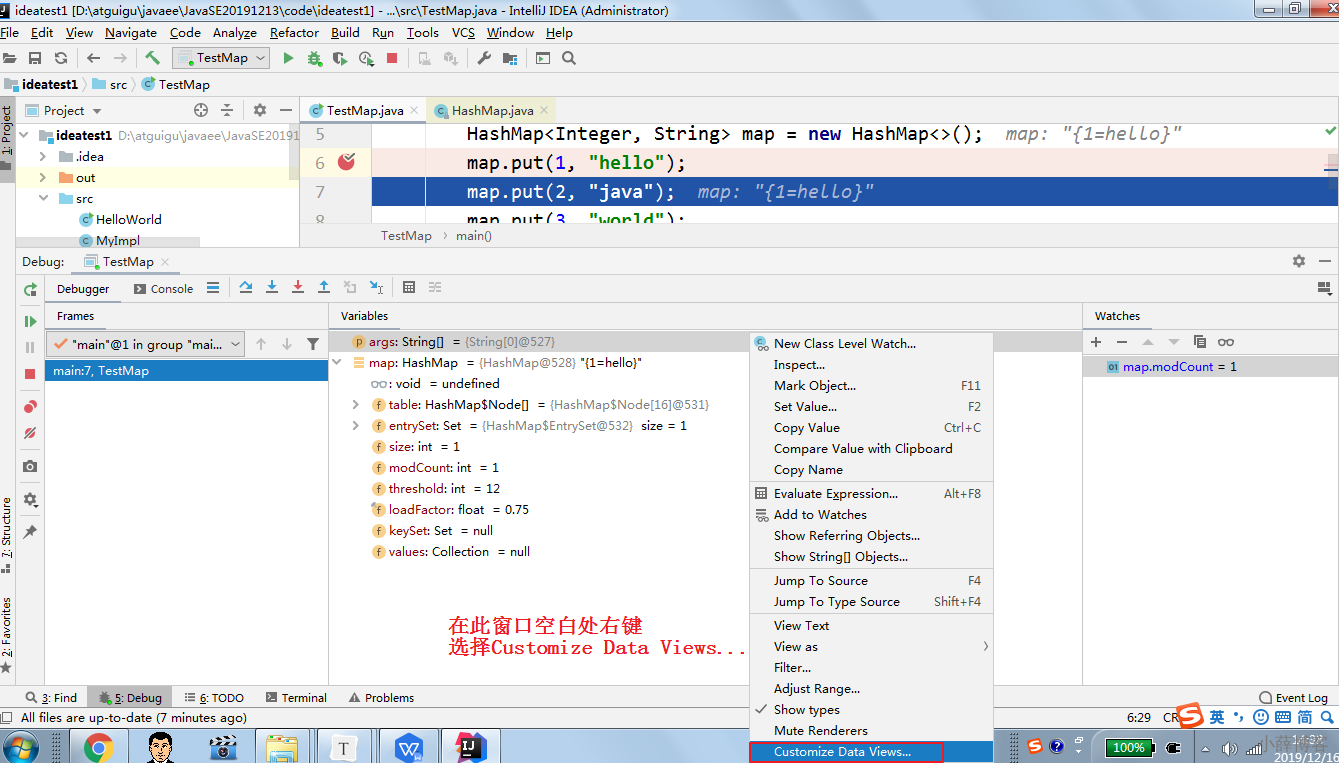
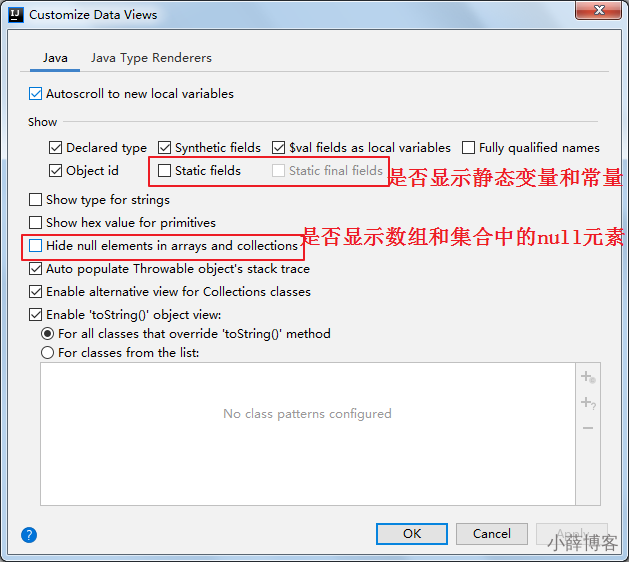
4、自定义调试数据视图
public class Debug08 {
    public static void main(String[] args) {
        HashMap<Integer,String> map = new HashMap<>();
        map.put(1,"高铁");
        map.put(2,"网购");
        map.put(3,"支付宝");
        map.put(4,"共享单车");

        System.out.println(map);
    }
}设置如下:
5、常见问题
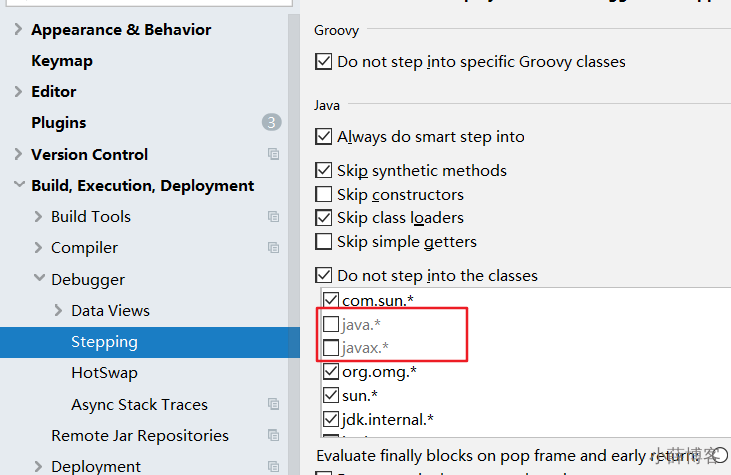
问题:使用Step Into时,会出现无法进入源码的情况。如何解决?
方案1:使用 force step into 即可
方案2:点击Setting -> Build,Execution,Deployment -> Debugger -> Stepping
把Do not step into the classess中的java.*、javax.* 取消勾选即可。
小结:
经验:初学者对于在哪里加断点,缺乏经验,这也是调试程序最麻烦的地方,需要一定的经验。
简单来说,在可能发生错误的代码的前面加断点。如果不会判断,就在程序执行的起点处加断点。