二、Spring注解开发
1、@Configuration
新建 Person 类
package com.xue.bean;

import lombok.Data;

/**
 * @Author: xueqimiao
 * @Date: 2022/7/2 16:07
 */
@Data
public class Person {
    private String name;
    private Integer age;

    public Person(){

    }
    public Person(String name,Integer age){
        this.name = name;
        this.age = age;
    }
}创建 beans06.xml
<!-- 注册组件 -->
<bean id="person" class="com.xue.bean.Person">
    <property name="name" value="xue"></property>
    <property name="age" value="18"></property>
</bean>至此,我们使用XML配置文件的方式注入JavaBean就完成了。
@Test
public void test12(){
    ApplicationContext context = new ClassPathXmlApplicationContext("bean06.xml");
    // 根据类型获取
    Person person = context.getBean(Person.class);
    System.out.println(person);
}运行以上test12方法,输出的结果信息如下图所示。
Person(name=xue, age=18)从输出结果中,我们可以看出,Person类通过beans06.xml文件的配置,已经注入到Spring的IOC容器中去了。
1、通过注解注入JavaBean
创建一个类作为配置类,标注@Configuration注解
package com.xue.config;

import com.xue.bean.Person;
import org.springframework.context.annotation.Bean;
import org.springframework.context.annotation.ComponentScan;
import org.springframework.context.annotation.Configuration;

/**
 * @Author: xueqimiao
 * @Date: 2022/7/2 16:09
 * 这个配置类也是一个组件
 * 告诉Spring这是一个配置类
 */
@Configuration
public class Config01 {

    @Bean
    public Person person() {
        return new Person("xue", 21);
    }
}@Test
public void test13(){
ApplicationContext applicationContext = new AnnotationConfigApplicationContext(Config01.class);
Person person = applicationContext.getBean(Person.class);
System.out.println(person);
}Person(name=xue, age=21)可以看出,通过注解将Person类注入到了Spring的IOC容器中。
到这里,我们已经明确了,通过XML配置文件和注解这两种方式都可以将JavaBean注入到Spring的IOC容器中。那么,使用注解将JavaBean注入到IOC容器中时,使用的bean的名称又是什么呢?我们可以在MainTest类的main方法中添加如下代码来获取Person这个类型的组件在IOC容器中的名字。
@Test
public void test14(){
    ApplicationContext applicationContext = new AnnotationConfigApplicationContext(Config01.class);
    String[] namesForType = applicationContext.getBeanNamesForType(Person.class);
    for (String name : namesForType) {
        System.out.println(name);
    }
}person
我们修改下MainConfig类中的person()方法,将其名字修改成person01,如下所示。
@Bean
public Person person01() {
    return new Person("xue", 21);
}person01
使用注解注入JavaBean时,bean在IOC容器中的名称就是使用@Bean注解标注的方法名称。我们可不可以为bean单独指定名称呢?那必须可以啊!只要在@Bean注解中明确指定名称就可以了。比如在下面MainConfig类的代码中,我们将person01()方法上的@Bean注解修改成了@Bean("person")注解,如下所示。
@Bean("person")
public Person person01() {
    return new Person("xue", 21);
}此时,我们再次运行MainTest类中的main方法,输出的结果信息如下图所示。
person
可以看到,此时,输出的JavaBean的名称确实是person了。
2、小结
我们在使用注解方式向Spring的IOC容器中注入JavaBean时,如果没有在@Bean注解中明确指定bean的名称,那么就会使用当前方法的名称来作为bean的名称;如果在@Bean注解中明确指定了bean的名称,那么就会使用@Bean注解中指定的名称来作为bean的名称。
2、@ComponentScan
1、使用XML文件配置包扫描
我们可以在Spring的XML配置文件中配置包的扫描,在配置包扫描时,需要在Spring的XML配置文件中的beans节点中引入context标签,如下所示。
<?xml version="1.0" encoding="UTF-8"?>
<beans xmlns="http://www.springframework.org/schema/beans"
       xmlns:xsi="http://www.w3.org/2001/XMLSchema-instance"
       xmlns:p="http://www.springframework.org/schema/p"
       xmlns:util="http://www.springframework.org/schema/util"
       xmlns:context="http://www.springframework.org/schema/context"
       xsi:schemaLocation="http://www.springframework.org/schema/beans
       http://www.springframework.org/schema/beans/spring-beans.xsd
       http://www.springframework.org/schema/util
       http://www.springframework.org/schema/util/spring-util.xsd
       http://www.springframework.org/schema/context
       http://www.springframework.org/schema/context/spring-context.xsd">

    <context:component-scan base-package="com.xue"></context:component-scan>

</beans>这样配置以后,只要在com.xue包下,或者com.xue的子包下标注了@Repository、@Service、@Controller、@Component注解的类都会被扫描到,并自动注入到Spring容器中。
此时,我们分别创建BookDao、BookService以及BookController这三个类,并在这三个类中分别添加@Repository、@Service、@Controller注解,如下所示。
BookDao
javapackage com.xue.dao; import org.springframework.stereotype.Repository; /** * @Author: xueqimiao * @Date: 2022/7/2 20:12 * @Repository 名字默认是类名首字母小写 */ @Repository public class BookDao { }BookService
javapackage com.xue.service; import org.springframework.stereotype.Service; /** * @Author: xueqimiao * @Date: 2022/7/2 20:13 */ @Service public class BookService { }BookController
javapackage com.xue.controller; import org.springframework.stereotype.Controller; /** * @Author: xueqimiao * @Date: 2022/7/2 20:13 */ @Controller public class BookController { }
@Test
public void test15(){
    ClassPathXmlApplicationContext applicationContext = new ClassPathXmlApplicationContext("bean06.xml");
    // 我们现在就来看一下IOC容器中有哪些bean,即容器中所有bean定义的名字
    String[] definitionNames = applicationContext.getBeanDefinitionNames();
    for (String name : definitionNames) {
        System.out.println(name);
    }
}运行测试用例,输出的结果信息如下图所示。 由于com.xue包下还有写组件
config01 bookController bookDao userDao userDao2 bookService userService org.springframework.context.annotation.internalConfigurationAnnotationProcessor org.springframework.context.annotation.internalAutowiredAnnotationProcessor org.springframework.context.annotation.internalCommonAnnotationProcessor org.springframework.context.event.internalEventListenerProcessor org.springframework.context.event.internalEventListenerFactory person
可以看到,除了输出我们自己创建的bean的名称之外,也输出了Spring内部使用的一些重要的bean的名称。
接下来,我们使用注解来完成这些功能。
2、使用注解配置包扫描
使用@ComponentScan注解之前我们先将bean06.xml配置文件中的下述配置注释掉。
<!--<context:component-scan base-package="com.xue"></context:component-scan>-->注释掉之后,我们就可以使用@ComponentScan注解来配置包扫描了。使用@ComponentScan注解配置包扫描非常非常easy!只须在我们的MainConfig类上添加@ComponentScan注解,并将扫描的包指定为com.meimeixia即可,如下所示。
package com.xue.config;

import com.xue.bean.Person;
import org.springframework.context.annotation.Bean;
import org.springframework.context.annotation.ComponentScan;
import org.springframework.context.annotation.Configuration;

/**
 * @Author: xueqimiao
 * @Date: 2022/7/2 20:17
 */
@ComponentScan(value="com.xue") // value指定要扫描的包
@Configuration
public class Config02 {
    @Bean("person")
    public Person person01() {
        return new Person("xue", 20);
    }
}没错,就是这么简单,只需要在类上添加@ComponentScan(value="com.xue")这样一个注解即可。
@Test
public void test16(){
    AnnotationConfigApplicationContext applicationContext = new AnnotationConfigApplicationContext(Config02.class);
    // 我们现在就来看一下IOC容器中有哪些bean,即容器中所有bean定义的名字
    String[] definitionNames = applicationContext.getBeanDefinitionNames();
    for (String name : definitionNames) {
        System.out.println(name);
    }
}org.springframework.context.annotation.internalConfigurationAnnotationProcessor org.springframework.context.annotation.internalAutowiredAnnotationProcessor org.springframework.context.annotation.internalCommonAnnotationProcessor org.springframework.context.event.internalEventListenerProcessor org.springframework.context.event.internalEventListenerFactory config02 config01 bookController bookDao userDao userDao2 bookService userService person
可以看到使用@ComponentScan注解同样输出了容器中bean的名称。
既然使用XML配置文件和注解的方式都能够将相应的类注入到Spring容器当中,那我们是使用XML配置文件还是使用注解呢?我更倾向于使用注解,如果你确实喜欢使用XML配置文件来进行配置,也可以啊,哈哈,个人喜好嘛!好了,我们继续。
3、关于@ComponentScan注解
idea下载源码 点开源码后点击右上角下载源码
如果下载不下来,进入命令行输入以下命令即可
mvn dependency:resolve -Dclassifier=sources/*
* Copyright 2002-2017 the original author or authors.
*
* Licensed under the Apache License, Version 2.0 (the "License");
* you may not use this file except in compliance with the License.
* You may obtain a copy of the License at
*
* https://www.apache.org/licenses/LICENSE-2.0
*
* Unless required by applicable law or agreed to in writing, software
* distributed under the License is distributed on an "AS IS" BASIS,
* WITHOUT WARRANTIES OR CONDITIONS OF ANY KIND, either express or implied.
* See the License for the specific language governing permissions and
* limitations under the License.
*/
package org.springframework.context.support;
import org.springframework.beans.BeansException;
import org.springframework.context.ApplicationContext;
import org.springframework.core.io.ClassPathResource;
import org.springframework.core.io.Resource;
import org.springframework.lang.Nullable;
import org.springframework.util.Assert;
/**
* Standalone XML application context, taking the context definition files
* from the class path, interpreting plain paths as class path resource names
* that include the package path (e.g. "mypackage/myresource.txt"). Useful for
* test harnesses as well as for application contexts embedded within JARs.
*
* <p>The config location defaults can be overridden via {@link #getConfigLocations},
* Config locations can either denote concrete files like "/myfiles/context.xml"
* or Ant-style patterns like "/myfiles/*-context.xml" (see the
* {@link org.springframework.util.AntPathMatcher} javadoc for pattern details).
*
* <p>Note: In case of multiple config locations, later bean definitions will
* override ones defined in earlier loaded files. This can be leveraged to
* deliberately override certain bean definitions via an extra XML file.
*
* <p><b>This is a simple, one-stop shop convenience ApplicationContext.
* Consider using the {@link GenericApplicationContext} class in combination
* with an {@link org.springframework.beans.factory.xml.XmlBeanDefinitionReader}
* for more flexible context setup.</b>
*
* @author Rod Johnson
* @author Juergen Hoeller
* @see #getResource
* @see #getResourceByPath
* @see GenericApplicationContext
*/
public class ClassPathXmlApplicationContext extends AbstractXmlApplicationContext {
@Nullable
private Resource[] configResources;
/**
* Create a new ClassPathXmlApplicationContext for bean-style configuration.
* @see #setConfigLocation
* @see #setConfigLocations
* @see #afterPropertiesSet()
*/
public ClassPathXmlApplicationContext() {
}
/**
* Create a new ClassPathXmlApplicationContext for bean-style configuration.
* @param parent the parent context
* @see #setConfigLocation
* @see #setConfigLocations
* @see #afterPropertiesSet()
*/
public ClassPathXmlApplicationContext(ApplicationContext parent) {
super(parent);
}
/**
* Create a new ClassPathXmlApplicationContext, loading the definitions
* from the given XML file and automatically refreshing the context.
* @param configLocation resource location
* @throws BeansException if context creation failed
*/
public ClassPathXmlApplicationContext(String configLocation) throws BeansException {
this(new String[] {configLocation}, true, null);
}
/**
* Create a new ClassPathXmlApplicationContext, loading the definitions
* from the given XML files and automatically refreshing the context.
* @param configLocations array of resource locations
* @throws BeansException if context creation failed
*/
public ClassPathXmlApplicationContext(String... configLocations) throws BeansException {
this(configLocations, true, null);
}
/**
* Create a new ClassPathXmlApplicationContext with the given parent,
* loading the definitions from the given XML files and automatically
* refreshing the context.
* @param configLocations array of resource locations
* @param parent the parent context
* @throws BeansException if context creation failed
*/
public ClassPathXmlApplicationContext(String[] configLocations, @Nullable ApplicationContext parent)
throws BeansException {
this(configLocations, true, parent);
}
/**
* Create a new ClassPathXmlApplicationContext, loading the definitions
* from the given XML files.
* @param configLocations array of resource locations
* @param refresh whether to automatically refresh the context,
* loading all bean definitions and creating all singletons.
* Alternatively, call refresh manually after further configuring the context.
* @throws BeansException if context creation failed
* @see #refresh()
*/
public ClassPathXmlApplicationContext(String[] configLocations, boolean refresh) throws BeansException {
this(configLocations, refresh, null);
}
/**
* Create a new ClassPathXmlApplicationContext with the given parent,
* loading the definitions from the given XML files.
* @param configLocations array of resource locations
* @param refresh whether to automatically refresh the context,
* loading all bean definitions and creating all singletons.
* Alternatively, call refresh manually after further configuring the context.
* @param parent the parent context
* @throws BeansException if context creation failed
* @see #refresh()
*/
public ClassPathXmlApplicationContext(
String[] configLocations, boolean refresh, @Nullable ApplicationContext parent)
throws BeansException {
super(parent);
setConfigLocations(configLocations);
if (refresh) {
refresh();
}
}
/**
* Create a new ClassPathXmlApplicationContext, loading the definitions
* from the given XML file and automatically refreshing the context.
* <p>This is a convenience method to load class path resources relative to a
* given Class. For full flexibility, consider using a GenericApplicationContext
* with an XmlBeanDefinitionReader and a ClassPathResource argument.
* @param path relative (or absolute) path within the class path
* @param clazz the class to load resources with (basis for the given paths)
* @throws BeansException if context creation failed
* @see org.springframework.core.io.ClassPathResource#ClassPathResource(String, Class)
* @see org.springframework.context.support.GenericApplicationContext
* @see org.springframework.beans.factory.xml.XmlBeanDefinitionReader
*/
public ClassPathXmlApplicationContext(String path, Class<?> clazz) throws BeansException {
this(new String[] {path}, clazz);
}
/**
* Create a new ClassPathXmlApplicationContext, loading the definitions
* from the given XML files and automatically refreshing the context.
* @param paths array of relative (or absolute) paths within the class path
* @param clazz the class to load resources with (basis for the given paths)
* @throws BeansException if context creation failed
* @see org.springframework.core.io.ClassPathResource#ClassPathResource(String, Class)
* @see org.springframework.context.support.GenericApplicationContext
* @see org.springframework.beans.factory.xml.XmlBeanDefinitionReader
*/
public ClassPathXmlApplicationContext(String[] paths, Class<?> clazz) throws BeansException {
this(paths, clazz, null);
}
/**
* Create a new ClassPathXmlApplicationContext with the given parent,
* loading the definitions from the given XML files and automatically
* refreshing the context.
* @param paths array of relative (or absolute) paths within the class path
* @param clazz the class to load resources with (basis for the given paths)
* @param parent the parent context
* @throws BeansException if context creation failed
* @see org.springframework.core.io.ClassPathResource#ClassPathResource(String, Class)
* @see org.springframework.context.support.GenericApplicationContext
* @see org.springframework.beans.factory.xml.XmlBeanDefinitionReader
*/
public ClassPathXmlApplicationContext(String[] paths, Class<?> clazz, @Nullable ApplicationContext parent)
throws BeansException {
super(parent);
Assert.notNull(paths, "Path array must not be null");
Assert.notNull(clazz, "Class argument must not be null");
this.configResources = new Resource[paths.length];
for (int i = 0; i < paths.length; i++) {
this.configResources[i] = new ClassPathResource(paths[i], clazz);
}
refresh();
}
@Override
@Nullable
protected Resource[] getConfigResources() {
return this.configResources;
}
}这里,我们着重来看ComponentScan类中的如下两个方法。
**includeFilters()方法指定Spring扫描的时候按照什么规则只需要包含哪些组件,而excludeFilters()**方法指定Spring扫描的时候按照什么规则排除哪些组件。两个方法的返回值都是Filter[]数组,在ComponentScan注解类的内部存在Filter注解类,大家可以看下上面的代码。
1、扫描时排除注解标注的类
排除@Controller和@Service标注的组件之外,IOC容器中剩下的组件我都要。可以在MainConfig类上通过@ComponentScan注解的excludeFilters()方法实现。例如,我们在Config02类上添加了如下的注解。
@ComponentScan(value = "com.xue", excludeFilters = {
        /*
         * type:指定你要排除的规则,是按照注解进行排除,还是按照给定的类型进行排除,还是按照正则表达式进行排除,等等
         * classes:除了@Controller和@Service标注的组件之外,IOC容器中剩下的组件我都要,即相当于是我要排除@Controller和@Service这俩注解标注的组件。
         */
        @ComponentScan.Filter(type = FilterType.ANNOTATION, classes = {Controller.class, Service.class})
}) // value指定要扫描的包
@Configuration
public class Config02 {
    @Bean("person")
    public Person person01() {
        return new Person("xue", 20);
    }
}这样,我们就使得Spring在扫描包的时候排除了使用@Controller和@Service这俩注解标注的类。
org.springframework.context.annotation.internalConfigurationAnnotationProcessor
org.springframework.context.annotation.internalAutowiredAnnotationProcessor
org.springframework.context.annotation.internalCommonAnnotationProcessor
org.springframework.context.event.internalEventListenerProcessor
org.springframework.context.event.internalEventListenerFactory
config02
config01
bookDao
userDao
userDao2
person从上图中可以清楚地看到,输出的结果信息中不再输出bookController和bookService了,这已然说明了Spring在进行包扫描时,忽略了@Controller和@Service这俩注解标注的类。
2、扫描时只包含注解标注的类
我们也可以使用ComponentScan注解类中的includeFilters()方法来指定Spring在进行包扫描时,只包含哪些注解标注的类。
这里需要注意的是,当我们使用includeFilters()方法来指定只包含哪些注解标注的类时,需要禁用掉默认的过滤规则。 还记得我们以前在XML配置文件中配置这个只包含的时候,应该怎么做吗?我们需要在XML配置文件中先配置好use-default-filters="false",也就是禁用掉默认的过滤规则,因为默认的过滤规则就是扫描所有的,只有我们禁用掉默认的过滤规则之后,只包含才能生效。
<context:component-scan base-package="com.xue" use-default-filters="false"></context:component-scan>只包含@Controller注解标注的类。
@ComponentScan(value = "com.xue", includeFilters = {
        /*
         * type:指定你要排除的规则,是按照注解进行排除,还是按照给定的类型进行排除,还是按照正则表达式进行排除,等等
         * classes:我们需要Spring在扫描时,只包含@Controller注解标注的类
         */
        @ComponentScan.Filter(type = FilterType.ANNOTATION, classes = {Controller.class})}, useDefaultFilters = false)
// value指定要扫描的包
@Configuration
public class Config02 {
    @Bean("person")
    public Person person01() {
        return new Person("xue", 20);
    }
}org.springframework.context.annotation.internalConfigurationAnnotationProcessor
org.springframework.context.annotation.internalAutowiredAnnotationProcessor
org.springframework.context.annotation.internalCommonAnnotationProcessor
org.springframework.context.event.internalEventListenerProcessor
org.springframework.context.event.internalEventListenerFactory
config02
bookController
person可以看到,在输出的结果中,只包含了@Controller注解标注的组件名称,并没有输出@Service和@Repository这俩注解标注的组件名称。
温馨提示:在使用includeFilters()方法来指定只包含哪些注解标注的类时,结果信息中会一同输出Spring内部的组件名称。
3、重复注解
不知道小伙伴们有没有注意到ComponentScan注解类上有一个如下所示的注解。  我们先来看看@ComponentScans注解是个啥,
@Retention(RetentionPolicy.RUNTIME)
@Target(ElementType.TYPE)
@Documented
public @interface ComponentScans {

	ComponentScan[] value();

}可以看到,在ComponentScans注解类的内部只声明了一个返回ComponentScan[]数组的value()方法,说到这里,大家是不是就明白了,没错,这在Java 8中是一个重复注解。
如果你用的是Java 8,那么@ComponentScan注解就是一个重复注解,也就是说我们可以在一个类上重复使用这个注解,如下所示。
@ComponentScan(value = "com.xue", includeFilters = {
        /*
         * type:指定你要排除的规则,是按照注解进行排除,还是按照给定的类型进行排除,还是按照正则表达式进行排除,等等
         * classes:我们需要Spring在扫描时,只包含@Controller注解标注的类
         */
        @ComponentScan.Filter(type = FilterType.ANNOTATION, classes = {Controller.class})}, useDefaultFilters = false)
@ComponentScan(value = "com.xue", includeFilters = {
        /*
         * type:指定你要排除的规则,是按照注解进行排除,还是按照给定的类型进行排除,还是按照正则表达式进行排除,等等
         * classes:我们需要Spring在扫描时,只包含@Controller注解标注的类
         */
@ComponentScan.Filter(type = FilterType.ANNOTATION, classes = {Service.class,Repository.class})}, useDefaultFilters = false)org.springframework.context.annotation.internalConfigurationAnnotationProcessor
org.springframework.context.annotation.internalAutowiredAnnotationProcessor
org.springframework.context.annotation.internalCommonAnnotationProcessor
org.springframework.context.event.internalEventListenerProcessor
org.springframework.context.event.internalEventListenerFactory
config02
bookController
bookDao
bookService
person可以看到,同时输出了@Controller、@Service和@Repository注解标注的组件名称。
当然了,如果你使用的是Java 8之前的版本,那也没有问题,虽然我们再也不能直接在类上写多个@ComponentScan注解了,但是我们可以在类上使用@ComponentScans注解,同样也可以指定多个@ComponentScan,如下所示。
@ComponentScans({@ComponentScan(value = "com.xue", includeFilters = {
        /*
         * type:指定你要排除的规则,是按照注解进行排除,还是按照给定的类型进行排除,还是按照正则表达式进行排除,等等
         * classes:我们需要Spring在扫描时,只包含@Controller注解标注的类
         */
        @ComponentScan.Filter(type = FilterType.ANNOTATION, classes = {Controller.class})}, useDefaultFilters = false), @ComponentScan(value = "com.xue", includeFilters = {
        /*
         * type:指定你要排除的规则,是按照注解进行排除,还是按照给定的类型进行排除,还是按照正则表达式进行排除,等等
         * classes:我们需要Spring在扫描时,只包含@Controller注解标注的类
         */
        @ComponentScan.Filter(type = FilterType.ANNOTATION, classes = {Service.class, Repository.class})}, useDefaultFilters = false)})
与使用多个@ComponentScan注解输出的结果信息相同。4、自定义TypeFilter指定@ComponentScan注解的过滤规则
1、FilterType中常用的规则
在使用@ComponentScan注解实现包扫描时,我们可以使用@Filter指定过滤规则,在@Filter中,通过type来指定过滤的类型。而@Filter注解中的type属性是一个FilterType枚举,其源码如下图所示。
/*
 * Copyright 2002-2013 the original author or authors.
 *
 * Licensed under the Apache License, Version 2.0 (the "License");
 * you may not use this file except in compliance with the License.
 * You may obtain a copy of the License at
 *
 *      https://www.apache.org/licenses/LICENSE-2.0
 *
 * Unless required by applicable law or agreed to in writing, software
 * distributed under the License is distributed on an "AS IS" BASIS,
 * WITHOUT WARRANTIES OR CONDITIONS OF ANY KIND, either express or implied.
 * See the License for the specific language governing permissions and
 * limitations under the License.
 */

package org.springframework.context.annotation;

/**
 * Enumeration of the type filters that may be used in conjunction with
 * {@link ComponentScan @ComponentScan}.
 *
 * @author Mark Fisher
 * @author Juergen Hoeller
 * @author Chris Beams
 * @since 2.5
 * @see ComponentScan
 * @see ComponentScan#includeFilters()
 * @see ComponentScan#excludeFilters()
 * @see org.springframework.core.type.filter.TypeFilter
 */
public enum FilterType {

	/**
	 * Filter candidates marked with a given annotation.
	 * @see org.springframework.core.type.filter.AnnotationTypeFilter
	 */
	ANNOTATION,

	/**
	 * Filter candidates assignable to a given type.
	 * @see org.springframework.core.type.filter.AssignableTypeFilter
	 */
	ASSIGNABLE_TYPE,

	/**
	 * Filter candidates matching a given AspectJ type pattern expression.
	 * @see org.springframework.core.type.filter.AspectJTypeFilter
	 */
	ASPECTJ,

	/**
	 * Filter candidates matching a given regex pattern.
	 * @see org.springframework.core.type.filter.RegexPatternTypeFilter
	 */
	REGEX,

	/** Filter candidates using a given custom
	 * {@link org.springframework.core.type.filter.TypeFilter} implementation.
	 */
	CUSTOM

}下面我会讲解每一个枚举值的含义。
1、FilterType.ANNOTATION:按照注解进行包含或者排除
例如,使用@ComponentScan注解进行包扫描时,如果要想按照注解只包含标注了@Controller注解的组件,那么就需要像下面这样写了。
@ComponentScan(value="com.xue", includeFilters={
        /*
         * type:指定你要排除的规则,是按照注解进行排除,还是按照给定的类型进行排除,还是按照正则表达式进行排除,等等
         * classes:我们需要Spring在扫描时,只包含@Controller注解标注的类
         */
        @ComponentScan.Filter(type=FilterType.ANNOTATION, classes={Controller.class})
}, useDefaultFilters=false)2、FilterType.ASSIGNABLE_TYPE:按照给定的类型进行包含或者排除
例如,使用@ComponentScan注解进行包扫描时,如果要想按照给定的类型只包含BookService类(接口)或其子类(实现类或子接口)的组件,那么就需要像下面这样写了。
@ComponentScan(value="com.xue", includeFilters={
        /*
         * type:指定你要排除的规则,是按照注解进行排除,还是按照给定的类型进行排除,还是按照正则表达式进行排除,等等
         */
        // 只要是BookService这种类型的组件都会被加载到容器中,不管是它的子类还是什么它的实现类。记住,只要是BookService这种类型的
        @ComponentScan.Filter(type=FilterType.ASSIGNABLE_TYPE, classes={BookService.class})
}, useDefaultFilters=false)此时,只要是BookService这种类型的组件,都会被加载到容器中。也就是说,当BookService是一个Java类时,该类及其子类都会被加载到Spring容器中;当BookService是一个接口时,其子接口或实现类都会被加载到Spring容器中。
3、FilterType.REGEX:按照正则表达式进行包含或者排除
例如,使用@ComponentScan注解进行包扫描时,按照正则表达式进行过滤,就得像下面这样子写。
@ComponentScan(value="com.xue", includeFilters={
        /*
         * type:指定你要排除的规则,是按照注解进行排除,还是按照给定的类型进行排除,还是按照正则表达式进行排除,等等
         */
        @ComponentScan.Filter(type=FilterType.REGEX, classes={RegexPatternTypeFilter.class})
}, useDefaultFilters=false)这种过滤规则基本上不怎么用!
5、FilterType.CUSTOM:按照自定义规则进行包含或者排除
如果实现自定义规则进行过滤时,自定义规则的类必须是org.springframework.core.type.filter.TypeFilter接口的实现类。
要想按照自定义规则进行过滤,首先我们得创建org.springframework.core.type.filter.TypeFilter接口的一个实现类,例如MyTypeFilter,该实现类的代码一开始如下所示。
package com.xue.filter;

import org.springframework.core.type.classreading.MetadataReader;
import org.springframework.core.type.classreading.MetadataReaderFactory;
import org.springframework.core.type.filter.TypeFilter;

import java.io.IOException;

/**
 * @Author: xueqimiao
 * @Date: 2022/7/2 20:44
 */
public class MyTypeFilter implements TypeFilter {

    /**
     * 参数:
     * metadataReader:读取到的当前正在扫描的类的信息
     * metadataReaderFactory:可以获取到其他任何类的信息的(工厂)
     */
    @Override
    public boolean match(MetadataReader metadataReader, MetadataReaderFactory metadataReaderFactory) throws IOException {

        return false; // 这儿我们先让其返回false

    }
}当我们实现TypeFilter接口时,需要实现该接口中的match()方法,match()方法的返回值为boolean类型。当返回true时,表示符合规则,会包含在Spring容器中;当返回false时,表示不符合规则,那就是一个都不匹配,自然就都不会被包含在Spring容器中。另外,在match()方法中存在两个参数,分别为MetadataReader类型的参数和MetadataReaderFactory类型的参数,含义分别如下。
- metadataReader:读取到的当前正在扫描的类的信息
- metadataReaderFactory:可以获取到其他任何类的信息的工厂
然后,使用@ComponentScan注解进行如下配置。
@ComponentScan(value="com.xue", includeFilters={
        /*
         * type:指定你要排除的规则,是按照注解进行排除,还是按照给定的类型进行排除,还是按照正则表达式进行排除,等等
         */
        // 指定新的过滤规则,这个过滤规则是我们自个自定义的,过滤规则就是由我们这个自定义的MyTypeFilter类返回true或者false来代表匹配还是没匹配
        @ComponentScan.Filter(type=FilterType.CUSTOM, classes={MyTypeFilter.class})
}, useDefaultFilters=false)FilterType枚举中的每一个枚举值的含义我都讲解完了,说了这么多,其实只有ANNOTATION和ASSIGNABLE_TYPE是比较常用的,ASPECTJ和REGEX不太常用,如果FilterType枚举中的类型无法满足我们的需求时,我们也可以通过实现org.springframework.core.type.filter.TypeFilter接口来自定义过滤规则,此时,将@Filter中的type属性设置为FilterType.CUSTOM,classes属性设置为自定义规则的类所对应的Class对象。
2、实现自定义过滤规则
从上面可以知道,我们在项目的com.meimeixia.config包下新建了一个类,即MyTypeFilter,它实现了org.springframework.core.type.filter.TypeFilter接口。此时,我们先在MyTypeFilter类中打印出当前正在扫描的类名,如
@Test
public void test16(){
    AnnotationConfigApplicationContext applicationContext = new AnnotationConfigApplicationContext(Config02.class);
    // 我们现在就来看一下IOC容器中有哪些bean,即容器中所有bean定义的名字
    String[] definitionNames = applicationContext.getBeanDefinitionNames();
    for (String name : definitionNames) {
        System.out.println(name);
    }
}此时,输出的结果信息如下图所示。
org.springframework.context.annotation.internalConfigurationAnnotationProcessor
org.springframework.context.annotation.internalAutowiredAnnotationProcessor
org.springframework.context.annotation.internalCommonAnnotationProcessor
org.springframework.context.event.internalEventListenerProcessor
org.springframework.context.event.internalEventListenerFactory
config02
person可以看到,已经输出了当前正在扫描的类的名称,同时,除了Spring内置的bean的名称之外,只输出了mainConfig和person,而没有输出使用@Repository、@Service、@Controller这些注解标注的组件的名称。这是因为当前MainConfig类上标注的@ComponentScan注解是使用的自定义规则,而在自定义规则的实现类(即MyTypeFilter类)中,直接返回了false,那么就是一个都不匹配了,自然所有的bean就都没被包含进去容器中了。
我们可以在MyTypeFilter类中简单的实现一个规则,例如,当前扫描的类名称中包含有"er"字符串的,就返回true,否则就返回false。此时,MyTypeFilter类中match()方法的实现代码如下所示。
package com.xue.filter;

import org.springframework.core.io.Resource;
import org.springframework.core.type.AnnotationMetadata;
import org.springframework.core.type.ClassMetadata;
import org.springframework.core.type.classreading.MetadataReader;
import org.springframework.core.type.classreading.MetadataReaderFactory;
import org.springframework.core.type.filter.TypeFilter;

import java.io.IOException;

/**
 * @Author: xueqimiao
 * @Date: 2022/7/2 20:44
 */
public class MyTypeFilter implements TypeFilter {

    /**
     * 参数:
     * metadataReader:读取到的当前正在扫描的类的信息
     * metadataReaderFactory:可以获取到其他任何类的信息的(工厂)
     */
    @Override
    public boolean match(MetadataReader metadataReader, MetadataReaderFactory metadataReaderFactory) throws IOException {

        // 获取当前类注解的信息
        AnnotationMetadata annotationMetadata = metadataReader.getAnnotationMetadata();
        // 获取当前正在扫描的类的类信息,比如说它的类型是什么啊,它实现了什么接口啊之类的
        ClassMetadata classMetadata = metadataReader.getClassMetadata();
        // 获取当前类的资源信息,比如说类的路径等信息
        Resource resource = metadataReader.getResource();
        // 获取当前正在扫描的类的类名
        String className = classMetadata.getClassName();
        System.out.println("--->" + className);

        // 现在来指定一个规则
        if (className.contains("er")) {
            return true; // 匹配成功,就会被包含在容器中
        }

        return false; // 这儿我们先让其返回false

    }
}此时,结果信息中输出了使用@Service和@Controller这俩注解标注的组件的名称,分别是bookController和bookService。
从以上输出的结果信息中,你还可以看到输出了一个myTypeFilter,你不禁要问了,为什么会有myTypeFilter呢?这就是因为我们现在扫描的是com.xue包,该包下的每一个类都会进到这个自定义规则里面进行匹配,若匹配成功,则就会被包含在容器中。
3、@Scope
1、@Scope注解概述
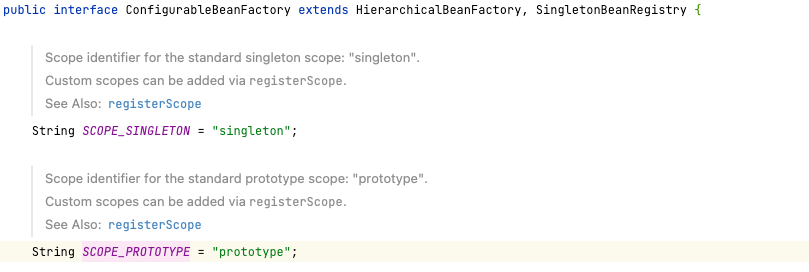
@Scope注解能够设置组件的作用域,我们先来看看@Scope注解类的源码,如下所示。  从@Scope注解类的源码中可以看出,在@Scope注解中可以设置如下值:
- ConfigurableBeanFactory.SCOPE_PROTOTYPE
- ConfigurableBeanFactory.SCOPE_SINGLETON
- org.springframework.web.context.WebApplicationContext.SCOPE_REQUEST
- org.springframework.web.context.WebApplicationContext.SCOPE_SESSION
很明显,在@Scope注解中可以设置的值包括ConfigurableBeanFactory接口中的SCOPE_PROTOTYPE和SCOPE_SINGLETON,以及WebApplicationContext类中的SCOPE_REQUEST和SCOPE_SESSION。
 没错,
没错,SCOPE_SINGLETON就是singleton,而SCOPE_PROTOTYPE就是prototype。
那么,WebApplicationContext类中的SCOPE_REQUEST和SCOPE_SESSION又是什么呢?当我们使用Web容器来运行Spring应用时,在@Scope注解中可以设置WebApplicationContext类中的SCOPE_REQUEST和SCOPE_SESSION这俩的值,而SCOPE_REQUEST的值就是request,SCOPE_SESSION的值就是session。
综上,在@Scope注解中的取值如下所示。  其中,
其中,request和session作用域是需要Web环境来支持的,这两个值基本上使用不到。当我们使用Web容器来运行Spring应用时,如果需要将组件的实例对象的作用域设置为request和session,那么我们通常会使用
request.setAttribute("key", object);和
session.setAttribute("key", object);这两种形式来将对象实例设置到request和session中,而不会使用@Scope注解来进行设置。
2、单实例bean作用域
首先,我们在com.meimeixia.config包下创建一个配置类,例如MainConfig2,然后在该配置类中实例化一个Person对象,并将其放置在Spring容器中,如下所示。
@Bean("person")
public Person person() {
    return new Person("xue", 20);
}@Test
public void test17() {
AnnotationConfigApplicationContext applicationContext = new AnnotationConfigApplicationContext(Config02.class);
// 获取到的这个Person对象默认是单实例的,因为在IOC容器中给我们加的这些组件默认都是单实例的,
// 所以说在这儿我们无论多少次获取,获取到的都是我们之前new的那个实例对象
Person person = applicationContext.getBean(Person.class);
Person person2 = applicationContext.getBean(Person.class);
// true
System.out.println(person == person2);
}由于对象在Spring容器中默认是单实例的,所以,Spring容器在启动时就会将实例对象加载到Spring容器中,之后,每次从Spring容器中获取实例对象,都是直接将对象返回,而不必再创建新的实例对象了。很显然,此时结果会输出true 这也正好验证了我们的结论:对象在Spring容器中默认是单实例的,Spring容器在启动时就会将实例对象加载到Spring容器中,之后,每次从Spring容器中获取实例对象,都是直接将对象返回,而不必再创建新的实例对象了。
3、多实例bean作用域
修改Spring容器中组件的作用域,我们需要借助于@Scope注解。此时,我们将MainConfig2配置类中Person对象的作用域修改成prototype,如下所示。
@Scope(ConfigurableBeanFactory.SCOPE_PROTOTYPE)
@Bean("person")
public Person person() {
    return new Person("xue", 20);
}此时,我们再次运行IOCTest类中的test02()方法,你觉得从Spring容器中获取到的person对象和person2对象还是同一个对象吗?
@Test
public void test18() {
    AnnotationConfigApplicationContext applicationContext = new AnnotationConfigApplicationContext(Config02.class);
    // 获取到的这个Person对象默认是单实例的,因为在IOC容器中给我们加的这些组件默认都是单实例的,
    // 所以说在这儿我们无论多少次获取,获取到的都是我们之前new的那个实例对象
    Person person = applicationContext.getBean(Person.class);
    Person person2 = applicationContext.getBean(Person.class);
    // false
    System.out.println(person == person2);
}很显然不是,从以上输出结果中也可以看出,此时,输出的person对象和person2对象已经不是同一个对象了。
4、单实例bean作用域何时创建对象?
接下来,我们验证下在单实例作用域下,Spring是在什么时候创建对象的?
首先,我们将MainConfig2配置类中的Person对象的作用域修改成单实例,并在返回Person对象之前打印相关的信息,如下所示。
//@Scope(ConfigurableBeanFactory.SCOPE_PROTOTYPE)
@Bean("person")
public Person person() {
    System.out.println("person对象创建");
    return new Person("xue", 20);
}@Test
public void test17() {
AnnotationConfigApplicationContext applicationContext = new AnnotationConfigApplicationContext(Config02.class);
// 获取到的这个Person对象默认是单实例的,因为在IOC容器中给我们加的这些组件默认都是单实例的,
// 所以说在这儿我们无论多少次获取,获取到的都是我们之前new的那个实例对象
Person person = applicationContext.getBean(Person.class);
Person person2 = applicationContext.getBean(Person.class);
// true
System.out.println(person == person2);
}person对象创建 true
从以上输出的结果信息中可以看出,Spring容器在创建的时候,就将@Scope注解标注为singleton的组件进行了实例化,并加载到了Spring容器中。 这说明,Spring容器在启动时,将单实例组件实例化之后,会即刻加载到Spring容器中,以后每次从容器中获取组件实例对象时,都是直接返回相应的对象,而不必再创建新的对象了。
5、多实例bean作用域何时创建对象?
如果我们将对象的作用域修改成多实例,那么会什么时候创建对象呢?
此时,我们将MainConfig2配置类中的Person对象的作用域修改成多实例,如下所示。
@Scope(ConfigurableBeanFactory.SCOPE_PROTOTYPE)
@Bean("person")
public Person person() {
    System.out.println("person对象创建");
    return new Person("xue", 20);
}@Test
public void test18() {
AnnotationConfigApplicationContext applicationContext = new AnnotationConfigApplicationContext(Config02.class);
}没有任何输出
这说明在创建Spring容器时,并不会去实例化和加载多实例对象,那多实例对象到底是什么时候实例化的呢?此时,我们可以在IOCTest类中的test03()方法中添加一行获取Person对象的代码,如下所示。
@Test
public void test18() {
    AnnotationConfigApplicationContext applicationContext = new AnnotationConfigApplicationContext(Config02.class);
    // 获取到的这个Person对象默认是单实例的,因为在IOC容器中给我们加的这些组件默认都是单实例的,
    // 所以说在这儿我们无论多少次获取,获取到的都是我们之前new的那个实例对象
    Person person = applicationContext.getBean(Person.class);
    Person person2 = applicationContext.getBean(Person.class);
    // false
    System.out.println(person == person2);
}然后,我们再次运行以上方法,输出的结果信息如下所示。
person对象创建 person对象创建 false
从以上输出的结果信息中可以看出,当向Spring容器中获取Person实例对象时,Spring容器才会实例化Person对象,再将其加载到Spring容器中去。 从以上输出的结果信息中可以看出,当对象的Scope作用域为多实例时,每次向Spring容器获取对象时,它都会创建一个新的对象并返回。很显然,以上获取到的person和person2就不是同一个对象了,这我们也可以打印结果信息来进行验证,即在IOCTest类中的test03()方法中判断两个对象是否相等,如下所示。
可以看到,当对象是多实例时,每次从Spring容器中获取对象时,都会创建新的实例对象,并且每个实例对象都不相等。
6、单实例bean注意的事项
单实例bean是整个应用所共享的,所以需要考虑到线程安全问题,之前在玩SpringMVC的时候,SpringMVC中的Controller默认是单例的,有些开发者在Controller中创建了一些变量,那么这些变量实际上就变成共享的了,Controller又可能会被很多线程同时访问,这些线程并发去修改Controller中的共享变量,此时很有可能会出现数据错乱的问题,所以使用的时候需要特别注意。
7、多实例bean注意的事项
多实例bean每次获取的时候都会重新创建,如果这个bean比较复杂,创建时间比较长,那么就会影响系统的性能.
8、自定义Scope
如果Spring内置的几种scope都无法满足我们的需求时,我们可以自定义bean的作用域。
如何实现自定义Scope呢?
自定义Scope主要分为三个步骤,如下所示。
第一步,实现Scope接口。我们先来看下Scope接口的源码,如下所示。
package org.springframework.beans.factory.config;

import org.springframework.beans.factory.ObjectFactory;

public interface Scope {

	/**
	 * 返回当前作用域中name对应的bean对象
	 * @param name 需要检索的bean对象的名称
	 * @param objectFactory 如果name对应的bean对象在当前作用域中没有找到,那么可以调用这个objectFactory来创建这个对象
	 */
	Object get(String name, ObjectFactory<?> objectFactory);

	/**
	 * 将name对应的bean对象从当前作用域中移除
	 */
	Object remove(String name);

	/**
	 * 用于注册销毁回调,若想要销毁相应的对象,则由Spring容器注册相应的销毁回调,而由自定义作用域选择是不是要销毁相应的对象
	 */
	void registerDestructionCallback(String name, Runnable callback);

	/**
	 * 用于解析相应的上下文数据,比如request作用域将返回request中的属性
	 */
	Object resolveContextualObject(String key);

	/**
	 * 作用域的会话标识,比如session作用域的会话标识是sessionId
	 */
	String getConversationId();

}第二步,将自定义Scope注册到容器中。此时,需要调用org.springframeworkbeans.factory.config.ConfigurableBeanFactory#registerScope这个方法,咱们看一下这个方法的声明。
/**
	 * Register the given scope, backed by the given Scope implementation. 向容器中注册自定义的Scope
	 * @param scopeName the scope identifier 作用域名称
	 * @param scope the backing Scope implementation 作用域对象
	 */
void registerScope(String scopeName, Scope scope);第三步,使用自定义的作用域。也就是在定义bean的时候,指定bean的scope属性为自定义的作用域名称。
1、一个自定义Scope实现案例
例如,我们来实现一个线程级别的bean作用域,同一个线程中同名的bean是同一个实例,不同的线程中的bean是不同的实例。
这里,要求bean在线程中是共享的,所以我们可以通过ThreadLocal来实现,ThreadLocal可以实现线程中数据的共享。
首先,我们在com.xue.scope包下新建一个ThreadScope类,如下所示。
package com.xue.scope;

import org.springframework.beans.factory.ObjectFactory;
import org.springframework.beans.factory.config.Scope;

import java.util.HashMap;
import java.util.Map;
import java.util.Objects;

/**
 * @Author: xueqimiao
 * @Date: 2022/7/2 21:37
 * 自定义本地线程级别的bean作用域,不同的线程中的bean是不同的实例,同一个线程中同名的bean是同一个实例
 */
public class ThreadScope implements Scope {

    public static final String THREAD_SCOPE = "thread";

    private ThreadLocal<Map<String, Object>> beanMap = new ThreadLocal() {

        @Override
        protected Object initialValue() {
            return new HashMap<>();
        }

    };

    /**
     * 返回当前作用域中name对应的bean对象
     *
     * @param name:需要检索的bean对象的名称
     * @param objectFactory:如果name对应的bean对象在当前作用域中没有找到,那么可以调用这个objectFactory来创建这个bean对象
     */
    @Override
    public Object get(String name, ObjectFactory<?> objectFactory) {
        Object bean = beanMap.get().get(name);
        if (Objects.isNull(bean)) {
            bean = objectFactory.getObject();
            beanMap.get().put(name, bean);
        }
        return bean;
    }

    /**
     * 将name对应的bean对象从当前作用域中移除
     */
    @Override
    public Object remove(String name) {
        return this.beanMap.get().remove(name);
    }

    /**
     * 用于注册销毁回调,若想要销毁相应的对象,则由Spring容器注册相应的销毁回调,而由自定义作用域选择是不是要销毁相应的对象 bean作用域范围结束的时候调用的方法,用于bean的清理
     */
    @Override
    public void registerDestructionCallback(String name, Runnable callback) {
        System.out.println(name);
    }

    /**
     * 用于解析相应的上下文数据,比如request作用域将返回request中的属性
     */
    @Override
    public Object resolveContextualObject(String key) {
        return null;
    }

    /**
     * 作用域的会话标识,比如session作用域的会话标识是sessionId
     */
    @Override
    public String getConversationId() {
        return Thread.currentThread().getName();
    }

}在ThreadScope类中,我们定义了一个THREAD_SCOPE常量,该常量是在定义bean的时候给scope使用的。
然后,我们在com.xue.config包下创建一个配置类,例如Config03,并使用@Scope("thread")注解标注Person对象的作用域为Thread范围,如下所示。
package com.xue.config;

import com.xue.bean.Person;
import org.springframework.context.annotation.Bean;
import org.springframework.context.annotation.Scope;

/**
 * @Author: xueqimiao
 * @Date: 2022/7/2 21:38
 * 测试@Scope注解设置的作用域
 */
public class Config03 {

    @Scope("thread")
    @Bean("person")
    public Person person() {
        System.out.println("给容器中添加Person对象...");
        return new Person("zhangsan", 25);
    }
}@Test
public void test19() {
AnnotationConfigApplicationContext applicationContext = new AnnotationConfigApplicationContext(Config03.class);
// 向容器中注册自定义的Scope
applicationContext.getBeanFactory().registerScope(ThreadScope.THREAD_SCOPE, new ThreadScope());
// 使用容器获取bean
for (int i = 0; i < 2; i++) {
new Thread(() -> {
System.out.println(Thread.currentThread() + "," + applicationContext.getBean("person"));
System.out.println(Thread.currentThread() + "," + applicationContext.getBean("person"));
}).start();
}
try {
TimeUnit.SECONDS.sleep(1);
} catch (Exception e) {
e.printStackTrace();
}
}此时,我们运行以上方法,会看到输出的结果信息如下所示。
会得到同一线程会拿到同一对象
从以上输出的结果信息中可以看到,bean在同样的线程中获取到的是同一个bean的实例,不同的线程中bean的实例是不同的。
4、@Lazy-如何实现懒加载
Spring在启动时,默认会将单实例bean进行实例化,并加载到Spring容器中去。也就是说,单实例bean默认是在Spring容器启动的时候创建对象,并且还会将对象加载到Spring容器中。如果我们需要对某个bean进行延迟加载,那么该如何处理呢?此时,就需要使用到@Lazy注解了。
1、什么是懒加载呢?
何为懒加载呢?懒加载就是Spring容器启动的时候,先不创建对象,在第一次使用(获取)bean的时候再来创建对象,并进行一些初始化。
2、非懒加载模式
这里我们先来看看非懒加载这种模式。首先,我们将MainConfig2配置类中Person对象的作用域修改成单实例,如下所示。
@Bean("person")
public Person person() {
    System.out.println("给容器中添加Person对象...");
    return new Person("zhangsan", 25);
}然后,在IOCTest类中创建一个test05()方法,如下所示。
@Test
public void test20() {
    AnnotationConfigApplicationContext applicationContext = new AnnotationConfigApplicationContext(Config03.class);
    System.out.println("IOC容器创建完成");
}给容器中添加Person对象... IOC容器创建完成
可以看到,单实例bean在Spring容器启动的时候就会被创建,并且还加载到Spring容器中去了。
3、懒加载模式
我们再来看看懒加载这种模式。首先,我们在MainConfig2配置类中的person()方法上加上一个@Lazy注解,以此将Person对象设置为懒加载,如下所示。
package com.xue.config;

import com.xue.bean.Person;
import org.springframework.context.annotation.Bean;
import org.springframework.context.annotation.Lazy;
import org.springframework.context.annotation.Scope;

/**
 * @Author: xueqimiao
 * @Date: 2022/7/2 21:38
 * 测试@Scope注解设置的作用域
 */
public class Config03 {

    @Lazy
    @Bean("person")
    public Person person() {
        System.out.println("给容器中添加Person对象...");
        return new Person("zhangsan", 25);
    }
}IOC容器创建完成
可以看到,此时只是打印出了IOC容器创建完成这样一条信息,说明此时只创建了IOC容器,而并没有创建bean对象。
那么,加上@Lazy注解后,bean对象是何时被创建的呢?我们可以试着在IOCTest类中的test05()方法中获取一下Person对象,如下所示。
@Test
public void test20() {
    AnnotationConfigApplicationContext applicationContext = new AnnotationConfigApplicationContext(Config03.class);
    System.out.println("IOC容器创建完成");
    Person person = applicationContext.getBean(Person.class);
}此时,我们再次运行以上方法,发现输出的结果信息如下所示。
IOC容器创建完成 给容器中添加Person对象...
这说明,我们在获取bean对象的时候,创建出了bean对象并加载到Spring容器中去了。
那么,问题又来了,只是第一次获取bean对象的时候创建出了它吗?多次获取会不会创建多个bean对象呢?
@Test
public void test20() {
    AnnotationConfigApplicationContext applicationContext = new AnnotationConfigApplicationContext(Config03.class);
    System.out.println("IOC容器创建完成");
    Person person1 = applicationContext.getBean(Person.class);
    Person person2 = applicationContext.getBean(Person.class);
    System.out.println(person1 == person2);
}接着,我们再次运行以上方法,发现输出的结果信息如下所示。
IOC容器创建完成 给容器中添加Person对象... true
从以上输出结果中可以看出,使用@Lazy注解标注后,单实例bean对象只是在第一次从Spring容器中获取时被创建,以后每次获取bean对象时,直接返回创建好的对象。
懒加载,也称延时加载,仅针对单实例bean生效。 单实例bean是在Spring容器启动的时候加载的,添加@Lazy注解后就会延迟加载,在Spring容器启动的时候并不会加载,而是在第一次使用此bean的时候才会加载,但当你多次获取bean的时候并不会重复加载,只是在第一次获取的时候才会加载,这不是延迟加载的特性,而是单实例bean的特性。
5、@Conditional-条件装配
1、@Conditional注解概述
@Conditional注解可以按照一定的条件进行判断,满足条件向容器中注册bean,不满足条件就不向容器中注册bean。
@Conditional注解是由Spring Framework提供的一个注解,它位于 org.springframework.context.annotation包内,定义如下。
@Target({ElementType.TYPE, ElementType.METHOD})
@Retention(RetentionPolicy.RUNTIME)
@Documented
public @interface Conditional {

	/**
	 * All {@link Condition} classes that must {@linkplain Condition#matches match}
	 * in order for the component to be registered.
	 */
	Class<? extends Condition>[] value();

}从@Conditional注解的源码来看,@Conditional注解不仅可以添加到类上,也可以添加到方法上。在@Conditional注解中,还存在着一个Condition类型或者其子类型的Class对象数组。
@FunctionalInterface
public interface Condition {

	/**
	 * Determine if the condition matches.
	 * @param context the condition context
	 * @param metadata the metadata of the {@link org.springframework.core.type.AnnotationMetadata class}
	 * or {@link org.springframework.core.type.MethodMetadata method} being checked
	 * @return {@code true} if the condition matches and the component can be registered,
	 * or {@code false} to veto the annotated component's registration
	 */
	boolean matches(ConditionContext context, AnnotatedTypeMetadata metadata);

}可以看到,它是一个接口。所以,我们使用@Conditional注解时,需要写一个类来实现Spring提供的Condition接口,它会匹配@Conditional所符合的方法,然后我们就可以使用我们在@Conditional注解中定义的类来检查了。
我们可以在哪些场合使用@Conditional注解呢?@Conditional注解的使用场景如下图所示。 
2、向Spring容器注册bean
1、不带条件注册bean
我们在Config03配置类中新增person01()方法和person02()方法,并为这两个方法添加@Bean注解,如下所示。
package com.xue.config;

import com.xue.bean.Person;
import org.springframework.context.annotation.Bean;
import org.springframework.context.annotation.Lazy;
import org.springframework.context.annotation.Scope;

/**
 * @Author: xueqimiao
 * @Date: 2022/7/2 21:38
 * 测试@Scope注解设置的作用域
 */
public class Config03 {

    @Lazy
    @Bean("person")
    public Person person() {
        System.out.println("给容器中添加Person对象...");
        return new Person("zhangsan", 25);
    }

    @Bean("bill")
    public Person person01() {
        return new Person("Bill Gates", 62);
    }

    @Bean("linus")
    public Person person02() {
        return new Person("linus", 48);
    }
}那么,这两个bean默认是否会被注册到Spring容器中去呢?
@Test
public void test21() {
    AnnotationConfigApplicationContext applicationContext = new AnnotationConfigApplicationContext(Config03.class);
    // 我们现在就来看一下IOC容器中Person这种类型的bean都有哪些
    String[] namesForType = applicationContext.getBeanNamesForType(Person.class);

    for (String name : namesForType) {
        System.out.println(name);
    }
}我们运行以上test06()方法,发现输出的结果信息如下所示。
person bill linus
从输出结果中可以看出,同时输出了bill和linus。说明默认情况下,Spring容器会将单实例并且非懒加载的bean注册到IOC容器中。
接下来,我们再输出bean的名称和bean实例对象信息,此时我们只须在test06()方法中添加如下的代码片段即可。
@Test
public void test21() {
    AnnotationConfigApplicationContext applicationContext = new AnnotationConfigApplicationContext(Config03.class);
    // 我们现在就来看一下IOC容器中Person这种类型的bean都有哪些
    String[] namesForType = applicationContext.getBeanNamesForType(Person.class);

    for (String name : namesForType) {
        System.out.println(name);
    }
    Map<String, Person> persons = applicationContext.getBeansOfType(Person.class); // 找到这个Person类型的所有bean
    System.out.println(persons);
}再次运行以上test06()方法,输出的结果如下所示。
可以看到,输出了注册到容器中的bean实例对象的详细信息。
2、带条件注册bean
现在,我们就要提出一个新的需求了,比如,如果当前操作系统是Windows操作系统,那么就向Spring容器中注册名称为bill的Person对象;如果当前操作系统是Linux操作系统,那么就向Spring容器中注册名称为linus的Person对象。要想实现这个需求,我们就得要使用@Conditional注解了。
如何获取操作系统的类型呢
使用Spring中的AnnotationConfigApplicationContext类就能够获取到当前操作系统的类型,如下所示。
@Test
public void test22() {
    AnnotationConfigApplicationContext applicationContext = new AnnotationConfigApplicationContext(Config03.class);
    ConfigurableEnvironment environment = applicationContext.getEnvironment(); // 拿到IOC运行环境
    // 动态获取坏境变量的值,例如操作系统的名字
    String property = environment.getProperty("os.name"); // 获取操作系统的名字,例如Windows 10
    System.out.println(property);
}我这里使用的mac 所以输出为
Mac OS X
所以我下面把Mac OS当成Windows使用
到这里,我们成功获取到了操作系统的类型,接下来就要来实现上面那个需求了。此时,我们可以借助Spring中的@Conditional注解来实现。
要想使用@Conditional注解,我们需要实现Condition接口来为@Conditional注解设置条件,所以,这里我们创建了两个实现Condition接口的类,它们分别是LinuxCondition和WindowsCondition,如下所示。
LinuxCondition
javapackage com.xue.condition; import org.springframework.beans.factory.config.ConfigurableListableBeanFactory; import org.springframework.beans.factory.support.BeanDefinitionRegistry; import org.springframework.context.annotation.Condition; import org.springframework.context.annotation.ConditionContext; import org.springframework.core.env.Environment; import org.springframework.core.type.AnnotatedTypeMetadata; /** * @Author: xueqimiao * @Date: 2022/7/2 21:57 */ public class LinuxCondition implements Condition { /** * ConditionContext:判断条件能使用的上下文(环境) * AnnotatedTypeMetadata:当前标注了@Conditional注解的注释信息 */ @Override public boolean matches(ConditionContext context, AnnotatedTypeMetadata metadata) { // 判断操作系统是否是Linux系统 // 1. 获取到bean的创建工厂(能获取到IOC容器使用到的BeanFactory,它就是创建对象以及进行装配的工厂) ConfigurableListableBeanFactory beanFactory = context.getBeanFactory(); // 2. 获取到类加载器 ClassLoader classLoader = context.getClassLoader(); // 3. 获取当前环境信息,它里面就封装了我们这个当前运行时的一些信息,包括环境变量,以及包括虚拟机的一些变量 Environment environment = context.getEnvironment(); // 4. 获取到bean定义的注册类 BeanDefinitionRegistry registry = context.getRegistry(); String property = environment.getProperty("os.name"); if (property.contains("linux")) { return true; } return false; } }通过context的getRegistry()方法获取到的bean定义的注册对象,即
BeanDefinitionRegistry对象了。它到底是个啥呢?我们可以点进去看一下它的源码,如下所示,可以看到它是一个接口。javapackage org.springframework.beans.factory.support; import org.springframework.beans.factory.BeanDefinitionStoreException; import org.springframework.beans.factory.NoSuchBeanDefinitionException; import org.springframework.beans.factory.config.BeanDefinition; import org.springframework.core.AliasRegistry; // Spring容器中所有的bean都是通过BeanDefinitionRegistry对象来进行注册的,因此我们可以通过它来查看Spring容器中注册了哪些bean public interface BeanDefinitionRegistry extends AliasRegistry { // 可以通过这个方法向Spring容器中注册一个bean void registerBeanDefinition(String beanName, BeanDefinition beanDefinition) throws BeanDefinitionStoreException; // 可以通过这个方法在Spring容器中移除一个bean void removeBeanDefinition(String beanName) throws NoSuchBeanDefinitionException; // 获取bean的定义信息 BeanDefinition getBeanDefinition(String beanName) throws NoSuchBeanDefinitionException; // 判断容器中是否包含某个bean的定义信息 boolean containsBeanDefinition(String beanName); String[] getBeanDefinitionNames(); int getBeanDefinitionCount(); boolean isBeanNameInUse(String beanName); }在上面我对BeanDefinitionRegistry接口的源码作了一点简要的说明。知道了,Spring容器中所有的bean都可以通过BeanDefinitionRegistry对象来进行注册,因此我们可以通过它来查看Spring容器中到底注册了哪些bean。而且仔细查看一下BeanDefinitionRegistry接口中声明的各个方法,你就知道我们还可以通过BeanDefinitionRegistry对象向Spring容器中注册一个bean、移除一个bean、查询某一个bean的定义信息或者判断Spring容器中是否包含有某一个bean的定义。
因此,我们可以在这儿做更多的判断,比如说我可以判断一下Spring容器中是不是包含有某一个bean,就像下面这样,如果Spring容器中果真包含有名称为person的bean,那么就做些什么事情,如果没包含,那么我们还可以利用BeanDefinitionRegistry对象向Spring容器中注册一个bean。
WindowsCondition
javapackage com.xue.condition; import org.springframework.context.annotation.Condition; import org.springframework.context.annotation.ConditionContext; import org.springframework.core.env.Environment; import org.springframework.core.type.AnnotatedTypeMetadata; /** * @Author: xueqimiao * @Date: 2022/7/2 22:03 */ public class WindowsCondition implements Condition { @Override public boolean matches(ConditionContext context, AnnotatedTypeMetadata metadata) { Environment environment = context.getEnvironment(); String property = environment.getProperty("os.name"); /*if (property.contains("Windows")) { return true; }*/ if (property.contains("Mac")) { return true; } return false; } }
然后,我们就需要在MainConfig2配置类中使用@Conditional注解添加条件了。添加该注解后的方法如下所示。
@Conditional({WindowsCondition.class})
@Bean("bill")
public Person person01() {
    return new Person("Bill Gates", 62);
}

@Conditional({LinuxCondition.class})
@Bean("linus")
public Person person02() {
    return new Person("linus", 48);
}@Test
public void test21() {
AnnotationConfigApplicationContext applicationContext = new AnnotationConfigApplicationContext(Config03.class);
// 我们现在就来看一下IOC容器中Person这种类型的bean都有哪些
String[] namesForType = applicationContext.getBeanNamesForType(Person.class);
for (String name : namesForType) {
System.out.println(name);
}
Map<String, Person> persons = applicationContext.getBeansOfType(Person.class); // 找到这个Person类型的所有bean
System.out.println(persons);
}person bill 给容器中添加Person对象...
json{person=Person(name=zhangsan, age=25), bill=Person(name=Bill Gates, age=62)}
可以看到,输出结果中不再含有名称为linus的bean了,这说明程序中检测到当前操作系统为Mac之后,没有向Spring容器中注册名称为linus的bean。
此外,@Conditional注解也可以标注在类上,标注在类上的含义是:只有满足了当前条件,这个配置类中配置的所有bean注册才能生效,也就是对配置类中的组件进行统一设置。
package com.xue.config;

import com.xue.bean.Person;
import com.xue.condition.LinuxCondition;
import com.xue.condition.WindowsCondition;
import org.springframework.context.annotation.Bean;
import org.springframework.context.annotation.Conditional;
import org.springframework.context.annotation.Lazy;
import org.springframework.context.annotation.Scope;

/**
 * @Author: xueqimiao
 * @Date: 2022/7/2 21:38
 * 测试@Scope注解设置的作用域
 */
@Conditional({WindowsCondition.class})
public class Config03 {

    @Lazy
    @Bean("person")
    public Person person() {
        System.out.println("给容器中添加Person对象...");
        return new Person("zhangsan", 25);
    }

    @Conditional({WindowsCondition.class})
    @Bean("bill")
    public Person person01() {
        return new Person("Bill Gates", 62);
    }

    @Conditional({LinuxCondition.class})
    @Bean("linus")
    public Person person02() {
        return new Person("linus", 48);
    }
}设置一个-Dos.name=linux参数,就像下图所示的那样,这是我们将操作系统模拟为了linux系统。 
可以看到,没有任何bean的定义信息输出,这是因为程序检测到了当前操作系统为linux,没有向Spring容器中注册任何bean的缘故导致的。
4、@Conditional的扩展注解

6、@Import
那么如果不是我们自己写的类,比如说我们在项目中会经常引入一些第三方的类库,我们需要将这些第三方类库中的类注册到Spring容器中,该怎么办呢?此时,我们就可以使用@Bean和@Import注解将这些类快速的导入Spring容器中。
1、注册bean的方式
向Spring容器中注册bean通常有以下几种方式:
- 包扫描+给组件标注注解(
@Controller、@Servcie、@Repository、@Component),但这种方式比较有局限性,局限于我们自己写的类 @Bean注解,通常用于导入第三方包中的组件@Import注解,快速向Spring容器中导入一个组件
2、@Import注解概述
@Import注解提供了@Bean注解的功能,同时还有XML配置文件里面标签组织多个分散的XML文件的功能,当然在这里是组织多个分散的@Configuration,因为一个配置类就约等于一个XML配置文件。
我们先看一下@Import注解的源码
/*
* Copyright 2002-2019 the original author or authors.
*
* Licensed under the Apache License, Version 2.0 (the "License");
* you may not use this file except in compliance with the License.
* You may obtain a copy of the License at
*
* https://www.apache.org/licenses/LICENSE-2.0
*
* Unless required by applicable law or agreed to in writing, software
* distributed under the License is distributed on an "AS IS" BASIS,
* WITHOUT WARRANTIES OR CONDITIONS OF ANY KIND, either express or implied.
* See the License for the specific language governing permissions and
* limitations under the License.
*/
package org.springframework.context.annotation;
import java.lang.annotation.Documented;
import java.lang.annotation.ElementType;
import java.lang.annotation.Retention;
import java.lang.annotation.RetentionPolicy;
import java.lang.annotation.Target;
/**
* Indicates one or more <em>component classes</em> to import — typically
* {@link Configuration @Configuration} classes.
*
* <p>Provides functionality equivalent to the {@code <import/>} element in Spring XML.
* Allows for importing {@code @Configuration} classes, {@link ImportSelector} and
* {@link ImportBeanDefinitionRegistrar} implementations, as well as regular component
* classes (as of 4.2; analogous to {@link AnnotationConfigApplicationContext#register}).
*
* <p>{@code @Bean} definitions declared in imported {@code @Configuration} classes should be
* accessed by using {@link org.springframework.beans.factory.annotation.Autowired @Autowired}
* injection. Either the bean itself can be autowired, or the configuration class instance
* declaring the bean can be autowired. The latter approach allows for explicit, IDE-friendly
* navigation between {@code @Configuration} class methods.
*
* <p>May be declared at the class level or as a meta-annotation.
*
* <p>If XML or other non-{@code @Configuration} bean definition resources need to be
* imported, use the {@link ImportResource @ImportResource} annotation instead.
*
* @author Chris Beams
* @author Juergen Hoeller
* @since 3.0
* @see Configuration
* @see ImportSelector
* @see ImportBeanDefinitionRegistrar
* @see ImportResource
*/
@Target(ElementType.TYPE)
@Retention(RetentionPolicy.RUNTIME)
@Documented
public @interface Import {
/**
* {@link Configuration @Configuration}, {@link ImportSelector},
* {@link ImportBeanDefinitionRegistrar}, or regular component classes to import.
*/
Class<?>[] value();
}从源码里面可以看出@Import可以配合Configuration、ImportSelector以及ImportBeanDefinitionRegistrar来使用,下面的or表示也可以把Import当成普通的bean来使用。
注意:@Import注解只允许放到类上面,不允许放到方法上。
3、@Import注解的使用方式
@Import注解的三种用法主要包括:
- 直接填写class数组的方式
- ImportSelector接口的方式,即批量导入,这是重点
- ImportBeanDefinitionRegistrar接口方式,即手工注册bean到容器中
4、@Import导入组件的简单示例
1、没有使用@Import注解时的效果
首先,我们创建一个Color类,这个类是一个空类,没有成员变量和方法,如下所示。
package com.xue.bean;

/**
 * @Author: xueqimiao
 * @Date: 2022/7/2 22:12
 */
public class Color {
}输出Spring容器中所有bean定义的名字,来查看是否存在Color类对应的bean实例,以此来判断Spring容器中是否注册有Color类对应的bean实例。
@Test
public void test23() {
    AnnotationConfigApplicationContext applicationContext = new AnnotationConfigApplicationContext(Config03.class);
    String[] definitionNames = applicationContext.getBeanDefinitionNames();
    for (String name : definitionNames) {
        System.out.println(name);
    }
}org.springframework.context.annotation.internalConfigurationAnnotationProcessor org.springframework.context.annotation.internalAutowiredAnnotationProcessor org.springframework.context.annotation.internalCommonAnnotationProcessor org.springframework.context.event.internalEventListenerProcessor org.springframework.context.event.internalEventListenerFactory config03 person bill
可以看到Spring容器中并没有Color类对应的bean实例。
2、使用@Import注解时的效果
首先,我们在MainConfig2配置类上添加一个@Import注解,并将Color类填写到该注解中,如下所示。
@Conditional({WindowsCondition.class})
@Import(Color.class) // @Import快速地导入组件,id默认是组件的全类名
public class Config03 {org.springframework.context.annotation.internalConfigurationAnnotationProcessor org.springframework.context.annotation.internalAutowiredAnnotationProcessor org.springframework.context.annotation.internalCommonAnnotationProcessor org.springframework.context.event.internalEventListenerProcessor org.springframework.context.event.internalEventListenerFactory config03 com.xue.bean.Color person bill
说明使用@Import注解快速地导入组件时,容器中就会自动注册这个组件,并且id默认是组件的全类名。
@Import注解还支持同时导入多个类,例如,我们再次创建一个Red类,如下所示。
package com.xue.bean;

/**
 * @Author: xueqimiao
 * @Date: 2022/7/2 22:14
 */
public class Red {
}然后,我们也将以上Red类添加到@Import注解中,如下所示。
@Conditional({WindowsCondition.class})
@Import({Color.class, Red.class}) // @Import快速地导入组件,id默认是组件的全类名
public class Config03 {org.springframework.context.annotation.internalConfigurationAnnotationProcessor org.springframework.context.annotation.internalAutowiredAnnotationProcessor org.springframework.context.annotation.internalCommonAnnotationProcessor org.springframework.context.event.internalEventListenerProcessor org.springframework.context.event.internalEventListenerFactory config03 com.xue.bean.Colorcom.xue.bean.Red person bill
说明Color类对应的bean实例和Red类对应的bean实例都导入到Spring容器中去了。
7、在@Import注解中使用ImportSelector接口导入bean
上面我们简单介绍了如何使用@Import注解给容器中快速导入一个组件,接下来学习关于@Import注解非常重要的第二种方式,即ImportSelector接口的方式。
2、ImportSelector接口概述
ImportSelector接口是Spring中导入外部配置的核心接口,在Spring Boot的自动化配置和@EnableXXX(功能性注解)都有它的存在。我们先来看一下ImportSelector接口的源码,
/*
 * Copyright 2002-2020 the original author or authors.
 *
 * Licensed under the Apache License, Version 2.0 (the "License");
 * you may not use this file except in compliance with the License.
 * You may obtain a copy of the License at
 *
 *      https://www.apache.org/licenses/LICENSE-2.0
 *
 * Unless required by applicable law or agreed to in writing, software
 * distributed under the License is distributed on an "AS IS" BASIS,
 * WITHOUT WARRANTIES OR CONDITIONS OF ANY KIND, either express or implied.
 * See the License for the specific language governing permissions and
 * limitations under the License.
 */

package org.springframework.context.annotation;

import java.util.function.Predicate;

import org.springframework.core.type.AnnotationMetadata;
import org.springframework.lang.Nullable;

/**
 * Interface to be implemented by types that determine which @{@link Configuration}
 * class(es) should be imported based on a given selection criteria, usually one or
 * more annotation attributes.
 *
 * <p>An {@link ImportSelector} may implement any of the following
 * {@link org.springframework.beans.factory.Aware Aware} interfaces,
 * and their respective methods will be called prior to {@link #selectImports}:
 * <ul>
 * <li>{@link org.springframework.context.EnvironmentAware EnvironmentAware}</li>
 * <li>{@link org.springframework.beans.factory.BeanFactoryAware BeanFactoryAware}</li>
 * <li>{@link org.springframework.beans.factory.BeanClassLoaderAware BeanClassLoaderAware}</li>
 * <li>{@link org.springframework.context.ResourceLoaderAware ResourceLoaderAware}</li>
 * </ul>
 *
 * <p>Alternatively, the class may provide a single constructor with one or more of
 * the following supported parameter types:
 * <ul>
 * <li>{@link org.springframework.core.env.Environment Environment}</li>
 * <li>{@link org.springframework.beans.factory.BeanFactory BeanFactory}</li>
 * <li>{@link java.lang.ClassLoader ClassLoader}</li>
 * <li>{@link org.springframework.core.io.ResourceLoader ResourceLoader}</li>
 * </ul>
 *
 * <p>{@code ImportSelector} implementations are usually processed in the same way
 * as regular {@code @Import} annotations, however, it is also possible to defer
 * selection of imports until all {@code @Configuration} classes have been processed
 * (see {@link DeferredImportSelector} for details).
 *
 * @author Chris Beams
 * @author Juergen Hoeller
 * @since 3.1
 * @see DeferredImportSelector
 * @see Import
 * @see ImportBeanDefinitionRegistrar
 * @see Configuration
 */
public interface ImportSelector {

	/**
	 * Select and return the names of which class(es) should be imported based on
	 * the {@link AnnotationMetadata} of the importing @{@link Configuration} class.
	 * @return the class names, or an empty array if none
	 */
	String[] selectImports(AnnotationMetadata importingClassMetadata);

	/**
	 * Return a predicate for excluding classes from the import candidates, to be
	 * transitively applied to all classes found through this selector's imports.
	 * <p>If this predicate returns {@code true} for a given fully-qualified
	 * class name, said class will not be considered as an imported configuration
	 * class, bypassing class file loading as well as metadata introspection.
	 * @return the filter predicate for fully-qualified candidate class names
	 * of transitively imported configuration classes, or {@code null} if none
	 * @since 5.2.4
	 */
	@Nullable
	default Predicate<String> getExclusionFilter() {
		return null;
	}
}其主要作用是收集需要导入的配置类,selectImports()方法的返回值就是我们向Spring容器中导入的类的全类名。如果该接口的实现类同时实现EnvironmentAware,BeanFactoryAware,BeanClassLoaderAware或者ResourceLoaderAware,那么在调用其selectImports()方法之前先调用上述接口中对应的方法,如果需要在所有的@Configuration处理完再导入时,那么可以实现DeferredImportSelector接口。
在ImportSelector接口的selectImports()方法中,存在一个AnnotationMetadata类型的参数,这个参数能够获取到当前标注@Import注解的类的所有注解信息,也就是说不仅能获取到@Import注解里面的信息,还能获取到其他注解的信息。
3、ImportSelector接口实例
首先,我们创建一个MyImportSelector类实现ImportSelector接口,如下所示,先在selectImports()方法中返回null,后面我们再来改。
package com.xue.condition;

import org.springframework.context.annotation.ImportSelector;
import org.springframework.core.type.AnnotationMetadata;

/**
 * @Author: xueqimiao
 * @Date: 2022/7/2 22:20
 * 自定义逻辑,返回需要导入的组件
 */
public class MyImportSelector implements ImportSelector {

    // 返回值:就是要导入到容器中的组件的全类名
    // AnnotationMetadata:当前标注@Import注解的类的所有注解信息,也就是说不仅能获取到@Import注解里面的信息,还能获取到其他注解的信息
    @Override
    public String[] selectImports(AnnotationMetadata importingClassMetadata) { // 在这一行打个断点,debug调试一下
        return null;
    }
}然后,在Config03配置类的@Import注解中,导入MyImportSelector类,如下所示。
@Conditional({WindowsCondition.class})
@Import({Color.class, Red.class, MyImportSelector.class}) // @Import快速地导入组件,id默认是组件的全类名
public class Config03 {}至于使用MyImportSelector类要导入哪些bean,就需要你在MyImportSelector类的selectImports()方法中进行设置了,只须在MyImportSelector类的selectImports()方法中返回要导入的类的全类名(包名+类名)即可。
运行该测试方法后,报了一个空指针异常,打断点调试一下


因此要想不报这样一个空指针异常,咱们MyImportSelector类的selectImports()方法里面就不能返回一个null值了,先返回一个空数组试试。
package com.xue.condition;

import org.springframework.context.annotation.ImportSelector;
import org.springframework.core.type.AnnotationMetadata;

/**
 * @Author: xueqimiao
 * @Date: 2022/7/2 22:20
 * 自定义逻辑,返回需要导入的组件
 */
public class MyImportSelector implements ImportSelector {

    // 返回值:就是要导入到容器中的组件的全类名
    // AnnotationMetadata:当前标注@Import注解的类的所有注解信息,也就是说不仅能获取到@Import注解里面的信息,还能获取到其他注解的信息
    @Override
    public String[] selectImports(AnnotationMetadata importingClassMetadata) {
        // 方法不要返回null值,否则会报空指针异常
        return new String[]{};
    }
}@Test
public void test23() {
AnnotationConfigApplicationContext applicationContext = new AnnotationConfigApplicationContext(Config03.class);
String[] definitionNames = applicationContext.getBeanDefinitionNames();
for (String name : definitionNames) {
System.out.println(name);
}
}org.springframework.context.annotation.internalConfigurationAnnotationProcessor org.springframework.context.annotation.internalAutowiredAnnotationProcessor org.springframework.context.annotation.internalCommonAnnotationProcessor org.springframework.context.event.internalEventListenerProcessor org.springframework.context.event.internalEventListenerFactory config03 com.xue.bean.Color com.xue.bean.Red person bill
由于咱们在MyImportSelector类的selectImports()方法中返回的是一个空数组,所以还没有在IOC容器中注册任何组件,自然控制台就没有输出通过ImportSelector接口的方式注册的任何组件的名字了。
接下来,我们就来创建两个Java类,它们分别是Bule类和Yellow类,如下所示。
Bule类
javapackage com.xue.bean; /** * @Author: xueqimiao * @Date: 2022/7/2 22:34 */ public class Blue { }Yellow类
javapackage com.xue.bean; /** * @Author: xueqimiao * @Date: 2022/7/2 22:34 */ public class Yellow { }
然后,我们将以上两个类的全类名返回到MyImportSelector类的selectImports()方法中,此时,MyImportSelector类的selectImports()方法如下所示。
package com.xue.condition;
import org.springframework.context.annotation.ImportSelector;
import org.springframework.core.type.AnnotationMetadata;
/**
* @Author: xueqimiao
* @Date: 2022/7/2 22:20
* 自定义逻辑,返回需要导入的组件
*/
public class MyImportSelector implements ImportSelector {
// 返回值:就是要导入到容器中的组件的全类名
// AnnotationMetadata:当前标注@Import注解的类的所有注解信息,也就是说不仅能获取到@Import注解里面的信息,还能获取到其他注解的信息
@Override
public String[] selectImports(AnnotationMetadata importingClassMetadata) {
// 方法不要返回null值,否则会报空指针异常
return new String[]{"com.xue.bean.Blue","com.xue.bean.Yellow"};
}
}org.springframework.context.annotation.internalConfigurationAnnotationProcessor org.springframework.context.annotation.internalAutowiredAnnotationProcessor org.springframework.context.annotation.internalCommonAnnotationProcessor org.springframework.context.event.internalEventListenerProcessor org.springframework.context.event.internalEventListenerFactory config03 com.xue.bean.Color com.xue.bean.Red com.xue.bean.Bulecom.xue.bean.Yellow person bill
使用ImportSelector接口的方式已经成功将Bule类和Yellow类导入到Spring容器中去了。
8、在@Import注解中使用ImportBeanDefinitionRegistrar向容器中注册bean
1、ImportBeanDefinitionRegistrar接口的简要介绍
1、概述
/*
* Copyright 2002-2019 the original author or authors.
*
* Licensed under the Apache License, Version 2.0 (the "License");
* you may not use this file except in compliance with the License.
* You may obtain a copy of the License at
*
* https://www.apache.org/licenses/LICENSE-2.0
*
* Unless required by applicable law or agreed to in writing, software
* distributed under the License is distributed on an "AS IS" BASIS,
* WITHOUT WARRANTIES OR CONDITIONS OF ANY KIND, either express or implied.
* See the License for the specific language governing permissions and
* limitations under the License.
*/
package org.springframework.context.annotation;
import org.springframework.beans.factory.support.BeanDefinitionRegistry;
import org.springframework.beans.factory.support.BeanDefinitionRegistryPostProcessor;
import org.springframework.beans.factory.support.BeanNameGenerator;
import org.springframework.core.type.AnnotationMetadata;
/**
* Interface to be implemented by types that register additional bean definitions when
* processing @{@link Configuration} classes. Useful when operating at the bean definition
* level (as opposed to {@code @Bean} method/instance level) is desired or necessary.
*
* <p>Along with {@code @Configuration} and {@link ImportSelector}, classes of this type
* may be provided to the @{@link Import} annotation (or may also be returned from an
* {@code ImportSelector}).
*
* <p>An {@link ImportBeanDefinitionRegistrar} may implement any of the following
* {@link org.springframework.beans.factory.Aware Aware} interfaces, and their respective
* methods will be called prior to {@link #registerBeanDefinitions}:
* <ul>
* <li>{@link org.springframework.context.EnvironmentAware EnvironmentAware}</li>
* <li>{@link org.springframework.beans.factory.BeanFactoryAware BeanFactoryAware}
* <li>{@link org.springframework.beans.factory.BeanClassLoaderAware BeanClassLoaderAware}
* <li>{@link org.springframework.context.ResourceLoaderAware ResourceLoaderAware}
* </ul>
*
* <p>Alternatively, the class may provide a single constructor with one or more of
* the following supported parameter types:
* <ul>
* <li>{@link org.springframework.core.env.Environment Environment}</li>
* <li>{@link org.springframework.beans.factory.BeanFactory BeanFactory}</li>
* <li>{@link java.lang.ClassLoader ClassLoader}</li>
* <li>{@link org.springframework.core.io.ResourceLoader ResourceLoader}</li>
* </ul>
*
* <p>See implementations and associated unit tests for usage examples.
*
* @author Chris Beams
* @author Juergen Hoeller
* @since 3.1
* @see Import
* @see ImportSelector
* @see Configuration
*/
public interface ImportBeanDefinitionRegistrar {
/**
* Register bean definitions as necessary based on the given annotation metadata of
* the importing {@code @Configuration} class.
* <p>Note that {@link BeanDefinitionRegistryPostProcessor} types may <em>not</em> be
* registered here, due to lifecycle constraints related to {@code @Configuration}
* class processing.
* <p>The default implementation delegates to
* {@link #registerBeanDefinitions(AnnotationMetadata, BeanDefinitionRegistry)}.
* @param importingClassMetadata annotation metadata of the importing class
* @param registry current bean definition registry
* @param importBeanNameGenerator the bean name generator strategy for imported beans:
* {@link ConfigurationClassPostProcessor#IMPORT_BEAN_NAME_GENERATOR} by default, or a
* user-provided one if {@link ConfigurationClassPostProcessor#setBeanNameGenerator}
* has been set. In the latter case, the passed-in strategy will be the same used for
* component scanning in the containing application context (otherwise, the default
* component-scan naming strategy is {@link AnnotationBeanNameGenerator#INSTANCE}).
* @since 5.2
* @see ConfigurationClassPostProcessor#IMPORT_BEAN_NAME_GENERATOR
* @see ConfigurationClassPostProcessor#setBeanNameGenerator
*/
default void registerBeanDefinitions(AnnotationMetadata importingClassMetadata, BeanDefinitionRegistry registry,
BeanNameGenerator importBeanNameGenerator) {
registerBeanDefinitions(importingClassMetadata, registry);
}
/**
* Register bean definitions as necessary based on the given annotation metadata of
* the importing {@code @Configuration} class.
* <p>Note that {@link BeanDefinitionRegistryPostProcessor} types may <em>not</em> be
* registered here, due to lifecycle constraints related to {@code @Configuration}
* class processing.
* <p>The default implementation is empty.
* @param importingClassMetadata annotation metadata of the importing class
* @param registry current bean definition registry
*/
default void registerBeanDefinitions(AnnotationMetadata importingClassMetadata, BeanDefinitionRegistry registry) {
}
}由源码可以看出,ImportBeanDefinitionRegistrar本质上是一个接口。在ImportBeanDefinitionRegistrar接口中,有一个registerBeanDefinitions()方法,通过该方法,我们可以向Spring容器中注册bean实例。
Spring官方在动态注册bean时,大部分套路其实是使用ImportBeanDefinitionRegistrar接口。
所有实现了该接口的类都会被ConfigurationClassPostProcessor处理,ConfigurationClassPostProcessor实现了BeanFactoryPostProcessor接口,所以ImportBeanDefinitionRegistrar中动态注册的bean是优先于依赖其的bean初始化的,也能被aop、validator等机制处理。
2、使用方法
ImportBeanDefinitionRegistrar需要配合@Configuration和@Import这俩注解,其中,@Configuration注解定义Java格式的Spring配置文件,@Import注解导入实现了ImportBeanDefinitionRegistrar接口的类。
2、ImportBeanDefinitionRegistrar接口实例
既然ImportBeanDefinitionRegistrar是一个接口,那我们就创建一个MyImportBeanDefinitionRegistrar类,去实现ImportBeanDefinitionRegistrar接口,如下所示。
package com.xue.condition;
import org.springframework.beans.factory.support.BeanDefinitionRegistry;
import org.springframework.context.annotation.ImportBeanDefinitionRegistrar;
import org.springframework.core.type.AnnotationMetadata;
/**
* @Author: xueqimiao
* @Date: 2022/7/2 22:38
*/
public class MyImportBeanDefinitionRegistrar implements ImportBeanDefinitionRegistrar {
/**
* AnnotationMetadata:当前类的注解信息
* BeanDefinitionRegistry:BeanDefinition注册类
* <p>
* 我们可以通过调用BeanDefinitionRegistry接口中的registerBeanDefinition方法,手动注册所有需要添加到容器中的bean
*/
@Override
public void registerBeanDefinitions(AnnotationMetadata importingClassMetadata, BeanDefinitionRegistry registry) {
}
}可以看到,这里,我们先创建了MyImportBeanDefinitionRegistrar类的大体框架。然后,我们在Config03配置类上的@Import注解中,添加MyImportBeanDefinitionRegistrar类,如下所示。
@Conditional({WindowsCondition.class})
@Import({Color.class, Red.class, MyImportSelector.class, MyImportBeanDefinitionRegistrar.class}) // @Import快速地导入组件,id默认是组件的全类名
public class Config03 {接着,创建一个RainBow类,作为测试ImportBeanDefinitionRegistrar接口的bean来使用,如下所示。
package com.xue.bean;
/**
* @Author: xueqimiao
* @Date: 2022/7/2 22:39
*/
public class RainBow {
}紧接着,我们就要实现MyImportBeanDefinitionRegistrar类中的registerBeanDefinitions()方法里面的逻辑了,添加逻辑后的registerBeanDefinitions()方法如下所示。
package com.xue.condition;
import com.xue.bean.RainBow;
import org.springframework.beans.factory.support.BeanDefinitionRegistry;
import org.springframework.beans.factory.support.RootBeanDefinition;
import org.springframework.context.annotation.ImportBeanDefinitionRegistrar;
import org.springframework.core.type.AnnotationMetadata;
/**
* @Author: xueqimiao
* @Date: 2022/7/2 22:38
*/
public class MyImportBeanDefinitionRegistrar implements ImportBeanDefinitionRegistrar {
/**
* AnnotationMetadata:当前类的注解信息
* BeanDefinitionRegistry:BeanDefinition注册类
* <p>
* 我们可以通过调用BeanDefinitionRegistry接口中的registerBeanDefinition方法,手动注册所有需要添加到容器中的bean
*/
@Override
public void registerBeanDefinitions(AnnotationMetadata importingClassMetadata, BeanDefinitionRegistry registry) {
boolean definition = registry.containsBeanDefinition("com.xue.bean.Red");
boolean definition2 = registry.containsBeanDefinition("com.xue.bean.Blue");
if (definition && definition2) {
// 指定bean的定义信息,包括bean的类型、作用域等等
// RootBeanDefinition是BeanDefinition接口的一个实现类
RootBeanDefinition beanDefinition = new RootBeanDefinition(RainBow.class); // bean的定义信息
// 注册一个bean,并且指定bean的名称
registry.registerBeanDefinition("rainBow", beanDefinition);
}
}
}以上registerBeanDefinitions()方法的实现逻辑很简单,就是判断Spring容器中是否同时存在以com.xue.bean.Red命名的bean和以com.xue.bean.Blue命名的bean,如果真的同时存在,那么向Spring容器中注入一个以rainBow命名的bean。
org.springframework.context.annotation.internalConfigurationAnnotationProcessor org.springframework.context.annotation.internalAutowiredAnnotationProcessor org.springframework.context.annotation.internalCommonAnnotationProcessor org.springframework.context.event.internalEventListenerProcessor org.springframework.context.event.internalEventListenerFactory config03 com.xue.bean.Color com.xue.bean.Red com.xue.bean.Blue com.xue.bean.Yellow person bill rainBow
可以看到,此时输出了rainBow,说明Spring容器中已经成功注册了以rainBow命名的bean。
9、如何使用FactoryBean向Spring容器中注册bean
1、FactoryBean概述
一般情况下,Spring是通过反射机制利用bean的class属性指定实现类来实例化bean的。在某些情况下,实例化bean过程比较复杂,如果按照传统的方式,那么则需要在标签中提供大量的配置信息,配置方式的灵活性是受限的,这时采用编码的方式可以得到一个更加简单的方案。Spring为此提供了一个org.springframework.bean.factory.FactoryBean的工厂类接口,用户可以通过实现该接口定制实例化bean的逻辑。
FactoryBean接口对于Spring框架来说占有非常重要的地位,Spring自身就提供了70多个FactoryBean接口的实现。它们隐藏了实例化一些复杂bean的细节,给上层应用带来了便利。从Spring 3.0开始,FactoryBean开始支持泛型,即接口声明改为FactoryBean<T>的形式。
FactoryBean接口的定义如下所示。
package org.springframework.beans.factory;
public interface FactoryBean<T> {
/**
* The name of an attribute that can be
* {@link org.springframework.core.AttributeAccessor#setAttribute set} on a
* {@link org.springframework.beans.factory.config.BeanDefinition} so that
* factory beans can signal their object type when it can't be deduced from
* the factory bean class.
* @since 5.2
*/
String OBJECT_TYPE_ATTRIBUTE = "factoryBeanObjectType";
/**
* Return an instance (possibly shared or independent) of the object
* managed by this factory.
* <p>As with a {@link BeanFactory}, this allows support for both the
* Singleton and Prototype design pattern.
* <p>If this FactoryBean is not fully initialized yet at the time of
* the call (for example because it is involved in a circular reference),
* throw a corresponding {@link FactoryBeanNotInitializedException}.
* <p>As of Spring 2.0, FactoryBeans are allowed to return {@code null}
* objects. The factory will consider this as normal value to be used; it
* will not throw a FactoryBeanNotInitializedException in this case anymore.
* FactoryBean implementations are encouraged to throw
* FactoryBeanNotInitializedException themselves now, as appropriate.
* @return an instance of the bean (can be {@code null})
* @throws Exception in case of creation errors
* @see FactoryBeanNotInitializedException
*/
@Nullable
T getObject() throws Exception;
/**
* Return the type of object that this FactoryBean creates,
* or {@code null} if not known in advance.
* <p>This allows one to check for specific types of beans without
* instantiating objects, for example on autowiring.
* <p>In the case of implementations that are creating a singleton object,
* this method should try to avoid singleton creation as far as possible;
* it should rather estimate the type in advance.
* For prototypes, returning a meaningful type here is advisable too.
* <p>This method can be called <i>before</i> this FactoryBean has
* been fully initialized. It must not rely on state created during
* initialization; of course, it can still use such state if available.
* <p><b>NOTE:</b> Autowiring will simply ignore FactoryBeans that return
* {@code null} here. Therefore it is highly recommended to implement
* this method properly, using the current state of the FactoryBean.
* @return the type of object that this FactoryBean creates,
* or {@code null} if not known at the time of the call
* @see ListableBeanFactory#getBeansOfType
*/
@Nullable
Class<?> getObjectType();
/**
* Is the object managed by this factory a singleton? That is,
* will {@link #getObject()} always return the same object
* (a reference that can be cached)?
* <p><b>NOTE:</b> If a FactoryBean indicates to hold a singleton object,
* the object returned from {@code getObject()} might get cached
* by the owning BeanFactory. Hence, do not return {@code true}
* unless the FactoryBean always exposes the same reference.
* <p>The singleton status of the FactoryBean itself will generally
* be provided by the owning BeanFactory; usually, it has to be
* defined as singleton there.
* <p><b>NOTE:</b> This method returning {@code false} does not
* necessarily indicate that returned objects are independent instances.
* An implementation of the extended {@link SmartFactoryBean} interface
* may explicitly indicate independent instances through its
* {@link SmartFactoryBean#isPrototype()} method. Plain {@link FactoryBean}
* implementations which do not implement this extended interface are
* simply assumed to always return independent instances if the
* {@code isSingleton()} implementation returns {@code false}.
* <p>The default implementation returns {@code true}, since a
* {@code FactoryBean} typically manages a singleton instance.
* @return whether the exposed object is a singleton
* @see #getObject()
* @see SmartFactoryBean#isPrototype()
*/
default boolean isSingleton() {
return true;
}
}- T getObject():返回由FactoryBean创建的bean实例,如果isSingleton()返回true,那么该实例会放到Spring容器中单实例缓存池中
- boolean isSingleton():返回由FactoryBean创建的bean实例的作用域是
singleton还是prototype,默认singleton - Class getObjectType():返回FactoryBean创建的bean实例的类型
这里,需要注意的是:当配置文件中标签的class属性配置的实现类是FactoryBean时,通过 getBean()方法返回的不是FactoryBean本身,而是FactoryBean#getObject()方法所返回的对象,相当于FactoryBean#getObject()代理了getBean()方法。
2、FactoryBean案例
首先,创建一个ColorFactoryBean类,它得实现FactoryBean接口,如下所示。
package com.xue.bean;
import org.springframework.beans.factory.FactoryBean;
/**
* @Author: xueqimiao
* @Date: 2022/7/3 14:54
*/
public class ColorFactoryBean implements FactoryBean<Color> {
/**
* 返回一个Color对象,这个对象会添加到容器中
* @return
* @throws Exception
*/
@Override
public Color getObject() throws Exception {
System.out.println("ColorFactoryBean...getObject...");
return new Color();
}
@Override
public Class<?> getObjectType() {
// 返回这个对象的类型
return Color.class;
}
/**
* 是单例吗?
* 如果返回true,那么代表这个bean是单实例,在容器中只会保存一份;
* 如果返回false,那么代表这个bean是多实例,每次获取都会创建一个新的bean
* @return
*/
@Override
public boolean isSingleton() {
return true;
}
}然后,我们在Congif03配置类中加入ColorFactoryBean的声明,如下所示。
@Bean
public ColorFactoryBean colorFactoryBean() {
return new ColorFactoryBean();
}我在这里使用@Bean注解向Spring容器中注册的是ColorFactoryBean对象。
@Test
public void test23() {
    AnnotationConfigApplicationContext applicationContext = new AnnotationConfigApplicationContext(Config03.class);
    String[] definitionNames = applicationContext.getBeanDefinitionNames();
    for (String name : definitionNames) {
        System.out.println(name);
    }
}org.springframework.context.annotation.internalConfigurationAnnotationProcessor org.springframework.context.annotation.internalAutowiredAnnotationProcessor org.springframework.context.annotation.internalCommonAnnotationProcessor org.springframework.context.event.internalEventListenerProcessor org.springframework.context.event.internalEventListenerFactory config03 com.xue.bean.Color com.xue.bean.Red com.xue.bean.Blue com.xue.bean.Yellow person bill colorFactoryBean rainBow
可以看到,结果信息中输出了一个colorFactoryBean,我们输出colorFactoryBean实例的类型,如下所示。
@Test
public void test24() {
    AnnotationConfigApplicationContext applicationContext = new AnnotationConfigApplicationContext(Config03.class);
    String[] definitionNames = applicationContext.getBeanDefinitionNames();
    for (String name : definitionNames) {
        System.out.println(name);
    }

    // 工厂bean获取的是调用getObject方法创建的对象
    Object bean2 = applicationContext.getBean("colorFactoryBean");
    System.out.println("bean的类型:" + bean2.getClass());
}org.springframework.context.annotation.internalConfigurationAnnotationProcessor org.springframework.context.annotation.internalAutowiredAnnotationProcessor org.springframework.context.annotation.internalCommonAnnotationProcessor org.springframework.context.event.internalEventListenerProcessor org.springframework.context.event.internalEventListenerFactory config03 com.xue.bean.Color com.xue.bean.Red com.xue.bean.Blue com.xue.bean.Yellow person bill colorFactoryBean rainBow ColorFactoryBean...getObject... bean的类型:class com.xue.bean.Color可以看到,虽然我在代码中使用@Bean注解注入的是ColorFactoryBean对象,但是实际上从Spring容器中获取到的bean对象却是调用ColorFactoryBean类中的getObject()方法获取到的Color对象。
看到这里,是不是有种豁然开朗的感觉!!!
在ColorFactoryBean类中,我们将Color对象设置为单实例bean,即让isSingleton()方法返回true。接下来,我们在IOCTest类中的testImport()方法里面多次获取Color对象,并判断一下多次获取的对象是否为同一对象,如下所示。
@Test
public void test25() {
    AnnotationConfigApplicationContext applicationContext = new AnnotationConfigApplicationContext(Config03.class);
    // 工厂bean获取的是调用getObject方法创建的对象
    Object bean1 = applicationContext.getBean("colorFactoryBean");
    Object bean2 = applicationContext.getBean("colorFactoryBean");
    System.out.println("bean的类型:" + bean1.getClass());
    System.out.println(bean1 == bean2);
}ColorFactoryBean...getObject... bean的类型:class com.xue.bean.Color true
可以看到,在ColorFactoryBean类中的isSingleton()方法里面返回true时,每次获取到的Color对象都是同一个对象,说明Color对象是单实例bean。
这里,可能就会有小伙伴要问了,如果将Color对象修改成多实例bean呢?别急,这里我们只需要在ColorFactoryBean类的isSingleton()方法中返回false即可,这样就会将Color对象设置为多实例bean,如下所示。
/**
     * 是单例吗?
     * 如果返回true,那么代表这个bean是单实例,在容器中只会保存一份;
     * 如果返回false,那么代表这个bean是多实例,每次获取都会创建一个新的bean
     * @return
     */
@Override
public boolean isSingleton() {
    return false;
}最终结果会返回false,说明此时Color对象是多实例bean。
3、如何在Spring容器中获取到FactoryBean对象本身呢?
之前,我们使用@Bean注解向Spring容器中注册的是ColorFactoryBean,获取出来的却是Color对象。那么,小伙伴们可能会问了,我就想获取ColorFactoryBean实例,那么该怎么办呢?
其实,这也很简单,只需要在获取工厂Bean本身时,在id前面加上&符号即可,例如&colorFactoryBean。
打开我们的IOCTest测试类,在testImport()方法中添加获取ColorFactoryBean实例的代码,如下所示。
@Test
public void test26() {
    AnnotationConfigApplicationContext applicationContext = new AnnotationConfigApplicationContext(Config03.class);
    Object bean = applicationContext.getBean("&colorFactoryBean");
    System.out.println(bean.getClass());
}class com.xue.bean.ColorFactoryBean
可以看到,在获取bean时,在id前面加上&符号就会获取到ColorFactoryBean实例对象。
为什么在id前面加上&符号就会获取到ColorFactoryBean实例对象呢?
打开BeanFactory接口,查看其源码。

看到这里,是不是明白了呢?没错,在BeanFactory接口中定义了一个&前缀,只要我们使用bean的id来从Spring容器中获取bean时,Spring就会知道我们是在获取FactoryBean本身。